
I have a concrete floor in my studio. I also have flat feet, thus I need really good floor mats in my studio. Over the years I have tried lots of different options for floor mats.
I tried the cheap ones from Home Depot, etc. When they were not soft enough, I tried stacking up the cheap ones, etc. I even let someone at a AAW symposium talk me into a really expensive $200 mat. A sucker is born every minute! I hate that mat with a passion! It will not stay put! It is always sliding out of position! Err!!!
A few years ago I decided to change all of my mats to the expensive kitchen mats with holes from Rubber-Cal. If they are good enough for chiefs who stand on them all day in the kitchen then they are good enough for me.
I like the “Rubber-Cal Dura-Chef Interlock Anti-Fatigue Rubber Matting, 5/8″ x 36″ x 36”.
It has to be the 5/8″ thick mat! The 1/2″ and 3/8″ thick ones are not soft enough. The 3/8″ thick one is a complete and total waste. It is like standing on concrete.
Get from Amazon with a Prime Membership!
 Often there are similar looking mats at Home Depot, etc. At first I was buying my mats their. Then they changed brands. The new brand really sucked! The rubber was to hard! Not enough cushioning for my flat feet.
Then I discovered I could get the mats on Amazon and the shipping was FREE with my Amazon Prime membership! Otherwise, the shipping will kill you! The mats are really heavy.
Do NOT purchase directly from Rubber-Cal. The shipping will kill you! Free shipping from Amazon with Prime membership is like the best deal on the face of the earth!
The mats from “Rubber-Cal” come and go on Amazon. With a price around $25 each. Right now (12/18/2019) they are on Amazon for $30 each. A good price! Beware! Some times the price goes up to $50 each or more. Wait a while and the price will go back down.
Well, maybe $30 is not such a good price. But, I have flat feet. It is worth it for me. Similar mats at Home Depot, etc. have gone up in price over the years. They are getting close to $25.
Also beware of Amazon’s dynamic pricing. If you purchase something today . Then go back to purchase more in a few days then Amazon with jack up the price. You can sometimes avoid this by looking up your old order. Then going to old order. Then go to the item from the old order. Now the price is the same?
Other Sizes, Etc

I like the mats that lock together with tabs rather than the ones with fancy beveled edges. I just let the tabs hang off at the end of a run of mats. I have no problems with walking or tripping over the tabs. I don’t need beveled edges.
This is really important so I am going to repeat it. It has to be the 5/8″ thick mat! The 1/2″ and 3/8″ thick ones are not soft enough.
Taking Up the Mats
 The mats are heavy. Taking the all up and putting them back is a huge job! This has not really been a problem.
I only take up the mats when I absolutely have to move a big stationary tool .
I DO NOT take them up for cleaning!
Cleaning
 Yea all those hole catch wood chips and saw dust like crazy! I avoided these mats for a long time. I wanted a smooth top mat that would be easy to clean!
In use I have found the holes actually help. The wood chips in the holes add to the cushioning.
Cleaning is not a huge problem if you are not to anal about it. Most of the time I just sweep the big wood shaving off the top. Sweeping is easy, no problem. Let the saw dust in the holes be! Live and let live.
When I want to get the mats really clean for classes, etc then I use by big 4″ vacuum hose attached to my big cyclone dust collector. It sucks the shavings out of the holes no problems in most cases. Let live any small stuff that gets stuck. It will come out next time.
Floor Coverage
 I have a ton of mats. Lots of them. I purchased them little by little at first. Then I decided to cover all the area in my studio where their were no big stationary tools and I walked frequently.
You can’t put the mats under big tools like lathes. They are to soft. The tools will bounce around to much.
Entrance Mats for Studio
 Long ago I installed similar mats in the hallway outside of my studio. See photo. It was one of the best things I ever did!
The idea here is these mats knock off any saw dust and shavings on the bottom of my feet BEFORE I track into the rest of the house. They work good.
I got the mats long ago. I have no idea where I got them or any other details.
]]>
I am looking for two new students!
I have 1 opening in my Tuesday classes and 1 opening in my Thursday classes starting in January of 2020. Matching the right lathe height to each person’s elbow height above the floor is very important.
The opening on Tuesdays is on my shorter lathe. I am looking for a person around 5′ 5″
The opening on Thursdays in on my taller lathe. I am looking for a person around 6′ 2′.
Dates
Any 10 out of 12 Tueday’s between January 14th and April 7th, 2020. (Jan 14, 21, 28, Feb 4, 11, 18, 25, Mar 3, 17, 24, 31, Apr 7, 2019 (No class Mar 10)
OR
Any 10 out of 12 Thursday’s between January 16th and April 9th, 2020. (Jan 16, 23, 30, Feb 6, 13, 20, 27, Mar 5, 19, 26, Apr 2, 9, 2019 (No class Mar 12)
Class Information
For more class info you read my PDF here:
http://www.carlford.info/pages/calendar/images/2019/my_ww_class_details_2020.pdf
Or you can get in on the web here:
http://www.carlford.info/pages/calendar/calendar.html
Sign Up
If you are interested in taking a class please email me at [email protected]
]]>
I am now using sandpaper rolls from Klingspor for all of my hand sanding. Rather than “Porter Cable Stikit Sandpaper”. I still like the Stikit paper but it is to hard to get.
• I like “Klingspor Abrasives 4.5″x 10 Meter (33′) Pressure Sensitive Adhesive, Paperbacked Roll, xxx Grit, Stearated Aluminum Oxide”. Item # AR330xx. AR33008 for 80 grit, etc. Around $18 per roll on 12/2019.
I purchased several different rolls of stuff from Klingspor. I decided I liked the above the best. It is very similar to the “Porter Cable Stikit Sandpaper” that use to be my favorite.
“Klingspor Abrasives Stearated Silicon Carbide, 4-1/2″x 10 Meter (33′) PSA Roll, 180 Grit, Porter Cable Stickit” is ok. Item #AR136xx. It is cheaper at $14 per roll. But, I don’t like it as much. The paper seems to be a little stiffer.
 • I have 80, 120, 180, and 220 grits.
I get it from “Klingspor’s Woodworking Shop”.
I generally do not sand beyond 220 grit. If I do sand beyond 220 then I use 6″ Abralon pads by Mirka.
For more info see my “Great Polyurethane Finishes” handout at http://www.carlford.info/pages/demos_classes/great_poly_finish/Great_Poly_Finish.pdf

• I like to cut up the sandpaper into small sheets in advance and store it in “Large Binder Clips” (aka large paper clips). For more info see “Spindle Turning Sandpaper” section in my “Handy Sandpaper” blog entry.
Notes:
1. I use to use “Porter Cable Stikit Sandpaper”. My old “Stikit Sandpaper” blog entry is now obsolete. It is replaced by this new blog entry.
2. I use Blue Flex disks for all of my power sanding. See my Blue Flex Sanding Disks blog entry.
3. I have eliminated 150 grit from my sanding. I decided it is to close to 120 grit. Just a waste of time. I sand 80, 120, 180, then 220.
Don Pencil is no longer in business. Thus I now suggest you get the following from Packard Woodworks (www.packardwoodworks.com)

– 1-1/4″ x 8 Lathe Buffing Extender #120952
– 8″ Wax Beall Replacement Wheel #123940W
– 4″ Wax Beall Bowl Buff #123934W
Note: I attach the Buffing Wheels to Long Buffing Adapter with a local hardware store 3/8” bolt and fender washers.
I don’t use any wax on my buffing wheels! Thus I just get the Beall wheel. NOT the complete system! See “Great Polyurethane Finishes Demo” (http://carlford.info/blog/2013/01/great-polyurethane-finishes-demo/) for more info.
 Or you can get the 8″ Wheel from Mcmaster-Carr (www.mcmaster.com). Two of “Buffing Wheel for Curved Surfaces, 8″ Diameter x 1/2″ Thick, 1/2″ Arbor Hole” #4820A12.
https://www.etsy.com/shop/carlfordwoodturner/
My high quality pieces are priced to sell! You win because I have a lot of pieces that I want to sell!
I am going to add more stuff over the next couple of days. Then I hope to add 2 new pieces per week.
There are also never seen before pictures of my stuff.


I have found that using a 2-1/2″ diameter hole that is 1/4″ deep is a good way to mount blanks for plates and shallow bowls on the lathe. It is easy and very secure.
It’s a lot better than using a chuck screw. Because chuck screws and shallow holes don’t mix well.
I drill a 2-1/2″ diameter hole that is 1/4″ deep with a Forstner bit. Then expand my 4 jaw chuck into the hole.

You need to be careful when drilling a big hole. You ABSOLUTELY need to use a drill press. Using a hand held drill would be a receipt for disaster.
You also need to clamp the blank down to the drill press table. A big drill bit can easily catch and rip the blank out of and/or thru your hand. Any sharp edges or corners on the blank will shred your hand.

The cheap “Steelex” brand Forstner bits currently available on Amazon for $2x work ok. The Amazon reviews vary quite a bit. Getting a good one is a crap shoot. I have gotten 2 winners recently.
Note: Amazon dynamically prices everything. I purchased a new 2-1/2″ Forstner bit last week for $20. Today the lowest price it will show me is $28.91. If I wait a few more weeks then the price will probably go back down to $20.

I have found that the “Sanding Wheel Brushes” from McMaster-Carr are a good alternative to the “3M Radial Bristle Discs” that I talk about in my “Power Carving Textures” blog entry.
The sanding wheel brushes are cheaper and last longer because they are tougher. They work good on raw wood. They are not as aggressive as wire wheel. They are more aggressive then 3M discs (not as soft). The bristles don’t break off like they do on the 3M discs.
I have all 3 grits available. I like the 180 grit best. The 120 grit is ok. The 320 grit is kind of to soft to be really useful.

You need to order an arbor for each brush. Www.mcmaster.com # 4875A14.

I want to document this here in my blog for my students.
The Nylon Mesh Sanding Rolls (aka Synthetic Steel Wool, aka Scotch Brite Pads) that I use are:
Carl Ford Course is
www.McMaster.com #4659A16 – Nylon Mesh Cushioned Sanding Roll for Aluminum, Soft Metal & Nonmetal, 15 Feet x 2″, Blending
Carl Ford Medium is
www.McMaster.com #4659A17 – Nylon Mesh Cushioned Sanding Roll for Aluminum, Soft Metal & Nonmetal, 15 Feet x 2″, All Purpose
Carl Ford Fine is
www.McMaster.com #4659A18 – Nylon Mesh Cushioned Sanding Roll for Aluminum, Soft Metal & Nonmetal, 15 Feet x 2″, Clean / Finish
All of the above are “Silicon Carbide” material. Catalog says they are for metal. I use them on wood.
They are all GRAY in color. To tell them apart, I do the following. I cut off a piece from roll. If fine then do nothing. If medium then clip 1/2″ off of ONE corner at 45 degrees. If course then clip 1/2″ off of TWO corners at 45 degrees.

Note: McMaster-Carr (www.McMaster.com) is an old school company. When you order something the order goes directly to the warehouse. They fill the order. Then the order goes to the office where they add the tax and ACTUAL shipping cost. Thus you DO NOT see the shipping cost until AFTER they ship something. You have to trust them to ship it to you at a reasonable cost, the old school way. I have always found their shipping cost to be reasonable. On 9/2019 it is roughly $10 for anything that fits in a 6″ x 12″ x 18″ box. In my experience, the weight has very little effect on the shipping cost. I live roughly 130 miles from their warehouse in Robbinsville NJ. You can find their closest warehouse at www.McMaster.com/returns.
Green and Maroon Stuff
I no longer use the green and maroon stuff that people may have seen me use in the past. They were “Aluminum Oxide” material (rather than “Silicon Carbide”). I gave up on these because they melt to easy. Hold them up to a piece running fast on the lathe, hit the corner or a sharp edge and they melt. It turns green! Ugg!!! No way to get rid of green.
If you want the old green it was www.McMaster.com #4659A13. I don’t known what the Maroon stuff was. I purchased it a very long time ago.
I Purchase from McMaster-Carr (www.McMaster.com)
Long ago, I gave up on the junk (oh, I mean stuff) from Home Depot, Lowes, etc. The quality varies to much by manufacturer. They are always changing their source. Some times it is good. Often it is junk. McMaster forces it’s suppliers to meet their quality specs or get lost.
I have found that the 2″ wide rolls from www.mcmaster.com are a lot better than the 6″ x 9″ pads from big box stores, etc. I don’t have to spend a lot time cutting the 6×9 pads up into small pieces to avoid wasting a lot of the pad. The stuff is already 2″ wide. Just cut off a 2″ or 3″ long piece and you are ready to go. When it is worn out or dirty you just discard a small piece. In the long run the rolls save money.
Real Steel Wool Sucks
I don’t use real steel wool. It gets caught in wood fiber to easy. Rusts, cuts your fingers off, etc.
Blue Towel

My “Blue Towel” that I use for buffing is a “Surgical Cotton Huck Towel”. You can get them on Amazon.
Beware: I got a big box of blue towels long ago from my father. He got them at an auction. The Amazon ones appear to be the same thing. But, I have never purchased the Amazon ones.
Carl Ford’s Sanding and Buffing in a Nutshell
I ONLY sand to 220 grit. Sand 80, 120, 180, 220 grit. Then I use Carl Ford “Medium” nylon mesh pad. Followed by Carl Ford “Fine” nylon mesh pad. Followed by buffing with “Blue Huck” towel.
Note: I have eliminated 150 grit sandpaper from my world. I use to sand 80, 120, 150, 180, 220 grit. Then, I decided that 150 grit was a waste of time. To close to 120 and/or 180. I no longer use 150 grit sandpaper. I now sand 80, 120, 180, 220 grit.
I use nylon mesh pads and buffing to replace sanding beyond 220 grit. If you catch the end of a nylon mesh pad, nothing happens! It DOES NOT scratch the work like the edge of 400 grit sandpaper will.
I may hold the nylon mesh pad up to the work while the lathe is running.
Often I cut a 2″ by 2″ square chunk of the nylon mesh pad and use it like a sanding disk with the lathe running. The nylon mesh just sticks to the hook part of any Velcro sanding mandrel you mount in a drill or any interface pad. I like to use a soft interface pad (1/4″ or 3/8″ thick foam pad).
After nylon mesh pads, I buff with a blue huck towel. I hold the towel up to rotating work on the lathe. AFTER I have folded up the towel into a square with no corners sticking out that can get caught by the lathe. Yea, its not completely safe. But, not all that dangerous.
Or I use an 8″ buffing wheel. The soft cotton “wax” wheel in the Beall Buffing System. Or 2 of www.McMaster.com #4820A12. I DO NOT use any wax on the wheel for any reason!
My blue towel replaces the old fashion trick of buffing with a handful of wood shavings. In the modern world we sand to much (to far). Buffing with wood shavings is often coarser than a 220 grit sanded surface and thus scratches the surface rather buffing it. My blue towel does not scratch the surface.
For more info see my “Great Polyurethane Finishes” blog entry.
]]> I recently took a WOW Factor master class with Nick Agar at
Arrowmont School of Arts and Crafts in Gatlinburg, Tennessee. June 9-16,
2019. Here are some photos of the work I created in the class.
I recently took a WOW Factor master class with Nick Agar at
Arrowmont School of Arts and Crafts in Gatlinburg, Tennessee. June 9-16,
2019. Here are some photos of the work I created in the class.
I had a great time at the class. Nick is a great instructor. I loved the environment at Arrowmont. The food was excellent. The turning studio is top notch.
Nick is well known for his Viking Sunset Bowls. This class was something different. It was all about creating turned wall pieces and sculptures from cut up turned forms. I also made some plates on my own to play with some of Nick’s decorating techniques.
I teach woodturning. But, I believe you should never stop learning. It’s time to roll over and die when you stop learning. Thus, I still take classes.
Here is the class description from the Arrowmont catalog.
During this master workshop students explore the potential of the wooden surface and what it offers makers. You will discover form and proportion and will create wall pieces, cut up-reconstructed sculptures, and turned and sculpted solid forms. Participants will utilize power carving, pyrography, airbrushing, and ceramic and metal effects using the instructors signature series paints (all made in the U.S.) and other paints to enhance their work to give it the WOW factor. Open to all skill levels, however basic skills at the lathe are needed.
Nick Agar has over 25 years of experience as a woodturner. He is a registered professional turner, co-author of the book Woodturning Evolution and an elected member of the Devon Guild of Craftsmen. Specializing in surface enhancement and renowned for his wall sculptures, his award-winning work often incorporates carving, airbrushing, ceramic and metal effects. Agar has inspired many woodturners with his work and has traveled across the world to demonstrate his skills. TURNINGINTOART.COM
 I created 2 wall pieces in the class. I really enjoyed making
these. I am definitely going to be making more of these in the future.
I created 2 wall pieces in the class. I really enjoyed making
these. I am definitely going to be making more of these in the future.
 Here is the 1st wall piece I created in Nick’s class. The wood is
really nice curly maple. 12″ square by 2″ thick.
Here is the 1st wall piece I created in Nick’s class. The wood is
really nice curly maple. 12″ square by 2″ thick.
The idea here was to turn and decorate square pieces and then cut them up. Nick suggested cutting them up in 1″ wide strips or into quarters. Then we could rearrange or skew the pieces.
After I turned the square piece, I decided to decorate it with airbrush stuff I learned from Nick. I love the way it came out!
I decided it was too nice to cut into strips. Thus, I cut it into quarters. The original piece is on the left in above photo. One of 16 possible arrangements is on the right.
I colored the piece with Chroma Craft Wood Dyes applied with an airbrush. I used some airbrush stencils from Nick, Amazon and Binh Pho.
Note: 4 pieces * 4 sides = 16 possible arrangements.
 Here are two alternate arrangements of the 1st wall piece.
The piece is not done yet. I plan on mounting this piece on a black steel background that is roughly 3″ larger than the piece. I will install magnets on the back of each piece. This will allow people to rearrange the pieces to create their own image.
It looks better with a 1/4″ of space between the pieces. I just stacked them up for the photos. So, no space was possible. I am going to add spacers to the finial piece.
Note: Using magnets to mount sculptures on plinths (suspended in space) was one of the ideas Nick discussed in class. I decided to expand that idea to mount my wall pieces.
 Here is the 2nd wall piece I created in Nick’s class. The wood is
Maple. 10-1/2″ square by 1-1/4″ thick.
Here is the 2nd wall piece I created in Nick’s class. The wood is
Maple. 10-1/2″ square by 1-1/4″ thick.
Nick suggested that we could remount and turn each quarter individually after cutting the main piece into 4 parts. I wanted to try out that idea. I also wanted to try a piece with out a lot of fancy airbrushing. Just let the beauty of the wood shine thru.
I was finishing this piece on the last day of class and got in to much of a hurry. I accidentally powered sanded the orange center on one of the 4 pieces. Then I had to try to cover it up by sanding all 4 of them. It didn’t really work out.
I colored the piece with Chroma Craft Wood Dyes applied with an airbrush. The Chroma Craft dyes are fast drying and DO NOT penetrate into the wood. Thus, I got way with, just sanding any dye over spray off the top surface to expose nice clean wood. I masked the junctions in circles with masking tape. That was a pain.

 We started the class by creating sculptures from cut up turned
forms. We turned a 9″ round bottomed cereal bowl shape on the outside with
a small 2″ shallow bowl on the inside. Then we cut the bowl into slices
and experimented with carving, wood burning, coloring and finishing
techniques.
We started the class by creating sculptures from cut up turned
forms. We turned a 9″ round bottomed cereal bowl shape on the outside with
a small 2″ shallow bowl on the inside. Then we cut the bowl into slices
and experimented with carving, wood burning, coloring and finishing
techniques.
The photos show my 2 creations. The above photo on the left is the front view. The photo on right is the back view. I am really happy with the way the pieces turned out.
I cut my bowl into 3 slices. I never got around to using the center slice that contains the small 2″ bowl on the inside. It is NOT shown in the photos.
The green piece in photos is ash wood with power carved and burned textures. It was painted with copper and bronze reactive metallic paint. Some areas were painted with copper, others with bronze. Then it was aged with green patina aging solution.
The red, orange, and yellow piece is ash wood with power carved and burned textures. It was painted with red, orange and yellow Chroma Craft Wood Dyes. Then the back and some areas on the front were highlighted with Chroma Craft Viking Silver Chroma-Gilt.
Nick wanted us to mount our sculptures on a plinth with magnets. The magnets allow the pieces to be moved around and re positioned to create new configurations. I really liked the idea. But, the wimpy magnets I brought with me were not up to the task. My slices of ash were to heavy to be held up at the angle I wanted. I had to use dowels rather than magnets.
 I made some 9″ hard maple plates. They were canvases on which I
could try some of the techniques demonstrated by Nick in the class.
I made some 9″ hard maple plates. They were canvases on which I
could try some of the techniques demonstrated by Nick in the class.
The plate on the left in the photo is Chroma Craft Wood Dyes applied with an airbrush. I used some airbrush stencils from Amazon and Binh Pho.
The plate on the right is Chroma Craft Black Web-Fx special effect paint, over Golden brand Iridescent Bright Gold acrylic paint, over Chroma Craft Blood Red Wood Dye.
You can see in the photo that some paint escaped under the masking tape that I used to mask things off. In the future I need to do a better job of masking.
 I also made a viking style plate. I wanted to try Nick’s idea of
mixing different colors of Chroma Craft Chroma-Gilt on the same piece.
Some areas are say copper while others are bronze.
I also made a viking style plate. I wanted to try Nick’s idea of
mixing different colors of Chroma Craft Chroma-Gilt on the same piece.
Some areas are say copper while others are bronze.
I turned a 9″ hard maple plate and decorated it (cut groves in it) with my small and large Sorby Spiraling and Texturing tools.
In the above photos the front of the plate is on the left. The back is on the right. The back is darker than the front in real life. By design.
I kind of forget what I did here. I am not sure about the colors. Here is my best guess. The front is Saxon Gold and Antique Brass Chroma Craft Chroma-Gilt, over Green Verdigris Chroma Craft Chroma-Gilt, rubbed into the groves with a tooth brush, over Chroma Craft Black Wood Dye.
The back is Celtic Copper and Nordic Bronze Chroma Craft Chroma-Gilt, over Chroma Craft Black Wood Dye.
 On the last day of class I made a platter (wide rim bowl). I liked
a platter with a white and blue rim done by another student. I wanted to
try something similar.
On the last day of class I made a platter (wide rim bowl). I liked
a platter with a white and blue rim done by another student. I wanted to
try something similar.
I took the piece home to finish at home when I did not have time to finish it in class. I got inspired and made another piece with a red background at home.
The platter in left photo is Blue and Black Chroma Craft Web-Fx special effect paint, over Rustolem flat white spray paint. With Golden brand blue and black acrylic paint, airbrushed on shading. The ugly brown marks in the bowl, showed up when I turned the bowl. They are in the wood. I was not happy.
The platter in right photo is Black Chroma Craft Web-Fx special effect paint, over Blood Red Chroma Craft Wood Dye . With Golden brand black acrylic paint, airbrushed on shading.
The black rim on both platters is black acrylic paint, applied with an airbrush.
Both platters are 9″ diameter, hard maple wood. The bottom of both platters is a roman ogee shape, natural wood color.

People are always asking me about face shields.
In A Nut Shell
I have found that face shields are HIGHLY PERSONAL. What one person
likes, others will hate!
Therefore you should try before you buy. Try at a class, school,
club or a friends house.
I have several different models of face shields in my studio. I
can never predict in advance what people will like.
What I Like

I started out with a simple “MSA Defender +” face shield from a
local store. Around $15. I still like this face shield and use it when
other people are around. I have several of these in my Studio and most
people like them or can live with them.
I primarily like this face shield because it is tough and there is
lots of space between the inside of the clear plastic and my face. Thus it
does not fog up easily and it does not fog up my glasses.
Unfortunately this face shield is no longer available. It was
discontinued. MSA does not make anything similar in a low price range.

If I wanted something similar today I would try the “Heavy Duty
Faceshield” #199210 from www.packwoodworks.com for $22 on 4/2019. I like
that Packard says ” The shield allows room for people who wear glasses”. I
hope this means the face shield will not come to close to my face. I also
hope it is not to heavy. I DO NOT own one of these and have never seen one
up close and personal.
The Sellstrom S32010 on Amazon for $30 on 4/2019 also looks good.
I DO NOT own one of these and have never seen one up close and personal.
The Safety Works Faceshield for $17 on 4/2019 on Amazon may be
similar to my MSA Defender + face shield. Is it ANSI rated? I DO NOT own
one of these and have never seen one up close and personal.
What My Students Like (The Rolls Royce of Face Shields)

Several of my students have and really like the “UVEX by Honeywell
S9500 Uvex Turboshield Face Shield Headgear with Black Frame” $22 with a
“UVEX by Honeywell S9555 Uvex Turboshield Clear Polycarbonate Replacement
Visor and Clear Lens with Dual Anti-Scratch/Anti-Fog Lens Coating” $28.
You have to order the headgear and clear lens separately. They
snap together.
You can get a cheaper lens with out all of the anti… crap for
$13. That is what I would go with. I don’t like anti… crap on my
glasses, etc. However, my students say the cheaper lens is not as good.
The cheaper lens is a “UVEX by Honeywell S9550 Uvex Turboshield Clear
Polycarbonate Replacement Visor and Clear Lens, Uncoated”.
All of the above prices are on 4/2019.
This is not the face shield for me. I like my cheap and dirty
ones. I have been wearing glasses for 50+ years. A little dirt is normal
and does not bother me. If you like to keep things clean and insist on a
really clean face shield then this UVEX face shield may be for you!
What I Don’t Like

Beware! I already told you face shields are HIGHLY PERSONAL. You
may like, what I don’t like. I known people who have and like all of the
following.
- I don’t like the yellow Apprentice Face Shield from Craft Supplies USA. To flimsy. To close to my face.
- I don’t like the blue 3M Face Shield from Craft Supplies USA, Amazon, etc. Way to close to my face. I have these in my studio. Only like 1 in 10 people like these. It’s built like a tank on the plus side. But, I still really don’t like it.
- I don’t like the Bubble Face Shield from Craft Supplies USA. Fogs up to easy due to closure at bottom of face shield. I need a face shield that has a big open space at the bottom to allow my hot breath out. I have these in my studio. Most people are not thrilled with these but can live with them.
- I don’t like any face shield with plastic below the clear part. i.e. near my chin. Chin guards, etc. Like, I already said. I need a face shield that has a big open space at the bottom to allow my hot breath out. Thus I don’t like any of the Uvex Bionic shields.
Powered vs Non Powered Face Shields (Open vs Helmet Face Shields)
All of the above are Non Powered face shields. There is no fan that
forces air over your face while wearing the face shield. Thus you have to
put up with any heat build up or fogging. Thus the face shields need to
be open at the bottom and/or top to allow air circulation. They are good
for beginners and/or light duty use.
Face shields that are part of a helmet (hard hat) are generally to
much trouble for beginners. But, after a few close calls, experienced
turners often favor them. When things come off the lathe, all hell can
break loose. Things (wood, etc) can bounce off the ceiling and come down on
top of your head, etc.
The helmet systems incorporate a small fan with a rechargeable
battery. This often adds way to much to the cost for beginners. The fan
forces a stream of air over your face. The air is normally filtered. I
am NOT saying “fresh” air. It is just filter air.
Powered Face Shields

The “Trend Airshield Pro” for $380 on 4/2019 currently is the only
game in town for less than $1000. I I DO NOT own one of these. I don’t
known what to say about these. Recently, Mark Baker gave it a positive
(but not glowing) review in the UK Woodturning magazine.
This style of unit has the batteries and filter up on the helmet
rather than down on a belt around your waist. The current model moved the
battery and filters to the back (rather than up front) for better balance.
I have (but have not used in a long time) a similar “3M Airlite”
with the battery and filter on the helmet up front. I had a love hate
relationship with this unit. I always forgot to charge the battery. Even
when I had a spare battery. The fan did not blow enough air to satisfy me.
I personally like lots (tons) of air! Your mileage may vary! This unit
was long ago discounted. The new 3M models start at over $1000.
Note: I don’t known if the new “Trend Airshield Pro” would move
enough air for me. I have never really tried it.

Eventually, I replaced the 3M Airlite with a “Triton Powered
Respirator”. It was a hard hat style helmet with the battery and fan on a
belt around your waste. This one supplied a little more air. But, still
not enough. Donning it was a pain. This unit has also been discounted.
Then I decided that all of these battery units were never going to
supply enough fresh air to satisfy me. I replace the battery box and fan
on the Triton unit with a 20′ long 1.5″ diameter light duty hose that was
driven by a 6″ in line duck fan. The fans they use for boosting air flow
in AC systems. This worked reasonably well. But, I got tried of that 1.5″
hose. It was hard to coil up and store. If I stepped on it, then I was
screwed.
I decided to bite the bullet, when I became a full time Woodturner.
I got an Allegro fresh air system. See next section.
What I Really Use

When I work in the studio by myself I use my Allegro fresh air
system. It brings in fresh air from outside via a small 3/8″ ID (5/8″ OD)
BREATHING air hose. Being restricted by an air line is not for everyone!
I like the fresh air! I wish the air line was a little more
flexible. But, it is tough. If I step on it, it’s not the end of the
world.
This is the kind of system they use in auto body shops for
painting, sand blasting and welding.
I don’t like the Trend Airshield, etc systems. The fans are to
wimpy for me. I like lots (tons) of COOL air!
Anything that involves “breathing air” is not cheap. 50 feet of
3/8″ air hose for tools, etc, is like $15. You don’t want to breath thru
some cheap plastic air hose that may still be out gasing toxic chemicals,
etc. 50 feet of certified 3/8″ breathing are hose starts at $100+. The
Allegro 9245 system in photo starts at around $1000. Its a low pressure
system.
I actually have over $2000 in my system. I have the bigger A-1500
pump rather than the A-300 pump in photo. I also have a low pressure air
cooler that I modified to fit in a chest freezer so I don’t have to supply
fresh ice daily. The air that comes out of my big pump is to hot for my
liking. I like to have my face bathed with a cool breeze. I have, an
external intake hose connected to the pump that bring in fresh air from
outside. Plus 100′ of hose, fittings, etc. It all adds up.
I am not interested in USED systems on Ebay, etc. I don’t want to
breath thru the same system that someone else has already used. I don’t
known if they kept it clean. I don’t know what they were using it for.
Toxic chemicals? Fine sand blasting dust? Etc.
If I had to do again I would get the A-750 pump. I got A-1500 pump
because I like lots (tons) of air! I decided the A-300 pump would probably
be to small for me. The A-1500 pump is to much! It runs hot because it
supplies lots of air. I have to vent almost 1/2 of the air at the pump.
It costs to much to run. The pump is hard to deal with because it is
really heavy.
Some day I may upgrade to the 3M M-107 Versaflo Helmet or the full
hard helmet from Allegro rather than the half helmet that I have.
An added bonus of this system is that it works great while sanding
or spraying paint. When I finish my work the rattle spray cans, etc of
nasty stuff, I don’t breath it and I can’t smell it!
I strongly recommend you try something like a “Trend Airshield Pro”
and decide you RALLY can’t live with it. Before you go with one of these
EXPENSIVE systems!
Note: Low pressure systems use a little pump like shown in above
photo. High pressure systems bleed the air off of a big gas powered air
compressor. The kind they use on construction sites to power jack hammers,
etc. You can only use a venturi effect air cooler on high pressure
systems.
]]>


Here is my “Craft Foam Projects Bowl Rim” tip that appeared in the “Tips” section on page 15 of the AAW February 2019 “American Woodturner” Journal.
Note: Click here to view PDF with Photos 1, 2, 3 referenced below.
I recently discovered sticky-back craft foam at my local craft store. It is 1/8″ (3mm) thick with a self-adhesive back. I purchased a couple of sheets for future use and have now found a good use for it. I’ve installed it on the face of my jumbo jaws to protect a bowl’s rim when reverse-chucked.
Simply remove the buttons from the jumbo jaws, cut the foam to shape with scissors, stick it on, and reinstall the buttons (Photos 1, 2). You can poke holes through the foam for various button placement as needed. I no longer need to fumble with trying to stick a paper towel between the jaws and my work when I’m concerned about damaging a finished surface (Photo 3).
The foam sticks very well but could be peeled off if necessary. I plan to leave the foam on the jaws indefinitely and replace it when it wears out.
Long ago, I also made my own buttons for my jumbo jaws out of some rubber corks that I purchased at the local hardware store. I drilled a hole through the corks and attached them with longer machine screws (also from the hardware store). I really like this solution. The deep dovetail shape of the corks holds the work securely.
Additional Information
You can purchase the rubber corks with a hole already thru them from www.mcmaster.com item # 9545K116 $8.33 per pack of 25 on 4/4/2019. The matching 30mm long 8mm screws are #92000A438 $8.15 per pack of 25 on 4/4/2019.
]]>
I am going to be teaching my 5 Day Woodturning Workshop class at the Peters Valley School of Craft in Layton NJ (in the Delware Water Gap National Recreation Area) on July 12-16, 2019. Their name for it is “An Exploration of Woodturning”.
Click here for more info or to sign up on the Peters Valley web site.
There is also more info in the Student Material List. Lots of info, not just a materials list. Click here for additional info.
There are no fixed projects in the above class. Students are free to do there own thing. Pick there own projects. Thus students can make a cake stand in the above class if they want. With or without the decoration. Or we can do similar decoration on a plate, bowl, etc.
Click on the photo below for more photos of my recent work.

Turning Smocks & Low Cost Alternatives
Over the years I have owned a number of different turning smocks.
Here are MY thoughts.
Sooner or latter every turner decides they need a turning smock.
Because, sooner or latter nature calls and you just don’t have time to shed
all the wood chips, etc. She who must be obeyed, has a no wood chips in the
house policy!
In A Nutshell
I like the AAW Turning Smock best. I absolutely HATE the blue color. The
dark grey one is not a whole lot better. But, I have found the lightweight,
short sleeve and roomy design works best. It is easy to get on and off. It
easily sheds wood chips.
I also hate the price! $65 on 2/2019. However, all the available
Turning Smocks are in the $60 range. See below for some cheaper
alternatives.
There are some cheaper look-a-lines. In better colors! See below.
Features

Features I look for the following in a turning smock. Basically everything the AAW turning smock has.
- Easy on/off
This implies I like jackets, rather aprons. I don’t want to fiddle around with tying and untying apron strings in the back when I need to go! - Something that will keep me cool in the summer.
Some people are naturally always cold, while others are always hot. I am the kind of person who never gets cold. So, I am looking for a turning smock that keeps me cool in the summer. If I am cold, I will add a layer under the smock. - Short sleeves.
I don’t like the elastic and/or knit cuffs on long sleeve turning smocks. Long selves violate my easy on/off criteria. - Loose fitting selves. Like the sleeves on AAW smock.
You need a loose fit to stay cool or if you want to wear something under a turning smock. - Simple tight (but not to tight) fitting collar.
You should be able to just zip the smock up and that’s it. No extra neck flap that you need to dork around with. The collar needs to keep the shavings from going down your back. You should be wearing a face shield that deflects away any shavings in the front.
I don’t like a knit collar that fits really tight in the front. It traps to much body heat. Makes me to hot. - Water resistant and breathable. NOT waterproof!
A soft lightweight brushed nylon fabric (like the AAW Turning Smock) that is water resistant (sheds water) is best. I don’t like waterproof fabric that does not breath. Waterproof gets to heavy and hot. You don’t really need waterproof! You just need something that sheds water and dries fast.
When I turned my first green log and all that water came flying out, I got a waterproof turning smock. It was good that winter. When summer came that smock had to go! It was just way to hot. After a couple of false starts, I eventually replaced it with an AAW smock and lived happily ever after. - Loose fit.
I don’t want something that clings to me like a knit shirt. I want something with room to add a shirt or what ever under it for warmth. Something that keeps me cool in the summer. - A flap over any pocket on the front. Or no pockets.
Any pocket on the front that does not have a flap over it will quickly fill up with wood shavings and become a huge pain in the back side.
I personally never use the pockets in my turning smocks. Thus, I would like to see manufacturers lower the cost of smocks by leaving out all the pockets on the front and back.
Note: You can close up a pocket in a shirt, etc with some masking tape. The tape keeps the wood shavings out. - Pockets on the back are a don’t care for me! Your mileage may vary.
I never use the pockets that are the back of turning smocks. Thus I don’t care if they exists. Pockets on the back do not need flaps. - Left or Right Zip. I don’t care. But, some people may.
In the US most men’s jackets are right zip. This means you grasp the zipper pull in your right hand. In other countries things may be left zip. i.e. you grasp the zipper pull in you left hand.
Most US turning smocks are right zip. Those made by or for European markets are left zip.
Three Types of Turning Smocks
Below is my not so humble opinion. There are basically
3 different types of smocks available. The field has narrowed in recent
years. Several manufactures have dropped out.
Note: Lee Valley no longer sells a long sleeve smock with a collar
flap. Packard now only sells an apron. No smock.
- The AAW Turning Smock and look-a-likes

Lightweight. With underarm vents. Good for people who are not looking for warmth. Want something that is cool in the summer.
I like the AAW Turning Smock best. I absolutely HATE the blue color. The dark grey one is not a whole lot better. But, I have found the lightweight, short sleeve and roomy design works best. It is easy to get on and off. It easily sheds wood chips.
I also hate the price! $65 on 2/2019. However, all the available Turning Smocks are in the $60 range. See below for some cheaper alternatives.
The Powermatic Turning Smock is an exact copy of the AAW Turning Smock in a nice mustard yellow color! Well, almost. It is left rather than right zip. It’s only $50 on 2/2019. I own one. The only retailer is Beaver Industrial Supply (BIS). https://bispowermatic.com/search/?cat=0&q=turning+smock
The Highland Woodworking sells a Shop Smock that also appears to be a copy of the AAW Turning Smock in a nice red color! I DO NOT own one of these and have never seen one up close and personal. $57 on 2/2019. https://www.highlandwoodworking.com/shopsmock.aspx - The Old Tan Craft Supplies USA Turning Smock

Mid weight. No under arm vents. Good for people who are looking for warmth and can live with being hot in the summer.
Craft Supplies USA makes two turning smocks. A new Black “Lightweight” one and a old Tan one. The old tan one is “mid weight tan twill material”, “100% polyester”. I would describe it as mid weight canvas. A lot heavier than the AAW smock. No underarm vents like the AAW smock.
$56 on 2/2019. I own one of these. I never wear it. It is way to hot for me. Please keep in mind that I am the type of person who never gets cold. - The New Black Craft Supplies USA Lightweight Turning Smock
$45 on 2/2019. I have only worn this smock once. I don’t like the way it hangs. It is to tight and cling fitting for me.
Low Cost Alternatives
- Red Kap 1P60 Convertible Collar Shirt Jacket

Price varies by size. Around $32 for 2XL. I own and like this lightweight jacket. Its really more like a shirt in weight. Tough, 65% polyester, 35% cotton fabric that sheds wood chips and dirt.
If you put some masking tape over the pockets it works well as a turning smock. I really like it for painting things in my studio.
It was a weird zipper. It zips down from the top. It is easy to use, after you get the hang of it.
It only comes in navy blue or black. But, the price is right!
Red Kap is a very old and well known manufacture in the automotive and uniform business. They make things in a ton of sizes. From small to ultra large.
Google “Red Kap 1p60” then look for the best price. I use “Automative Workware” when they have it. - Red Kap KP44 Men’s Zip Front Smock or KP43 Women’s Zip Front Smock

Price varies by size. Around $20 for 2XL. I DO NOT own one of these. It just looks good to me. However you will have to sew up or masking tape over the lower pockets. The price is right!
It only comes in navy blue or white.
Google “Red Kap kp44” then look for the best price. I use “Automative Workware” when they have it. - Green Cotton Welding Jacket

Cotton welding jackets have been around for a long time. They tend to be cheap. Around $30 for XXL.
No pockets on the front. Very tough yet flexible fabric. They are mid weight like the old Tan Craft Supplies USA turning smock. Often a light green in color.
The old one I have and like was made by Weldmark. Go down to your local welding supply store and find one you like. Or via Amazon, etc.
I found a green jacket on Amazon made by West Chester and a tan one made by Revco.

Vest

I have a Red Kap VT22 Quilted Vest that I wear in my studio under
my turning smock when it is cold. While I am waiting for the heater to do
it’s thing.
I like it. Not to thick, not to thin. $30 for L on 2/2019. The
price is right. Thus, if it gets screwed up, I don’t care.
I have a Large Red Kap VT22. It is a bit tight on me. But, fits
nicely under my XL AAW Turning Smock.
Google “Red Kap vt224” then look for the best price. I use
“Automative Workware” when they have it.
Jacket

30 years ago, I picked up a jacket at local used work wear place for
$10. Over the years, I learned to love this jacket for outside work.
It works good for chain sawing. It is not to heavy, not to light.
Reasonably warm, but not to warm. Etc, etc. The exterior is a tough fabric.
You can wash the jacket in any washing machine.
The slim looking jacket fits over my round figure. It does make me,
sort of look like a UPS man. But, who really cares if the jacket works.
After years of hard use I recently decided to get a new one due to an ugly
paint stain on my old one. 30 years latter, and they still make the same
jacket!
It is a Red Kap JT50 Perma-Lined Panel Jacket. $48 for XL on 2/2019.
It comes in a number of dark colors in both regular and long versions.
I like this jacket a lot better than my Carhartt jacket.
Google “Red Kap jt50” then look for the best price. I use
“Automative Workware” when they have it.
Pants & Shirts
Well, I have gone this far. I mind wells tell you about my favorite work
pants and shirts for my studio.
I like the Red Kap brand work pants and shirts. They are low cost,
tough, permanent press, and yet soft!
They are NOT like the old Sears or JC
Penny work pants and shirts that I hate. Because, they are so stiff they
stand up on there own. The Red Kap stuff also comes in better colors. You
don’t have to look like a gas station mechanic.
Red Kap is better than Carhartt in my not so humble opinion.
Pants

I have several pairs and like Red Kap PT10 Men’s Red-E-Prest Work
Pant”. $20 on 2/2019.
I really like these paints. Really tough, but still soft. I have a
very old pair of these that I have run into the ground. Lots of paint
stains and heard wear. No holes. These pants are like Dockers that don’t
wear out and get holes. They look great. A lot better than an ugly genes that
are to heavy, get holes to easy and cost a fortune.
The BEST thing about these pants is that you can get them in any
waist size with any inseam length!!!
I recommend you get these from “Automative Workware”
www.automotiveworkwear.com for any waist and inseam options. They hem the
pants if necessary. No extra charge.
Shirts
I have several Red Kap shirts that I like.
- Red Kap SB12BS Men’s Long Sleeve Industrial Stripe Work Shirt.

Like a dress shirt with a tough soft fabric. The fabric is a little heavier than a fine dress shirt. Around $19 on 9/2019. Price varies with size and color.
It comes in lots of colors. Some are real nice dress shirt colors. Others are ugly. The style number varies from SB12, to SP10 and SP14 based on the color. Go on the Red Kap or Automotive Workwear web site and look thru the colors. - Red Kap SP10EX Men’s Long Sleeve Microcheck Uniform Shirt

This is really a dress shirt. Not a work shirt. Lighter weight than the above. The microcheck fabric really makes this shirt look like an expensive shirt. Around $22 on 9/2019. - Red Kap SP74GB Men’s Long Sleeve Mini-plaid Uniform Shirt

I also really like this shirt. Really a dress shirt… Different colors. Around $26 on 9/2019.
All of the above shirts work ok under a short sleeve turning smock.
i.e. the fabric in the shirts is smooth enough so it does not easily catch
a lot of wood chips on the long sleeves, like cotton plaid shirts do.
Note: I DO NOT like the fabric in Red Kap SP14BY Men’s Long Sleeve Industrial Work Shirt (solid color, not striped) that I have. It catches wood chips easily. I don’t known if this applies to all colors or just the burgundy one that I own. ]]>

Here is my new photo setup. I started using it in 2018. I am very happy
with it.
I am now using "softbox lights" with a big graduated
black to white background. See photo above.
Previously I used a "Photo Tent". (See photo at the end of this
blog post.) Like recommended in AAW Symposiums, etc. It worked ok for
years. But then I decided I was tired of it. I did not like the lights all
that much. The tent was to small. I wanted to take photos of bigger things
and groups of things. Moving things around and positioning them inside of
the tent was a pain.
I looked around and decided that "softbox lights" were
the way to go.

I found some softbox lights on Amazon that I liked the looks of in my price
range.
They are "LimoStudio 700W Photo Video Studio Soft Box Lighting
Kit, 24 x 24 Inch Dimension Softbox Light Reflector with Photo Bulb,
Photography Studio, AGG814". $64 on 2/2019.
I like them.

The bulbs are big. Really big. 4" diameter by 9" tall.
I think big is good. They create lots of light that is soft from
the start because it does not all come from a small point source.
The bulbs are marked "eTopLighting photo bulb PB-85 120V
85W". No other markings. But, I think they are 6500K, daylight neutral.

I decided to get a big background so I could take photos of big things. I
like the background in photos to trail off from grey to black. Thus I use a
graduated black to white background.
Real photographers use a huge studio and let the light trail off
naturally. I don't have room for that.
My background is from Amazon. It is a "Flotone Vinyl Graduated
Background 43" X 67" Black to White #609". $74 on 2/2019.
There are lots of similar choices on Amazon. The price was more
than I would like. But, it was the best I could do.
I wanted a vinyl background so I cold wash it off when it got
dirty. However, that does not work well, because all these backgrounds
scratch really easily!
Note: I use the smudge tool in Photoshop to wipe out any scratches I
see on the background in my photos.
If you want to go cheaper you could just use some photo gray paper. Something that is a “Dove Gray” color. Something like “Savage Seamless Background Paper – #84 Dove Gray (53 in x 36 ft)”. $45 on 2/2019. Pick something that is the right width for your application.

Here is my new photo studio all stowed. I just roll the background up to
the ceiling. Then shove the lights, back out of the way. The table is part
of my photo set up. I just, leave it up and use it for other things.
Stowing things takes just a minute or two.
I made my own background roller. More about that latter. Before, I
made the roller, I used some big binder paper clips that hung the background from the
ceiling from some wires. I never put the background away and thus ended up
with scratches on it.
Note: I had to use the flash on my camera to get a photo of the
screen up against the ceiling. Err… I hate on camera flash! The light is
just way to harsh.

Here is my photo studio set up and ready to go.
The tall light is lighting the background and the over all scene.
The low light is my accent light. For this big group with lots of shiny
things, I have the accent light higher than normal. Later, I had to dork
around with the accent light, quite a bit to get rid of hot spots on that
glossy red plate.
I am using an old GOOD tripod, I got from a friend. A good tripod
is a must! A cheap tripod that moves around will drive you crazy.
The big black binder paper clips on the bottom of the background just add
some weight so it hangs down, out of the way. The paint cans, keep the
background from slipping off the table.
I adjust the height of the background and paint cans to get a nice
almost black background at the top of my photos.
I always take my photos in a dark room at night or on a cloudy day.
The photo lights are the only source of light. I don't want any other
sources of light that may reflect off my work, cast weird shadows or color
shifts.
Note: My good camera is on the tripod. I am taking this photo with
my old camera. Thus the quality of the photos in this blog entry, vary a
lot.

Here I have my camera set up ready to take a shot. I am going to live with
the hot spots in centers of bowls. They are virtually impossible to get rid
of in a group shot like this. The top of the red plate is still a little to
bright. I need to adjust my lights a little more.
In the viewfinder you can see the edge of my background on the left. For this
big group, I have to frame the photo based on top and bottom of all items
in the photo. I will cut left and right off latter in Photoshop. I also
leave some room on the top and bottom of shot for cropping in Photoshop.
My camera is an "Olympus TG-3". I really good camera. I
really like this camera. But, it is totally the wrong camera for this
application. But, it works just fine. This camera is designed to be really
tough for travel. It can be bounced off a concrete floor, dropped in a lake
or you can take photos in pouring rain. I have done most of these things.
It has a piece of glass in front of the internal folded lens to make it
really waterproof and thus totally the wrong camera for this application.
You can put this camera in manual mode. And lots of other stuff.
But, I never do, because it takes FANTASTIC photos in AUTO mode. Here I
have forced the flash off, set it to 8m (3216 x 2144) photo size (not the
max), 3:2 photo with a 1 second self timer, in auto mode.
The most important thing here is to FORCE THE FLASH OFF! No flash
for any reason come hell or high water with digital cameras.
A 1 second self timer is also real important. i.e. take the photo 1
second after I push the shutter button. Wait until, I let go and the camera
stops shaking then take the photo.
These days, any good point and shoot camera will get the job done.
Note: If I had a ton of money to waste then I would get a fancy OFF
CAMERA flash unit that I could ADJUST the brightness of. Then I would not
need to dork with my lights, etc. I could just use the flash. On camera
flashes like I have and can afford, do not work! Only one brightness (usually super bright) flashes like I have and can afford do not work!

Well, sort of the original photo. The original is 3316 x 2144, 1.46 MB. The
photo here has been down sampled to a reasonable size for the web.
Here is the photo I decided to go with. It is one of 10 or so,
taken from slight different angles and heights. I picked the best one.
If you are taking photos on Auto. Just
moving the camera a little often makes a BIG difference in how the light is
captured by the camera. Big differences in ISO, F stop, shutter speed,
white balance, etc.
I have found the best solution for ME is to take 10 or more photos
on AUTO and then pick the best one. Because, I don't really known what
I am doing. Taking photos on manual is a waste of time for ME. What F stop,
etc should I use? I have no clue. Once in a long while, I will take a photo
on Auto and then switch to Manual, where I tweak the settings that Auto
mode came up with.
I often rotate the pieces around a little or lot. The grain on some
pieces only looks great from one angle. Often not the angle I start out
with.
There are lots of scratches and some dust/dirt on the background in
this photo. Can you find them? I did not touch them up. I can't find
them even in the 1.46 meg original with out a lot of zooming.

Here I cropped the photo a little in Photoshop. Remove the edge of
the background on right. Leave a nice amount of space all around.
Auto Levels in Photoshop often does wonders. Makes the background
look better. Removes the dull gray cast. Auto levels did not do much to
this photo. I got the lights, etc right from the start. My TG-3 camera is
not the right camera for the job, but it does a pretty good job.
In Photoshop I did an Export, Save for Web. Saved the photo at 1600
px wide (1600 x 1160), 648K. Then I let Jalbum program down sample it to
828 x 600, 93K for my blog on the web. I normally shoot for original images
saved on my computer for the long term around 600K to 800K. If just one
object in the photo than I save at 800 px wide. If you save photos anywhere
on the web (Flickr, Google Photos, etc) they frequently get saved way below
this size.
Photoshop use to be head and shoulders above any thing else. That is no
longer true. The programs that now come with most digital cameras are
pretty good. They all support cropping. And most support some form of
"auto levels". You don't need Photoshop. Photoshop is a tool.
A tool with a HUGE learning curve. The programs that now come with digital
cameras are often a lot easier to use.
Note: This is one of the promotional photos for my Woodturning
Workshop class at Peters Valley on July 12-16, 2019. PV is calling it
"An Exploration of Woodturning". See
http://petersvalleyworkshops.bigcartel.com/product/an-exploration-of-woodturning

Like I said eariler. I ALWAYS take 10 or more photos from slightly different angles, heights and rotations of the subject. Then I pick the best one.

Here I am taking a photo of a lamp that will definitely not fit in my old photo tent. I have raised the background up to make this work.
 Background Rolled Up for Storage
Here is what my background looks like when rolled up for storage. The big
black metal binder clips add a little weight to the end of the background.
They make things a lot easier.
Notice that my roller is roughly 6" wider than my background.
I did this on purpose. I didn't want the edges of my background getting
all screwed up.
I made the roller out of 4" Sewer and Drain PVC pipe from
local big box store. I wanted a big diameter roller. I did not want the
background to get screwed up by being rolled to tight. I also, did not want
it to develop a memory and try to roll back up on it's own.
Note: Before, I
made the roller, I used some big binder paper clips that hung the background from the
ceiling from some wires. I never put the background away and thus ended up
with scratches on it.

Here you can see that I put 3 feet of heavy construction paper above my
background. This allows me to roll down the background further.
I REALLY like this roller because it has a clutch mechanism built
into it. It will not roll down on it's own while I taking photos, etc.
You have to pull on the white chain on the right to roll it up or down. See
next photo.
 Clutch Mechanism for Background Roller
I purchased some roller brackets with a built in clutch mechanism. I
purchased "Good News Roller Blind Shade Metal Core Clutch Bracket Cord
Chain Repair kit 38mm" from Amazon. $9 on 2/2019.
I turned some pine wooden disks to reduce the 4" PVC pipe down
to the 38mm required by the rollers.

Here you can see that I cut the long slots off of the roller brackets in previous photo. Then I drilled my own new mounting holes.


Recently, I decided to start posting one photo per week of my recent work on the AAW’s Photo Gallery.
Go here to see some recent photos taken with my new photo studio set up: http://www.aawforum.org/community/index.php?media/albums/carl-ford.842/
Here is some advice I wrote for a new turner who has just purchased a Powermatic 3520C lathe. He was looking for advice on chucks, faceplates and a drill chuck. A threw in a little extra stuff.
Join the American Association of Turners (AAW)
 You should join the AAW for there Journal magazine ASAP. The great mag easily pays for membership. It has lots of GOOD stuff for beginners and experience people. Go here: https://www.woodturner.org/page/MemberBenefits
You should also check out the AAW’s Woodturning Fundamental magazine and other stuff for new people. Go here: https://www.woodturner.org/page/FUNdamentals
Take A Class – Try before you buy!
You should take a class with a well known turner and/or a well known school. Try tools before you buy!
If you live in Colorado. Then take a class with Trent Bosch or a beginner class at Anderson Ranch. Or Google “woodturning classes”.
Turning Tools
 I recommend taking a class and going with tool set used by your teacher/mentor. Otherwise my tool set is here: http://www.carlford.info/pages/jigs_tools/modern_tool_set/modern_tool_set.pdf
Faceplates
 Faceplates are a no brainier. The Oneway steel 4″ faceplate is the best out there. You don’t need stainless steel.
Note: Oneway is the manufacturer name.
Avoid the cast iron, thin steel ones and aluminum faceplates on the market. They are OK for making Jam Chucks, etc. But, not for everyday work where you “ride the plates hard and put them away wet”.
The faceplate that comes with the Powermatic 3520C is an exception to the no cast iron rule. It is OK. But, to small. Only 3″. Get a 4″ one.
If you want to go big. I would wait and see. If you go there, I would go with a Oneway Versa Hub with a 6″ Versa Plate. You could go the Versa Hub & Plate route for the 4″ faceplate. However, removing the plate from the versa hub to put in screws tends to be to much trouble for a 4″ plate.
The info here is out of date on the tools stuff. Use my new modern tool set stuff on my blog. But the screws and faceplate stuff is still good here: http://www.carlford.info/pages/demos_classes/natural_edge_bowls/My_Ellsworth_Class.pdf
Drill Chuck (Jacobs Chuck)

Currently (2/2019) the “PSI Woodworking Products TM32KL Keyless 1/2-Inch Drill Chuck with a 2 MT Mount” looks good for $38.
Look for a Rohm Supra chuck made in Germany if you want to waste some money on high quality you don’t need. There are some nice Rohm MT2 chucks on eBay. I just purchased one for $106 for my drill press.’
Note: Your Powermatic 3520C has a MT2 (Morse Taper #2) hole in the tailstock. The headstock is 1-1/4 by 8 threads with a MT2 hole.
Woodturning Chuck
 Now we get to the more controversial subject of chucks. I will try to stick to the middle of the road and be brief.
Wood Magazine has a good intro to how chucks work and terminology here: https://www.woodmagazine.com/woodworking-tips/techniques/woodturning/four-jaw-lathe-chucks
Think about Jaws First
Sooner or latter most people decide they need/want more than one set of chuck jaws. Different size jaws, different shape, etc. Thus you should look at the cost of extra jaw sets BEFORE you pick a manufacture. Because you can NOT interchange different brands of chuck bodies and jaws. Vicmarc jaws only fit on Vicmarc chucks, etc.
Note: Vicmarc, Oneway, and Nova are the names of well known manufactures.
In general, extra Oneway chuck jaw sets tend to be cheapest. Then Vicmarc, Nova and then Easy Wood is out of this world expensive!
Oneway has a good jaw size and shape table here: https://oneway.ca/products-category/chucks
Chucks in a Nutshell
I agree with most of the professional turners that Vicmarc makes the best chuck bodies. The VM120 chuck is loved by many. However, all these people tend to be in the “dovetail jaws are best camp”. They tend to turn mostly dry wood. They often expand the chuck jaws into a recess in the bottom of a piece. Making generalizations like this is obviously going to elicit negative responses from some people. Go with a Vicmarc VM120 if you are in the dovetail jaws camp.
I turn mostly green wood from FRESHLY cut logs from trees. Fresh cut wood is soft and cuts like butter. Thus, I am firmly in the “profiled serrated jaws are best camp”. They work better on green wood. I ALWAYS clamp my jaws down on to the OUTSIDE of a tenon. Expanding into a recess in the bottom of a green wood piece almost always ends in disaster.
You can ONLY get serrated jaws from Oneway and they only fit on Oneway chucks. Thus I recommend the Oneway Stronghold chuck. It is also loved by many. I have 5 of them. I don’t like the smaller Talon chuck by Oneway. Go with a Oneway Stronghold if you are going to turn bowls or hollow forms out of green wood.
You can get dovetail jaws for Oneway chucks and extra Oneway jaws are cheapest. So you can have the best of all worlds with a Oneway Stronghold.
Dovetail Jaws verses Serrated Jaws
The advantage to dovetail jaws is you can removed a piece from a chuck and then remount it latter. It will still run almost dead true, with no wobble, etc. If and only if the wood has not warped. You can’t do this with serrated jaws that are clamped down over a tenon. You can if you expand the serrated jaws into a recess. However, dovetail jaws expanded into a recess are better.
You have to cut a dovetail for dovetail jaws. This can be a huge source of pain for new people. They make dovetail scrapers that will cut a “perfect dovetail”. However, they tend to catch. Then all hell brakes lose. Serrated jaws use a simple straight tenon that is easier to create.
Other Chuck Manufactures
I started out with a Super Nova chuck. I still really hate that chuck. It’s the chuck key that I really hate! The newer Nova chucks that use a simple Allen wrench key are OK. It’s hard not to like the low price of the Nova SuperNova2 direct thread chuck bundles on ebay. But, extra Nova jaws tend to be expensive. Some people love Nova chucks. They are not going to agree with me here. Sorry, it’s my blog.
The new kids on the block, like Hurricane chucks use to be cheap. No more! I see no reason to go with one of these new kids when the above well known manufactures are in the same price range.
Record brand chucks just splashed onto the scene in the US. They have existed for a long time in Europe where they are known for being made by Nova. Why not go with a cheap Nova on eBay?
Sorby and Axminster chucks are UK companies. They generally are not cheap in the US.
When it comes to chucks for Mini Lathes the field has gotten pretty muddy. I have not been keeping up. I still like the Barracuda2 Chuck by Penn State Industries. Mostly, I like the $149 price. I don’t known that it is any better than the look-a-likes by other manufactures.
There is no way on the face of the earth I want anything to do with these new “no jaw screws” chucks! Like, Easy Wood Tools, Easy Chuck, etc. Jaws need to be securely screwed on to a chuck! Otherwise they are just an accident waiting to happen. Sooner or latter jaws with out screws will come flying off and kill you.
Chuck Size
Bigger is always better in the US. Thus sooner or latter someone was going to come out with chucks bigger than the Vicmarc VM120 (5″) or Oneway Stronghold (4-1/2″). They are just trying to knock these chucks off their well earned thrones. You don’t need any of the bigger chucks. The extra weight will just be a pain in the ass when you take them on/off the lathe. It is the chuck jaw size of work ranges that makes a difference. Not the chuck body size. Well, maybe if someone made an 8″ chuck it would be better. But there is no real difference between a 4-1/2″ chuck and a 5″ or 6″ chuck.
 Turning Smocks
Get yourself a turning smock before “he who must be obeyed” complains about wood shavings in the house. I like the AAW Turning Smock best. It’ll make a good valentines day gift! 
Ric Rac Orchid Cactus Plate Bowl

Last month, I found these old photos that I never got around to writing up.
They are still relevant. Thus, here is my Ric Rac Cactus Plate Bowl.
I created this plate bowl back in 2013. Not long after taking a
class with Al Stirt at The Center for Furniture Craftsmenship in Maine.
I used Al's pattern layout, and sgraffito process.
My inspiration for the pattern was my Ric Rac Orchid Cactus. See
photo above.
Note: I call a plate with a small blow in the center a "Plate
Bowl". Sgraffito definition "decoration by cutting away parts of
a surface layer (as of plaster or clay) to expose a different colored
ground".
Here is how I created the decoration on my plate bowl:

My inspiration for the pattern was my Ric Rac Orchid Cactus.
Boy this cactus was small back in 2013. It is now a big boy. I have
propagated it into numerous plants. See photo at end.

Here I have traced the leaf (stalk?) pattern onto the plate bowl with a
yellow water color pencil.
I am using a WATER COLOR pencil because I can easily remove it with
a wet paper towel. Water color pencils are easy to find in art supply
stores.
I turned the plate bowl out of maple wood. Then, I prepped it with
(one or two coats, I don't remember) of black acrylic gesso paint. I
thined the gesso a little with some water. The gesso dries flat. I like to
use a good quality gesso. I use either Golden or Liquitex brand.
Latter, I will top coat the finished piece with a semi gloss or
gloss finish. For now, I just want a nice flat surface I can draw on.
After the gesso dried, I sprayed it with flat lacquer to toughen up
the gesso and make it water proof. In 2013, I probably used Deft brand flat
lacquer. Sprayed on from a rattle can. Today (in 2019) I would use 2 to 3
VERY LIGHT coats of Krylon brand "Matte Finish 1311". Matte is
the name of the finish. It dries fast and makes a great surface to work on
top of.
 Transfer the Pattern to a Template
After I create a pattern that I like, I need to replicate it over and over
on the plate. I do this by creating a template.
I get some thin, yet rigid, see thru plastic sheet from local craft
or fabric store. Quilters use this stuff. Low cost. You can get it with or
with out a grid on the plastic. It looks like I had the grid stuff back in
2013. I now prefer it, with out the grid.
I trace the pattern I like onto the plastic with a run of the mill
#2 pencil. Click on the photo for a better view.

I cut out the template with an X-acto knife.
Note: Should I call it a Template or Stencil? I am going with
template.

Here I am testing out the template. It looks good.
Notice that I discarded the part in the middle. The part that most
people would keep. I want the outline of the shape. Not the shape. Why,
will become obvious in the next couple of photos.

Now I need a way to rotate the template around the center of the bowl and
position it at the same angle.
The photo shows the gizmo, I came up with. I cut a piece of plywood
that fits in the center bowl. Then I attached the plywood to a chunk of
scrap metal.
Then I taped the template to the metal with some masking tape. Now,
I have a template that can be rotated to any position on the bowl.
This gizmo works on any outside shape plate (square, oval or round)
with a round bowl in the center (or off center).

Now I play around. I move the pattern around and decide what visually looks
best. How close together, do I want the leaves? How many leaves fit nicely
all the way around the plate?
I can use my yellow WATER COLOR pencil to temporarily draw things
on and see how they look. Because I can easily erase the water color with a
damp paper towel.
I decided, I wanted 7 leaves. 7 is an odd number. Things often
occur in nature in odd numbers. 3, 5, 7, etc. Odd numbers often look best.
7 leaves allows the widest part of the leaves to almost touch.
About 3/16" apart. The pattern will visually fill up most of the
plate. But, not to much! See photos below.

Now it is time to make some reference marks that will allow me to evenly
space the pattern.
360 degrees / 7 leaves = 51.43 degrees. Thus, I need a reference
line every 51 degrees and then fudge the last one a little if needed to
make it look good.
I used my protractor to mark the first 51 degree spot. Then, I just
attached the protractor to my gizmo and rotated it, to make a mark every 51
degrees.
I made all the marks with a WATER COLOR pencil so I can easily
erase them latter with a damp paper towel.

This photo shows the 7 reference marks.
Why didn't I use the index in the lathe? Well, I find indexes
built into lathes, are generally, completely and totally useless in my not
so humble opinion! They are way to hard to use. They are often buried
inside and/or hard to see. They have way to many holes. I only need like
12! Counting every fifth hole or what ever is for the birds! It never comes
out right! Are they zero or one origin? Err……
In this case, there is no doubt, any lathe index is completely and
totally useless! I want 7, an odd number. Lathe indexes are always even
numbers!

Here I have taped the template to my gizmo. I am rotating the gizmo. Lining it up on my reference marks. Drawing on the pattern with a WATER COLOR pencil.


This photos shows my circle T-Square. I got this from Al Stirt. The
t-square has been adapted to ride on the outside edge of a circle.
In this case, my outside bowl is circular (rather than square or
oval) and my inside bowl is in the center, thus I could have used this
rather than my gizmo.
I could have just taped my template to the t-square and then
rotated the t-square.

Here I have started carving in the pattern with a 1/8" ball cutter
(burr) in a rotatory tool.
Note: You can only sort of see the shaft of the tool in the photo.
The cutter is not visible.
It looks like, I was using my Foredom Flex Tool back in 2013.
Today, I would just use a Dremel style tool. It's the pattern and
operator that matters. Not the tool!


Here the carving is all done. I used a 3M Radial Bristle disk to clean up
any carving fuzz.
Ready for a finish. Hum? Well, I don't really known. It may
already have a semi gloss lacquer finish on it.


Here is the finished piece.
My Ric Rac Cactus Plate Blow. 8-1/4" diameter, 1-1/4"
tall. Cherry wood. Power carved pattern. Semi gloss lacquer finish.
My Ric Rac Orchid Cactus in 2018

Here is a picture of my Ric Rac Orchid Cactus. Out on my deck in 2018.
It's a big boy now. Click on the photo for a better view.
The Ric Rac Cactus is on the right. Pointed to by magenta arrow.
There is another Orchid Cactus on the left in full bloom. I love the red
one. I don't known the name. It was a cutting from a mother plant with
fantastic flowers.
I love Orchid Cactus because they have fantastic flowers. They are
really tough. Easy to grow. But, they can be a bit ugly when not in bloom.
I love the shape of the Ric Rac Cactus leaves (stalks?) and the
flowers look great. The flowers are white and orange. However, the Ric Rac
flowers do not smell good. They have sort of an industrial smell. Not
really foul, but not sweet and pleasant.
The red one in photo smells good. But the smell is faint.

A few years ago I realized I needed to improve my hand strength if I wanted to be a better turner. Thus, I purchased a set of “Zon Resistance Strength Hand Grips” from Amazon for $7. I use them in the morning while I am riding my exercise bike. They give my hands a good work out. I like em. They have improved my turning.
When I was a kid my uncle had a set of these that you needed to be Superman to use. They were made for weight lifting, etc. The Zon ones I have are good for mere mortals. The resistance is enough, but not to much.
]]>
Here is my bowl from a 2×4.
I made it for the “Nutmeg Woodturners 2×4 Challenge” on January 14th, 2019.
The bowl is 3-1/8″ diameter by 1-1/4″ tall. The base is 7/8″ diameter. Wall thickness is roughly 1/8″. It was made out of a Douglas Fir 2×4 blank. The blank was actually 3.5″ x 3.5″ x 1.5″.
I am making this blog entry because I want to show people how to use a glue block (see below) and I want to encourage all the Nutmeg Club members to get busy and make something before our January 14th, 2019 meeting.
Also, I want to remind people of 2 important points.
1. People are encourage to explore different rim options and bowl shapes. The magazine article is just one option of many.
2. People are encourage to bring in multiple bowls. Each bowl gets a ticket for the raffle. However, there is 6 ticket limit per person.
I am definitely going to bring more than 1 bowl!
The Nutmeg 2×4 Challenge

I proposed the Nutmeg 2×4 Challenge for our “Nutmeg Woodturners Club” in Brookfield CT, after reading an article in a recent AAW Woodturning Fundamentals on line magazine. I liked the article because it talked about turning bowls out of ordinary soft wood 2x4s (Pine, Spruce, Douglas Fir). I thought, well here is something that anyone can do because every has access to soft wood 2x4s. You can do it on any lathe. Mini Lathe, etc. It seems easy, so everyone will give it a go. However, it’s not that easy, so it will challenge our experienced people. People are going to learn that cutting soft wood CLEANLY is not easy!
The article was “2×4 Softwood Bowl Puts You on Top of Grain Direction” by Walt Wager in the August 2018 AAW Woodturning FUNdementals on line magazine. Click here for the article.
After discussion at a club meeting, I sent out an email to all Nutmeg Members to get the challenge started. The email is attached to the end of this blog entry.
Use A Glue Block & Part the Bowl Off
The above magazine article does not use a glue block. I want to show people how to use a glue block. Because, I think a glue block makes things a lot easier. With a glue block you can just part the bowl off and finish up the bottom with a carving chisel. You don’t need to jam chuck the bowl to finish the bowl. Jam chucking can be a problem for new people.
Here is how I turned my bowl for the 2×4 challenge.

I looked around out back and found a nice Douglas Fir (DF) 2×4 scrap that I
could use for bowls. The top piece in photo.
I also found some Spruce 2×4 scraps that I could use for glue
blocks. Bottom pieces in photo.
Tip: Douglas Fir is one of the harder soft woods that you can
purchase from local store. It is harder than Spruce or Pine. Thus it is
easier to cut cleanly with a bowl gouge. Thus less sanding. Thus a good
choice! It often has nice strong grain lines that make attractive pieces.
Note: Here I can use a softwood glue block, because my blank is
softwood. Normally, I recommend using hardwood (Poplar, Maple, Cherry, etc)
for glue blocks.

Here I have cut out my blanks. My DF 2×4 was 3.5" wide by 1.5"
tall. I cut my DF blanks 3.75" long to making centering easier (less
fussy).
I cut my Spruce 2x4s into 3" x 3" blocks that are
1-1/2" tall. You really want the blocks to be 1-1/2" tall, to
make your life easier. See latter photos. Only 3" to make gluing
easier.

Use any Yellow or White Wood Glue. In photo, I have spread a LIBERAL coat
of glue with a plastic scrap.
When I put the blocks together I use an old trick. I rub the blocks
around until the glue sets up a little. Then position them. I don't
need to fuss with clamps.
I wait overnight for the glue to fully cure.
NO SUPER GLUE Super glue does not work well for glue blocks. If you
just spread it on and then spray with accelerator around the outside it
does not work! The accelerator only goes in like a 1/2" inch. After
that the glue stays wet. Sooner or latter the block breaks off. Some times
you can get away with using super glue if you spread it on one half, then
spray accelerator on the other half. Then stick the half's together
while praying they line up correctly. Because, the glue is going to set up
instantly.

Here I have cut a tenon on the bottom of my glue block. The tenon is
roughly 1/4" deep with a 1/4" wide flange for the front of my
chuck jaws to land on.
I turned the glue block down to 3".
I just jammed the bowl blank up against the chuck. It is being held
there by pressure from the tailstock. The block is not attached to the
chuck.
Use a bowl gouge and/or parting tool to cut the tenon like they say
in the magazine article.
 Cut the Inside (Yea, Inside First)
Here I have mounted the piece in the chuck via the tenon I cut in previous
step. Then I made the blank round with my 1/2" bowl gouge. Like they
show in magazine article.
Then I have started to cut the inside shape with my 1/2" bowl
goug
I turn the inside of my bowls first! Latter, I turn the outside to
match the inside. This is EASIER! Less mental stress!
Turning on the inside of a bowl is always a LOT HARDER than turning
on the outside. On the inside you have to swing the tool handle a lot more
thru a long arc while reaching out over the lathe bed. Doing this when the
bowl walls are getting thin, because you already turned the outside is a
receipt for disaster! The walls flex, etc. It's just all wrong. You
should turn the inside first. Get the hard part over, early, while the bowl
walls are still thick and therefore forgiving.
 1/2″ Bowl Gouge with a Double Bevel
This is a small bowl. But, I still use my standard full size set of tools.
A 1/2" bowl gouge, a 1/2" detail gouge and a 1/8" parting
tool.
Going to a smaller bowl gouge because we are turning a small bowl
is a NOT a good idea! Smaller tools (like a 3/8" bowl gouge) flex to
much because the tool shank is less than 1/2".
The best solution for small bowls is a 1/2" bowl gouge with a
double bevel. The second bevel cuts the heel off of the gouge. So the
primary bevel is smaller and thus can turn faster inside of a small bowl.
Like my bowl gouge in photo. There are also, some good photos of double
bevel bowl gouge in magazine article.
I create the second bevel by extending the tip of the gouge an
extra 1" beyond the end of my sharpening jig after sharpening the
primary bevel. i.e. if primary bevel is created with tip sticking 2"
out of sharpening jig, then secondary bevel is 3" sticking out.
Note: In this photo you can also see a lot of cracks in my blank.
This blank is really small, so I decided to take a chance. Turn away the
cracks. I was stupid, really stupid. I brought a nice DF 2×4 in from my
shed out back. My damp shed! I then cut it into blanks. Glued on some glue
blocks. Then I put the blocks in my furnace room while the glue dried
overnight. The damp wood dried out and cracked! Err… what an idiot! Will
I never learn. Fortunately, the cracks did not go to deep.

Here is the inside of my bowl, nice and clean. Finally pass was with a nice
freshly sharpened bowl gouge. See previous photo. I took several final
passes. Each pass removed just a little wood at a time (like 1/8" or
even 1/16" of inch) so I did not create a lot of torn grain that needs
to be sanded out. I also just floated along on the bevel, rather than
pushing in hard.
I decided to go with a shallow roman ogee bowl shape. Rather than a
deep cereal bowl shape, like in magazine. The ogee shape is easier and more
elegant in my not so humble opinion. See photo of finished bowl above.

Here I am roughing out the outside shape of the bowl. I cut thru the glue
block AS NEEDED to make room to work.
I am still using my 1/2" bowl gouge.
I used a 1-1/2" tall glue block to give me room to work here
on the chuck side of the bowl. It will also give me room to part off
latter.

Here I have inserted a golf ball wrapper in a paper towel for padding on
the tailstock side. I drilled a 3/4" hole in the golf ball so it just
slips over the threads on the live center.
The golf ball supports the walls on the bowl. It allows me to make
the walls 1/8" thick with out a lot of vibration. This is another good
reason why you should cut the inside of the bowl first, rather than the
outside.
The bowl shape is coming along nicely. I have left room on the
bottom for a foot, that I am starting to form.


Here is a close up of the Gage't in action. To the right of the brass
ball on the left you can see to gold bands and 1 black band showing between
the brass ball and blue plastic. Each band is 1/16".
3 bands are showing. 3 times 1/16" is 3/16". Thus the
wall thickness is 3/16" at about 3/4 of the way down the bowl. At the
edge we can visually see the wall thickness is only 1/8". Thus the
wall thickness is perfect, on course!
A Gage't is not cheap and in this small bowl you can just use
your fingers. But, I really like the Gage't. In bigger bowls, I have
found it to be a huge help to students. I often still use it, my self. I
encourage all my students to get one. In the end you will spend a lot less
money on screwed up bowl blanks.
Full Disclosure: Keith Thompson lives near me and is a friend. I
don't get any kick backs from Keith. I had to pay full price for this
Gage't.

Here I am creating the foot using my 1/2" double bevel detail gouge.
To the right of the detail gouge in photo you can see I cut a nice clean
tight junction between the foot and sides of bowl. The sharp point on
detail gouge can easily do this. The round point on a bowl gouge can't
get in there nice and tight.
I am also getting ready to part off. I have created space on left
of detail gouge to part the bowl off. A nice 1-1/2" thick glue block
gives me lots of room here.

Here, I decided to do something really stupid. Part of with the detail gouge. I knew there was a chance the sharp point on the detail gouge would catch and skate like a skew. And well, it did! I screwed it up good!

Here I am doing it right. I got my 1/8" wide parting tool and I am
parting the bowl off.
A nice 1-1/2" thick glue block gives me lots of room here. I
could cut the glue back some more, if I needed more space.
It looks like, I wasted 1/4" of my bowl blank height. I could
have made my bowl 1/4" deeper. The next one will be better.


One of the great things about these small bowls is, you turn another one in no time. My second bowl is on the left. I refined the shape on this one a little more. More of an ogee shape. I used the extra 1/4" of depth to make a smaller foot. I really like this bowl. However, the ogee could be a little better.
Nutmeg Challenge History

From time, to time, our Nutmeg Woodturners Club in Brookfield CT, likes to have a “member challenge”. Where we challenge all the members to go home and make something. Then bring it to the next club meeting for show and tell. We give out a prize to encourage participation.
Participation is the name of the game! So there is no judging! We really want everyone to bring in something regardless of their skill level. Thus, the prize is awarded via random drawing. If you bring in something, anything, you get a ticket for the prize drawing.
Our club has done this once a year (or so) for a long time. It works good! We get lots of participation and it is fun to see what people create.
New people often don’t have access to hardwood. Thus, in the past our Nutmeg Woodturners Club has passed out wood to get the challenge started. “What can people make with a 10″ x 10″ x 2″ chunk of maple wood?”
The club purchases all the wood blanks in advance. Predicting how many blanks we need is a bit tricky, but in the end it all seem to work out. We hand out the blanks at a meeting. People pay $10 for a blank. At the next meeting you get $5 back if you bring back a finished piece. You are also get a ticket for a random prize drawing. The prize is something like a $100 Gift Certificate. Club dues fund the cost of the prize and part of the cost for the wood.
But, not this time. 2x4s are easy to obtain. Thus everyone has been asked to supply there own 2×4. See copy of email below.
Challenge Email
Here is the email I sent out to all Nutmeg Club members to get the challenge started.
From: Nutmeg Woodturners
Subject: Nutmeg 2×4 Challenge. Bring in pieces for January, 14th, 2019 Meeting.
To: Nutmeg Woodturners
The Nutmeg 2×4 Challenge is based on a recent AAW Turning Fundamentals Mag that had an article on turning bowls out of Pine (soft wood) 2x4s. I have attached PDF.
People should turn bowls for the challenge and bring them to the Monday January 14th, 2019 Nutmeg meeting.
Everyone who brings in a bowl gets a ticket for random drawing for prize.
The prize is a $50 Craft Supplies gift certificate provided by the club.
People supply there own wood. Any soft wood from Home Depot, Lowes, etc. Pine, Douglas Fir, etc. NO Hardwoods! No Poplar, Cherry, Maple, etc. NO pressure treated wood!
NO glue! i.e. you can NOT glue up 2x4s into a bigger blank. Thus, people would be making small bowls. Like the magazine article.
Bowls must fit within a 4″ x 4″ x 2″ box.
Paint, stain, burning and other surface enhancements are allowed.
People are encourage to explore different rim options and bowl shapes. The magazine article is just one option of many.
People are encourage to bring in multiple bowls. Each bowl gets a ticket for the raffle. However, there is 6 ticket limit per person.
People can turn plates, hollow forms, boxes or bowls. They must fit within a 4″ x 4″ x 2″ box. NO glue!
You CAN glue on a glue block to mount your 2×4 on the lathe. NO glue is allowed in the finished piece!
P.S. I love snow! Please pray for more snow!
Carl Ford
[email protected]
(PLEASE do NOT reply to [email protected]. This email address is not monitored by anyone on a regular basis. Send any replies to [email protected]).

Here are some Cedar Vases I made with my new Sorby Ring Tool. The vases are roughly 6″ diameter by 5″ to 6-1/2″ tall. I turned these out of green Cedar logs. What you see is what came off the tool. NO sanding, 1 coat of poly when they were still wet, no finial finish yet.
Note: I cut the inside with Ring Tool. I cut the outside with 1/2″ Bowl Gouge.
Ring Tools are poplar in Europe. They are practically unheard of in the USA. Here is what one looks like: (3 different views of the same tool)

The above is what they call a 1/2″ ring tool. This means the hole thru the center is 1/2″. The outer diameter of the ring is a little less than 3/4″. You can cut with either side of the tool. There are 2 bevels. The flat bevel is used for drilling a hole in the center of an end grain. The 60 degree bevel is used to do all the rest of the cutting.
Here is a quick video by Ulf Jansson showing how to use a Ring Tool.

A ring tools is like a modern version of a hook tool. I find the ring tool, cutting on the 60 degree bevel is a lot more forgiving than a hook and thus easier to use. I love it for end grain hollowing. With the Ring Tool you can take a hair thin shaving or a big 1/2″ deep shaving all with the same tool. All in the same pass of the tool if you want.
The best thing about a Ring Tool is that it cuts very cleanly in the bottom of a deep vase shape. Like no sanding clean. It’s almost impossible, to due this with a Bowl Gouge, or anything else.
A 1/2″ Ring Tool is a like a bigger version of the Oneway Termite Tool. I have all 3 sizes of the Termite Tool. I like my new 1/2″ Ring Tool a LOT MORE than a Termite. The Termite cuts to slow for me and tends to drill a hole because the radius on the end is to small. I really like my new Ring Tool. I don’t like Termite Tools.
When I first saw one of these Ring Tools, I was very skeptical. There is no way a ring, just brazed on to a long shaft is not going to break off! Just a little bit of force and it is going to be gone! Well, I was all wrong! I have used and abused my Ring Tool, quite a bit. No problems.
Crown makes a 1″ Ring Tool. I just purchased one. I am looking forward to giving it a try. In the future I will probably be purchasing all my Ring Tools from Crown. I like Crown handles better than Sorby.
Mr Ring Tool – Ulf Jansson
I learned how to sharpen and use a Ring Tool from Ulf Jansson on the 2018 Norway Woodturning Cruise. Ulf is from Sweden. Ulf is “svarulf” on Instagram. He has posted good ring tool videos and great pictures of his very inspiring work. Ulf posts stuff in English.
Note: Ulf does not have a web site. He is just on Instagram. He posts often. You can access Instagram WITH OUT being a member!
Sorby says that Ring Tools are for End Grain only. Ulf’s videos show this is not true. He uses a Ring Tool on side grain bowls, etc. No problems.
Click here for Ulf’s Artist Statement and Profile on the Woodturning Cruise web site.
Click on the picture below for Ulf’s Ring Tool videos, etc.


Here is a Nick Agar style Viking Sunset Bowl that I just finished. 8″ diameter by 2″ tall. I really enjoyed making this piece. My students are also having a good time making these in my “Woodturning Workshop” studio classes.
I saw Nick make one of these in a demo at 2018 Totally Turning Symposium. I then purchased his “Viking Sunset Bowl Kit” from Chroma Craft. I also really enjoyed seeing Nick on the 2018 Woodturning Cruise in Norway.


I followed Nick’s directions in the kit. Plus Nick’s “Viking Sunset Bowl” article in “Woodturning” Magazine, February 2013, No 250 from www.pocketmags.com.
Airbrush
You need an airbrush to apply the stains and finishes in the kit. At Totally Turning I saw Nick use Paasche brand airbrushes. On the Woodturning Cruise, Nick used cheap $20 Harbor Freight airbrushes. Nick uses more than one airbrush at a time. One for each color and sealer.
Note: If you want a good Binh Pho style airbrush then you need to get something like an Iwata Hi-Line HP-CH for $250. Then you have spend a lot of time cleaning it because it was big bucks.
After doing some research I decided to go with a $80 Paasche VL airbrush. Below, is what I ordered from Amazon. All prices are on 12/2018.
I really like the Passche VL airbrush. It is easy and fast to clean. I load each of the glass jars with a different color stain or sealer. Then I can easily switch back and forth between the colors and sealer by swapping jars. I use the cup that comes with the airbrush and a lab squeeze bottle of denatured alcohol to clean the brush between colors or sealer.

Or


I am doing a new “Big, Bold & Fast Surface Decoration” demo.
Click here for the PDF demo handout.
Please contact me if you would like me to do this demo for your club.
]]>

The heart of the system is a new 5/8″ Quick Release Tool Handle from Jimmy Clewes. It works really good. I saw Jimmy use it on the 2018 Norway Woodturning Cruise. I was real impressed with the Quick Release mechanism that Jimmy has come up with. Just a simple 1/4 turn of the handle with your hand (no tools) locks a tool in place or releases it. You can change tools real fast. So, swapping tools does not interfere with the flow of a demo.
Set Screw Handles

Set Screw tool handles like the Hosaluk, Oneway, Bosch, Jordan, etc handles have been around for a long time. Loosening the set screws, taking out a tool, inserting a different tool, and then tightening the set screws takes too long in a demo situation. It also takes to long for most people at home. Thus these handles are best for the semi permanent mounting of tools.
Collet Handles

Recently collet tool handles have come on the market. Like the Robust, Serious, Kelton, Carter, etc collet tool handles. These handles use standard off the shelf metal working collets that have been around for a long time.
The ER32, ER16, etc collets are used to mount round rods in metal lathes. The collets are designed not to slip in tough metal lathe turning situations. Thus, they are not ideal for a tool handle. They weight to much and they are not cheap. When you add a steel nut and mounting, plus the collet the handles get to heavy overall and they are not balanced. They are way to heavy on one end.
Jimmy’s Quick Release Handles

Jimmy’s Quick Release Tool Handle is sort of like a collet handle. It uses an eccentric (offset) collar to QUICKLY lock a tool in place with just a simple 1/4 turn of the collar. You need to get the amount of offset JUST RIGHT to make one of these work and Jimmy has done it! The Quick Release Units are aluminum and weight very little. I REALLY like them!
Jimmy sells 16″ or 22″ long Ash wood handles that come with an aluminum Quick Release Unit or just the Quick Release Unit. 5/8″ Quick Release Units are $60, 16″ handles are $85, 22″ handles are $95 on 11/2018. You can only purchase these directly from www.jimmyclews.com or www.woodturningtoolstore.com. Jimmy also sells 3/8″ and 1/2″ units.

I thought about purchasing just the quick release mechanism from Jimmy and then making my own handle. I quickly realized this was a stupid idea. STRAIGHT grain hardwood blanks are not cheap. Jimmy’s only charges $25 MORE for a nice ash handle with a quick release. Jimmy’s handle shape is very close to my preferred wooden tool handle shape. Thus I just purchased a 16″ handle from Jimmy for $85 and customized it with my own rain bow colors.
Note: I DO NOT get any kick backs or anything like that from Jimmy or The Woodturning Tool Store. I paid full price for my stuff from Jimmy. Jimmy also sells Set Screw Units that look very similar to his Quick Release Units. I like the looks of the Set Screw Unints. However, I like the Quick Release Units better.
1/2″ to 5/8″ Bushings

Tools with a 5/8″ or 16mm shaft fit no problem in Jimmy’s 5/8″ Quick Release Unit!
For smaller tools, Jimmy’s sells bushings with set screws that convert 3/8″ or 1/2″ shaft tools to 5/8″. So you can mount them in 5/8″ Quick Release Unit. However, the bushings are not cheap. $27 each on 11/2018. If you don’t want to waste a lot of time swapping bushings with set screws then you need one bushing for each 3/8″ or 1/2″ tool. I needed 6 bushings. This was going to get expensive real fast.

Jimmy’s bushings are only 2-3/8″ long. The bottom of Jimmy’s Quick Release Units is solid. Thus, any tool you stick in there never goes in there more than 2-1/2″. This is not a problem. When tools come with a wooden handle the tool only goes in about 3″ or less.
I decided I don’t need any silly set screws for $27. I super glue or epoxy my tools into wooden handles. This works just fine. If I don’t need a set screw then I can make my own bushings no problem. I just need to glue my tools into some short chunks of steel tubing with a 5/8″ outside diameter (OD).

I purchased some 5/8″ outside diameter, 0.509″ inside diameter steel tubing from www.mcmaster.com. 3 feet for $24 + shipping on 11/2018. I then sliced off 2-1/2″ lengths with a hack saw. Each of these cost less than $3. I press fit and super glued my 1/2″ tools into my bushings.

In the photo on the right Jimmy’s 1/2″ bushing is on the left. My chunk of 2-1/2″ long tubing is on the right.
However, I ran into a small problem here. A 1/2″ is really 12.7mm. Most tools are NOT made in the US. They are made in Canada, Europe, etc to mm standards. They are advertised as 1/2″ or 12mm. But they vary all over the place and they are frequently over sized. If they are over 12.8 mm they will not fit in a 0.509″ ID steel tube. I had to grind down some of my tools to fit in the 0.509″ ID steel tubing. This was far from easy! I have one of Jimmy’s 1/2 bushing. Some of my tools would not fit in Jimmy’s 1/2″ Bushing.
Note: Think about it. 1 mm is almost to small for me to see. .8 mm in something like 12.8 mm is really small!

Thus, if I had to do it again I would hedge my bets. I would purchase 1 ft of 5/8″ OD, 0.509″ (12.93 mm) ID steel tube, www.mcmaster.com # 89955K148 $10 and 1 ft of 5/8″ OD, 0.527″ (13.39 mm) ID steel tube, www.mcmaster.com # 89955K289 $8. All prices on 9/11. This would cost less for the tubing and a lot less for shipping.
I don’t have any 3/8″ tools. If, I did then I would also purchase some tubing from www.mcmaster with a 3/8″ ID. Something like # 89955K829.
Note: 16mm is very close to 5/8″. Thus, you probably will not run into a lot of problems with 5/8″ tools. 5/8″ is 15.88 mm. I did not run into any problems with my 5/8″ tools fitting in Jimmy’s 5/8″ Quick Release Unit.
My experience seems to suggest that McMaster shipping is sort of flat rate. Anything that fits in a 6″ x 12″ x 18″ box ships from their Robbinsville, NJ warehouse to my studio in Poughkeepsie NY for around $10. Weight is a don’t care or a very small multiplier. If I fill the box up with lots of steel it may cost $12 or so. This is my OBSERVATION. Not a McMaster policy, etc. Your mileage may vary! Shipping anything that comes in a 36″ tube adds another $12 to the shipping cost. This amount varies more.
Rectangular Tangs

My 1/8″ P&N Parting Tool and my Al Stirt style Shear Scrappers have rectangular tangs rather than round shafts. I mounted these in the above 5/8″ OD bushings, the same way I would mount them in a wooden handle with a round hole. I cut 3″ long shims from a 1/2″ OD wooden towel. The shims plus tang fit nicely in a 1/2″ round hole. I first insert the tang in the hole. Then I drive the shims in. Cut off any extra shim that sticks out. Then I drip in some super glue.
The SECRET here is to cut the shims lengthwise out of a LONG dowel BEFORE you cross cut them off the end of the dowel.
My Tools

The tools in my traveling set are the same tools I recommend in my “My Modern Tool Set” handout.
Left to right in the photo. 1. 88 Degree Spear Point, 2. Left Hand Shear Scraper, 3. Right Hand Shear Scraper, 4. 1/8″ Parting Tool, 5. 1/2″ Hosaluk Double Bevel Detail Gouge, 6. 5/8″ Ellsworth Bowl Gouge, 7. 5/8″ Jordan Bowl Gouge, 8. 1/2 Stirt Bowl Gouge.
Note: To cut weight and cost, I decided to live with out a Spindle Roughing Gouge. I will just use my 5/8″ Jordan Bowl Gouge if I need to rough down spindles.
Tool Roll

Jimmy had a nice leather tool roll (custom made?) on the Woodturning Cruise. After looking around a bit I decided to order a “Dickies Work Gear 57007 Grey/Tan Small Wrench Roll” from Amazon. $10 on 11/2018.
I cut off the stupid little straps and anything else I did not like. Then, I added a chunk of double sided velcro from local big box store to hold the roll closed. I also cut out some of the stitches between compartments to make bigger compartments. Now I am really happy with my new tool roll.
I am also really happy that I made by own 1/2″ to 5/8″ bushings rather than purchasing Jimmy’s bushings. Jimmy’s are nice but they have a flange that makes a place to put a set screw. The flange would stick up and take up to much space in my tool roll.


If you have a Munro Hollower II then you probably have discovered that the Button Head Cap Screws (bolts) on the bottom are not the greatest. The allen head wrench hole in the heads strips out easily because the hole is to shallow.
If you purchased your Munro Hollower II from Steve Sinner at Advanced Lathe Tools then it comes with better Socket Head Cap Screws. The allen head wrench hole in these is nice and deep. However the standard height socket head cap screws are a little to tall. They stick down below the bottom of the cutter head. Some times they catch on the tool rest when you pull the tool out of a hollow form.
Low Head Socket Head Cap Screws work a lot better. They fit just right. See photo. You can get them from www.mcmaster.com. Part #92855A613 “Low-Profile Socket Head Screws, M6 x 1 mm Thread, 12 mm Long” $8.39 for 25 on 11/2018.
In the above photo the Button Head Cap Screw is the black one on the left. Standard height Socket Head Cap Screw is in the middle. Low Head Socket Head Cap Screw is on the right and in the bottom of the cutter head.
Note: The above only applies to the Munro Hollower II (or Hollower2). If you have the Mini Hollower or Wundercutt10 Hollower then you probably need a different size bolt.
]]>
Here is a pointer to my “Shopmade Collet Chuck” article that appeared on page 18 of the AAW August 2018 “American Woodturner” Journal.
Recently, I needed some extra collet chucks to turn bottle stoppers at a Nutmeg Woodturners’ Learn-and-Turn meeting. I own only two of the commercially available collet chucks and quickly decided that purchasing more was out of the question due to cost. Plus, I don’t like turning something like a bottle stopper right up tight against the metal collets in a commercial collet chuck; visions of my turning tool running into that metal collet are not pleasant. I decided to make my own custom collet chucks out of ultra high molecular weight (UHMW) polyethylene plastic.
To read more see my “Shopmade Collet Chuck” magazine article on page 18 of “American Woodturner, The Journal of the American Association of Woodturners, August 2018, Vol. 33, No. 4”. Or Click Here (PDF)
]]>
Here is my “Get A Grip” tip that appeared in the “Tips” section on page 18 of the AAW August 2018 “American Woodturner” Journal.
Adding a layer of elastic mesh sleeve is a cheap and easy way to get a better grip on your woodturning tools. My friends and students like it. You can purchase mesh sleeve from mcmaster.com (I purchased item #5969K23). It is made of 1⁄16″- (1.5mm-) thick polyethylene plastic and comes in different sizes and colors. The mesh I bought would cover handles with an outside diameter (OD) of 1″ to 1½” (25mm to 38mm).


One of my students showed up one day with a little battery powered workshop blower. I tried it and I was sold. I had to have one.
I put it on my Christmas list last year and it is the best Christmas present ever!
 These little blowers are light weight and just the right size for quick clean up. I just blow all the saw dust and shavings off of my lathes onto the floor and then sweep or vacuum them up.
I have a big air compressor and air hose. But, my little blower is a lot more fun. There is no hose to drag around. I don’t have to waste money at the end of the day running my air compressor. My blower has 3 speeds. Low speed puts a lot less dust in the air then my air hose.
My blower is a Bosch model GBL18V-71. I just needed the blower because I already had a battery for my other Bosch tools. All the other manufacturers (Makita, Dewalt, Milwaukee, etc) make similar blowers. So, if you already have a battery you should be able to pick up a blower. The bare blowers (no battery) sell for around $80.
The blower also works great for cleaning my car out. Open all the doors and blow the dirt out. Blow out the dirt and bark after I haul logs around.
Note: These blowers are smaller than the ones they sell for leaf blowers. The air speed is also lower, so they create less dust and are easier to control.
]]>
Tom, Scott & Steve with Finished Pieces

Here are 3 students with the pieces they made in my class on Thursday
3/22/2018.
Left to right. Tom, Scott, and Steve.
They were taking my "2018 Winter Woodturning Workshop"
class in my Studio in Poughkeepsie NY.
Scott was a new student. Scott very quickly became a very good turner.
Tom and Steve are both very good turners. They have taken the same
class over and over a couple of times. We just keep doing more and more
complex things. They enjoy coming to the class for fun and camaraderie.
Tom made a Vase out of Ambrosia Maple. The shape was from a photo I
took in Portugal of some pottery.
Scott made a "Natural-Edge Vase" from page 101 of Mark
Baker's "Weekend Woodturning Projects" book.
Steve made a "Burr Oak Bowl" in Maple (not Burr Oak) from
page 131 of John Hunnex's "Woodturning Forms & Materials"
book.
Future Classes
The Fall 2018 version of my "Woodturning Workshop" class
in my studio is already full. I have 2 returning students and 1 new
student.
The Fall 2018 version of my "Woodturning Workshop" class
at the Brookfield Craft Center in Brookfield CT has space available. I have
2 returning students already signed up. The class is limited to 6 students.
For more info on my classes click
here.
Scott Cutting Out the Top of the Vase

I took a couple of action shots for each student. I am just going to
present them with no commentary.
I was too busy teaching to take more photos.


Tom Hollowing Out the Inside (Lathe Stopped)

Tom is using my Hollowing Rig. For more info click
here.
Note: I have 2 of these Hollowing Rigs. Thus 2 out of 3 students in
each class can use my Hollowing Rig. I plan to getting a 3rd Hollowing Rig,
if I run into a real need for it.


Headstock Shelf for Powermatic 3520C Lathe

I added a shelf to the Headstock of my new Powermatic 3520C lathe. See
photo.
All of my lathes have a shelf on top of the headstock. I have found
that it makes a great place to store live centers, chucks, etc. Everything
is very "handy". My students and friends quickly fall in love my
headstock shelves.
My old PM 3520B lathe had what I am calling a "1st
generation" shelf. It was just one level. My Oneway lathes have
"2nd generation" shelves. They are 2 levels. My new PM3520C has a
new "3rd generation" shelf design that incorporates everything I
have learned over time. I really like it! It is 3 levels.
Note: For more info on my new lathe see "My New Powermatic
3520C Lathe Verses My Old Powermatic 3520B Lathe" blog entry.

Here is a close up view of the new headstock shelf on my PM 3520C lathe. It
is a 3 level design.
Click on photos for a better view.
Overall the shelf is 18" wide by 15-1/2" deep. See latter
photos for more details.

Here is a close up of the headstock shelf on my OLD PM 3520B lathe. It was
a 1 level design. The shelf was 16" wide by 16" deep.
I used this design for a long time. But it was a bit of a pain.
Because, I had to store my frequently used live centers at the back.
Reaching over things in the front to get the centers in back often sucked.
Live centers, etc had to go on the back because "the
headstock" and the VFD (controller box) on the back of the headstock
blocked most of the space under the plywood. I could only drill holes for
things that stuck down below the plywood at the back of the 1 level shelf.
For a better explanation see
"Side View from Spindle End"
photo
below.
Storing any tool rests on this shelf DID NOT work. The long
projections on the tool rests blocked or interfered with any thing else on
the shelf.

Here is a close up of the headstock shelf on one of my Oneway 2436 lathes.
It is a 2 level design.
This shelf has to be a lot narrower. So, it does NOT block turning
on the outboard side. The shelf is 10" wide by 14" deep.
I like the 2nd level on this design. It allows EASY access to the
tool rests. The 2nd level is tall enough so I DO NOT bang my hangs into any
points on live centers, etc on 1st level.
However, this design is still a little bit of a pain. Because, I
have to reach over things in front to get to frequently used live centers
in the back.
Note: The 2nd level is 10" wide by 2-3/4" wide and the
plywood supports are 4" tall. The shelf is elevated 1.5" above
the headstock by two 3/4" plywood spacers visible in photo. See
"Aluminum Shelf Support on Oneway Shelf"
photo at end for more
details.

Now I am going back to the 3rd generation shelf on my new PM 3520C lathe.
Here is a photo from a higher up angle, so you can see everything.
Overall the shelf is 18" wide by 15-1/2" deep.
A place for everything and everything in its place.
Any shelf on the headstock of a lathe needs to built like a tank!
It MUST be able to take any "rock rattle and roll" the lathe may
be forced to endure when a rough or out of balance piece is mounted on the
lathe. The shelf should not move around for any reason! Everything on the
self must be secure. Anything that rattles even just a little during normal
lathe operation can drive you crazy.

I am NOT going supply any plans or step by step photos. So here are some
dimensions for anyone who wants to build their own.
Level 1 and Level 2 are 18" wide by 8" deep. Note: They
overlap by a 1/2" due to tongue and groove construction. See latter
photos.
Level 3 (the top) is 18" wide by 2-1/2" deep. It is
supported by plywood spacers that are 2" wide by 3-1/2" tall.
The plywood back is 14" wide by 12-1/4" tall. The cutout
on the left for hand wheel clearance is 7" wide by 8" tall. See
latter photos.
It is 1-3/4" from the top of the Level 1 plywood to the bottom
of the Level 2 plywood. i.e. the location of the dado cut in plywood back
is 2" down from the top. 1/4" of the back at top is buried in a
1/4" deep dado on the bottom of Level 2. All dados are 1/4" deep.
I like everything in my studio to look nice. Thus I use reasonably
good plywood and finish everything with 2 coats of Watco Golden Oak Danish
Oil followed by 2 coats of Miniwax Semi Gloss Wipe On Poly.
I use good quality 3/4" 7 layer plywood from local Home Depot.
ACX grade. They don't label it, but I think it is southern yellow pine.
Around $38 per sheet. It comes and goes. When it comes, I stock up. There
is no way I would use EXPENSIVE Birch, Maple, Oak, etc plywood because the
outside veneer layers on expensive plywood is like paper thin and the stuff
inside is often crap with voids. I like the outside layer of my plywood to
be the same thickness as all the inside layers (roughly 1/16") so I
don't end up with crap if I accidentally sand thru it or when I round
the corners over. "Sanded Plywood" is ok. However,
"Sande" plywood is to soft. It's crap.
I belt sand the exposed edges on all of my plywood to remove all
open grain. i.e. to make them look better. I sand the flat surfaces to 220
grit with a random orbit sander and then I round the edges over with a
random orbit sander. The sander creates less tear out then a router when
rounding over.
If you just drive a screw into the end grain of plywood you will
just split the plywood. There is no strength. To avoid this problem I
capture all of my joints in dados. I glue the joint with yellow carpenters
glue and screw the join with 2-1/2" decking screws. The long screw
contacts more surface area. Short screws just pull out of the end grain on
plywood.
My favorite band of screws is Scorpion. I ONLY use there ceramic
coated decking screws. They are hi thread, square drive. You can NOT get
these at Home Depot, or Lowe's. You have to go to a real hardware
store. However, any good quality decking screws will do the job.
Note: It appears that the "Golden Oak" colored Watco
Danish Oil is no longer available. This is a real shame. Because it is my
favorite. It works real good on things with lots of holes. It is thin, you
can just pour it on. It gets in all the holes on it's own. You
don't have to work at it. I work over an old cafeteria tray. The tray
collects the excess when I pour the oil on. When I am done, I just pour the
excess back in the can and use it in the future.

The Level 1 plywood goes over the headstock. I then routed out the plywood
to accept the stock PM rubber mat that goes on top of the headstock.
I store my chucks, live center cones, etc on Level 1. This is
dictated by a no thru holes in Level 1 requirement.
On the right, the top of Level 1 bolts to the top of the cast iron
lathe headstock. Thus on thru holes are possible. On the left there are no
thru holes for safety! I don't want my hand to "catch" on
anything hanging down when I use the hand wheel.
The left side of Level 1 can take a lot of weight. It is NOT just
cantilevered out there! It is firmly supported by plywood at the back that
supports Level 2 and extends down the back of the headstock. See
"Support Over Hand Wheel"
photo below.
Note: If you look in the bottom left corner of photo you can see
the motor on the lathe. The 18" wide shelf is narrower than the motor.
Latter you will see that the Level 2 part overhangs the VFD (big black
control box) on the back of the lathe. Thus the shelf DOES NOT add to the
overall footprint of the lathe!
 Level 2 (Middle Level) and Level 3 (Top Level)
I like lots of holes in Level 2. You can never have to many holes. I can
never understand why people make things with just a couple of holes.
In my 3rd Generation design I created the 2nd level and elevated it
by 2-1/2" so I can have holes over the VFD. Something like a #2 MT
live center sticking down thru a hole in the Level 2 plywood does NOT hit
the top of the VFD on back of headstock. In my 1st Generation design, no
holes were possible over the VFD.
The holes vary in size. So small things do NOT fall thru the holes.
All of the big holes in Level 2 and Level 3 are 1-1/8" diameter. This
works good for tool rests, and most #2 MT things. Because most #2 MT things
have a head on them that is bigger than 1-1/8". I drill a few
11/16" holes for #2 MT things with a small head. I drill lots of holes
that will accept the "Red Bar" Oneway ships with it's face
plates, etc. I find that size holes works good for lots of things. Then
some smaller 3/16" holes for Oneway Live Center knock out bar, etc.
The line of small holes at the front of Level 2 go down into the
plywood back. Most of them are not very deep.
I drill the big holes with Forstner bits to minimize tear out and
then round over the edges using a 3/16" round over router bit. I drill
the smaller holes with brad point bits and then round over the edges using
a SINGLE flute counter sink.
The big holes in Level 3 line up with the Level 2 holes. So long
tool posts, etc just go thru both levels. I clamp Level 3 to Level 2 and
then drill the hole all the way thru.

The 3 wooden knobs sticking up help me secure things on the left side of
Level 1. They are slighly smaller than the 1-1/4" spindle threads on
the lathe. There are 3 more knobs on the left under UHMW codes and Colet
Chunk. Then another one under the big chuck. The knobs keep things from
shifting around when the lathe "rocks rattles and rolls".
In my old 1st Generation design, I drilled show big shallow holes
for the chuck. See
"1st Generation Shelf"
photo above. That did
not work out well. The knobs are a better solution.
I turned the knobs with 3/4" tenons on the bottoms that fit
into 3/4" non thru holes in plywood.
Just to right of the Oneway chuck is the wrench for the chuck.
Pointed to by blue arrow in photo. I REALLY like having the wrench sticking
up like this rather than going thru a hole. If it goes thru a hole then the
bar on the end of the wrench takes up to much space and fouls things up.
When the wrench sticks up like this, it is easy to find and use.
The thing the chuck wrench fits into is 1-1/2" in diameter
hard maple with a 3/4" tenon on the bottom to fit into plywood. The
tenon has a 5/16" thru hole so any saw dust drops thru rather than
clogging things up. The top is drilled and hollowed with a spindle gouge
until the wrench fits in there like a glove.

I drilled holes for special things behind the mat on the right side of
Level 1. Things, I don't want to lose because they cost to much to
replace. I size the holes to be just right. Pointed to by green arrow in
photo.
From left to right. The Slide Off pin from Tailstock end of PM
lathe in a nut. The Oneway Chuck screw. Center point from Oneway Live
Center, Knock out bar for Oneway Live Center. The red thing is a neat
little Allen wrench from Trent Bosch.
 Level 1 – Powermatic Mat Removed
This photo shows what is under the PM Mat that comes with the lathe. I
routed out the plywood to allow the mat to sit there nicely. It needs to be
deep around the outside and shallow in the middle to support the mat. In
the front it needs to drop down a bit to match the mat.
The 2 silver flat head screws pointed to by blue arrow in photo,
are really the top of 5/16" flat head bolts that I use to attach the
shelf to top of headstock. I drill thru the plywood to line things up. Then
remove the plywood and tap 5/16" x 18 holes.
Note: The headstock shelf is also supported by a piece of plywood
bolted to the back of the headstock. See
"Support Over Hand
Wheel"
photo below.


The plywood spacers between Level 2 and Level 3 are 2" wide by
3-1/2" tall. Each spacer has two 3/8" diameter holes that go all
the way thru from top to bottom. I drilled them on my drill press.
I temp screwed Level 2 to Level 3 (with out the spacers). First I
drilled counter sink holes in the top of Level 3 for 5/16" diameter
FLAT head bolts with a SINGLE flute countersink. Then I drilled 5/16"
diameter holes all the way thru both levels.
After stain and poly, I used 5 min epoxy and 6" long
5/16" flat head bolts to attach Level 3 to Level 2. I then cut off the
excess bolt length. The 3/8" thru holes in spacers gave me enough
wiggle room to line things up. The epoxy eliminated the wiggle after it was
dry. I epoxied the nuts on because they came lose on my Oneway lathes. See
"The Back"
photo below for nuts on bottom of bolts.
This photo also gives you a better view of the thru holes from
Level 2 to Level 3. The long tool post on the Steve Sinner tool rest goes
thru both levels. The bluish grey tool rest. Steve makes his tool posts
long so they work with stock PM banjo.

I elevated Level 2 to make it easier to see and access things that were
behind things on Level 1
This photo also shows another reason why I elevated Level 2 on my
3rd Generation design. Because, I wanted Live Centers, etc stored in the
Level 2 holes to clear the VFD on back of lathe. Note: The VFD is inside of
the big black box on the back of the lathe.
 Zoom In Side View from Spindle End
The green arrow in photo points to a 1/4" deep dado in the back plywood that captures the Level 1 plywood. This allows me to screw the back plywood to Level 1 with out splitting it.

 Zoom In Side View from Hand Wheel End
Another photo for people who want to make something similar.
Note: The photo was taken from a perspective that makes it appear
things are not square and/or level. Everything is square and level in the
real world.

The blue arrow in photo points to the plywood on the back that really
supports everything. Level 1 and Level 2 are NOT just cantilevered out
there.
There is NO WAY I want to bang or catch my hand on anything when I
use the hand wheel. Thus nothing hangs down from above into this space. The
plywood on the back is cut out to create a nice big clearance space and all
the corners are rounded over. The cutout in back plywood for hand wheel
clearance is 7" wide by 8" tall.
The green arrow in photo points to a 1/4" deep dado in the
back plywood that captures the Level 1 plywood.
See photos below for more plywood on the back shots.

The red arrow in photo points to the plywood that goes down the back of
headstock. It really supports everything.
I removed the VFD (the black box on the back of the headstock) and
installed the plywood using the VFD threaded mounting holes on the back of
the headstock. To do this, you have to removed the back cover from VFD.
Then reach in there with an Allen wrench to remove the cap head screws (aka
bolts) that attach the black cover to headstock. I replaced the cap head
screws with longer ones. Long enough to go thru 3/4" plywood. I
drilled holes in the plywood that matched holes in black VFD cover. Then
bolted everything back together thru the VFD cover. Not easy. I also had to
remove and reinstall the ground wire connection to headstock. This was a
pain. I had to drill a 1" hole in plywood to clear the ground wire and
screw. I did NOT remove any of the wires from the VFD. I just worked around
them. Not easy, but doable.
The back of the headstock is slanted inward. Thus, there is a space
between the plywood and headstock. See green arrow in photo. This space is
there because the VFD mounting holes go into cast iron stand offs on the
back of the cast iron headstock.
Note: I known some people are not going to like dorking around with
the VFD. It was my last resort. On my old PM 3520B lathe the back of the
headstock was wider. Thus I got away with mounting the plywood on the back
by just running it next to VFD. This was not possible on new PM 3520C lathe
because the VFD with the new cover takes up almost all the space on back of
headstock. See next photo.

Here is what the back looks like. I took this photo when I had the
headstock removed from the lathe while moving the lathe.
The magenta arrow in photo points to a 1/4" deep by 3/4"
wide dado slot in the bottom of the 2nd level plywood. It is not easy to
see in photo! The back plywood extends up 1/4" into this slot. Thus
the back plywood did NOT split, when I glued and screwed the 2nd level
plywood down to the back plywood with 2-1/2" decking screws.
If I had to do again, I would replace the plywood level 2 shelf
support triangles with a custom bent aluminum bar. See red arrow in NEXT
photo.
The aluminum bar would come down from one of the nuts under 3rd
level support (green arrow in photo) to the bottom of plywood triangle
(blue arrow in photo).
 Aluminum Shelf Support on Oneway Shelf
This photo shows the shelf on the back of my Oneway 2436 lathe. Note: See
"2nd Generation Shelf"
photo above for the front view.
The red arrow in photo points to an aluminum shelf support that I
created out of a 1/8" thick by 3/4" wide piece of aluminum bar
stock from local hardware store. This chunk of aluminum takes the place of
the plywood triangles in the above design. If, I had to do again, I would
use aluminum bar in the above design. Easier and better looking.
Note: The plywood is attached to the back of the Oneway headstock
with 4 black 5/16" socket head cap screws. You can see 2 of them in
photo. I used some 1/2" hex nuts between the plywood and metal
headstock to "stand off" the plywood so it would clear the round
part of headstock. All of the steel used by Oneway is hard stuff. I think
it may end up getting work hardened when it is bent and welded by Oneway.
Thus, drilling and tapping the holes for the bolts is no easy task!
Bottom Shelf for Powermatic 3520C Lathe

I added a Bottom Shelf to my new Powermatic 3520C lathe with roughly 240
lbs of stone weight. It is really a two level shelf. With stone on the
bottom and a storage shelf above.
The new shelf is similar to one on my old Powermatic 3520B lathe.
But, better. Wider and I painted it to match the lathe. See very last photo for old PM 3520B self.
I believe that all lathes, no matter how good they are, can benefit
from 200+ lbs of weight added to the bottom. It reduces the "rock
rattle and roll" of the lathe when you mount a big and/or out of
balance piece on the lathe.
Note: For more info on my new lathe see
"My New Powermatic 3520C
Lathe Verses My Old Powermatic 3520B Lathe"
blog entry.

The above photo has all of the stone I added for weight covered up so you
can NOT see it.
Here is what the stone looked like before I covered it up.
Now lets go back and see how I made the shelf.
 Bottom of Leg on PM 3520C Lathe
Here is what the bottom of the legs on the new PM 3520C lathe look like. I
have the 4" riser blocks installed.
The photo also shows upper and lower shelf supports that are cast
into the PM 3520C legs.

The bottom of the shelf on my old PM 3520B lathe was roughly 9" off
the floor. I liked that shelf height. It left room for my human feet under
the shelf. It was relatively easy to clean under. It also left room for a
second shelf on top of the stone where I could store things like my jam and
vacuum chucks.
I have also added shelves to my Oneway 2436 lathes. I have decided
that 8" under the shelf for your feet and clean up is a good height.
On my old PM 3520B lathe I used the upper shelf support cast into
the legs. It was good. I decided it was NO good on my new PM 3520C lathe
with the riser blocks installed. Both the upper and lower cast in shelf
supports are to high up for my purposes. Your mileage may vary.
Thus I decided to make my own shelf support. I cut a 2×4 to fit on top
of the feet. See photo. I reduced the height of the 2×4 to make the bottom
of shelf 8" above the floor.
For something like this you are better off going with a nice
Douglass Fir 2×4 from your local lumber yard. Avoid the cheaper pine 2x4s.
DF only costs a buck or two more.

Here is a close up shot of how I cut the end of my shelf supports on the band saw to fit. With 200+ lbs of weight on the shelf I figure it will be secure enough. Thus no bolts or glue. Latter, I will screw the shelf down to the shelf supports so they can not shift around and come out.

I do not want any wood shavings getting behind my shelf supports. If the
shavings are wet, or get wet then they would rust out the legs.
Thus I cut and installed a 1/8" thick piece of birch plywood
to fit nice and snug.
Note: I already had some 1/8" thick birch plywood. Thus, that
is what I used. A piece of 1/4" plywood or 1/8" real wood
paneling would work just as well.

I like to use stone for weight. If you use sand it runs out all over the
floor thru any small hole.
I get my stone in the landscaping dept of local big box store. I
like mini marble chips because they are heavy and small enough to fit close
together in a bag.
Here I am measuring the bag. It is roughly 15" wide and 40
lbs. I am going to use 6 of these bags. 6 * 40 = 240 lbs.


My bottom shelf is 15-1/2" wide by roughly 51 inches long. I cut the
length to fit tightly in the space.
I made my shelf out of a 10' foot long Douglas Fir 2×12. The
lumber was #2 grade. But, I looked thru the pile to find a piece with
minimal knots.
The front half of the shelf is the standard 11-1/4" 2×12
width. I cut the back part of the shelf to make it overall 15-1/2"
wide.
I have found that Douglas Fir is strong enough to span the 4+ feet with out
any braces or cross ties underneath.

Getting the shelf in there is not an easy task. The U shape of the legs
means you can not just slide it in there from the front or back.
This photo shows how I made the 2×12 shelf roughly 1" short.
Then filled in the 1" latter. This allowed me to get the shelf in
there. I added the filler to add strength. The 2×12 can not shift
left/right with the filler in there. Cutting off 1" was no big deal,
from a strength point of view because the last 1" extends beyond the 2×4 in
the bottom. The filler also prevents wet shavings from collecting and
rusting out the leg.
I was able to get the narrower back half of the shelf in there,
with out cutting it.
After I paint things, I will secured the shelf to the supporting 2×4
with 3" deck screws. Any good deck screw will do. I prefer Scorpion
band course thread ceramic coated screws.
After I screwed things down there was no way the shelf was going to
move left/right or front/back. Even if the lathe rocked, rattled and
rolled.

In this photo I am painting the self supports. I decide to paint everything
in advance. Up on my work bench. I am getting to old to bend over.
I can't understand how people can spend time working in a dark
crappy looking studio. I like my studio to be a bright and airy place to
work. Thus, I painted the shelf to match the lathe.
I took the door off of the tailstock and took it down to my local
Sherwood Williams store. I asked them to match the color. They scanned it
with there computer gadget and the color came out real close.
I asked them to give me a quart of there toughest paint. They gave
me some Sherwood Williams "All Surface Enamle – Acrylic Latex
Interious / Exterior". They used 6509-00640 Ultradeep Base. In a gloss
finish. I am not really sure about the gloss part. So far, I am real happy.
The paint seems to be really though. I can slide the chucks around on the
shelf with no noticable scratches yet.
I primed the bare wood with Sherwood Williams "Multi Purpose –
Latex Primer" before I put on the above paint. I have found that this
primer is real tough. It bounds to anything. It even bonds to the skin on
your hands. Don't ask how I known!
I decided to head off a lot of questions here by telling people
every last detail about the paint I used. I like Sherwood Williams, but it
is not the only fish in the sea. Home Depot and Lowe's also have
computers that can match paint colors. They also have good paints. The
Sherwood Williams store is close to my studio.
Note: John Deer also makes a "Construction Yellow Paint"
TY25627 that I have found is close to Powermatic Yellow. NOT an exact
match. It is a little to yellow and bright. But, it is close. It comes in a
rattle spray can. The very strong smell and the directions are almost
identical to the Rust-Oleum Professional line of paints.

I used a scrap 2×4 and a small sledge hammer to flatten out the bags of stone as I installed them.

Here is what the 6 bags of stone looked like after I installed them. They fit in there real nice. Each bag is roughly 40 lbs. 6 * 40 = 240 lbs.

The stone filled up the entire space real nice after I flattened it out with a 2×4 and sledge hammer.

Here is the top shelf. I made it out of good quality 3/4" plywood. It
is 16" wide so it overhangs the 15-1/2" wide shelf on the bottom.
The overhang will cover up the top of the plywood that goes on the front.
I added a 3/4" square nailer strip to the bottom of the
plywood to allow me to install a sheet of plywood on the front.
The ends of the plywood was scribed and cut to fit very tightly. I
don't want any wet wood shavings falling down around the ends and
rusting out the legs.
The plywood is roughly 50" long. I had to cut it into two
pieces to get it to fit in there. See next photo.
Note: This photo is the same as the #2 photo above.

This photo shows how I cut the plywood in two pieces to get it between the
legs. I used my Biscuit Joiner to install some biscuits to line up the
plywood ends.
You can also see in this photo that I belt sanded the front edges
of the plywood were it will be exposed. I removed all open grain. After I
paint it, you will hardly even known it is plywood.
 Cut and Test Fit Front Plywood
I cut a piece of 1/8" Birch plywood to go on the front. I don't
want those bags of stone collecting wood shavings and driving me crazy for
the rest of my life.
After I screw the front and back plywood in place it will actually
support the top shelf and make it rock solid.

Here is the primer coat. See "Time To Paint" photo above for paint info.

Here is the top coat. See
"Time To
Paint"
photo above for paint info.
Just one primer coat. Followed by one top coat. I put the paint on
with a small 3" wide roller.

This photos shows the bottom self all installed and ready to go. I
installed the plywood on the front with some gold button head screws. The
kind Kreg sells with its pocket hole jig.
You can also see my chip guard hanging down from some black wire
ties under the ways of the lathe. This chip guard deflects all the wood
chips that would drop between the ways of the lathe down a slope and out
the back of the lathe. At this point the wire ties are loose. While I dork
around with things. Latter I will sinch up the front of the chip guard to
be tight to the bottom of ways in the front ONLY.
The chip guard is made out of 1/8" Birch plywood. You can see
in photo that it is cut out to go around legs on the end. You could also
use 1/8" plywood paneling rather than birch plywood.
I drilled holes thru the bed of the lathe for the wire ties. I then painted
the holes with some black acrylic paint using a small round artist paint brush.


This photos shows the back. It is made out of one piece of 1/8" Birch
plywood. Flexing it to fit in there in one piece was anything but easy!
The plywood comes all the way up in back to form the back of the
top shelf from the front. See photos below. It also supports the back of
the chip guard.
You can see the chip guard slopes down in the back. The chip guard
is NOT fastened in the back. Very important! This allows me to reach thru
the ways and tap it up and down to clear any stubborn wood shavings.
I left the middle top of the chip guard primer white. I did not
paint it yellow. To make it easier to find things when I drop them in
there.
Note: On my old PM 3520B I did NOT enclose the back of the stone.
This turned out to be a mistake. Wood shavings collected in there and were
a pain to clean out. I also did not slope the chip guard down as much. I
corrected that mistake this time around.


This photo shows how the chip guard sloped down when I was all finished. I left the bottom of the chip guard primer white to reflect light down onto the shelf.


I needed to move the lathe out to work on back and take photos. This photo
shows how I used a pry bar to move the lathe out.
I can still move it, even with the 200+ lbs of stone weight on the
shelf. It is not easy, but it is doable. Lift it with one hand and shove it
around with the other.

1st Hollow Form on New Powermatic 3520C Lathe

The second thing I turned on my new Powermatic 3520C Lathe was a nice
cherry hollow form.
Here is the hollow form, all done.
I put a high gloss finish on this piece. Gloss sells. But, it made
getting a good photo a real pain. To many reflections.
7-1/2" diameter. 7-3/4" tall. Cherry wood.
The blank was a little out of balance. But, it did NOT give me any
trouble. My new Powermatic 3520C lathe, handled it, no problem.
Note: Full disclosure. I also have a big VB36 lathe that I use for
most of my hollow form turning. Turning this hollow form on my new
Powermatic 3520C was a "one off" kind of thing. I did it, to
check out the new lathe and write this blog entry.
 Me and My New Powermatic 3520C Lathe
Here I am all suited up and all ready to go. Standing in front of my new
Powermatic 3520C Lathe.
For more info about my new lathe see
"My New Powermatic 3530C Lathe Verses My Old Powermatic 3520B" blog entry.
I really like the color of the Powermatic Turning Smock that I am
wearing. Over time I have owned a lot of smocks. I have found that the AAW
Turning Smock is the best design for me. It is light weight, well
ventilated, sheds wood savings easily and comes out of the washing machine,
looking like new. However, I really hate the blue and other dark colors!
The PM smock is the same design and fabric. Just a lot better color.
Well, there is one difference / problem. The PM smock zips on the
left. Most men's clothes in the US and the AAW smock zip on the right.
I had to purchase my own PM smock on the web. The $50 price is the same as
the AAW smock. Shipping is not cheap.

Here is the cherry wood log blank that I started with. My silver 1 foot
ruler is on top.
The blank was roughly 10" long. The blank was a bit oval and
thus the diameter was difficult to measure. Sort of 9" diameter.
You can also see that the blank had a big knot in the side from a
branch. I really like the interesting grain pattern this added to the
finished piece. See first photo above. However, it can make the piece hard
to hollow when your hollowing tool bounces around due to the hard spot
created by the grain around the knot.
You can also see I am driving the blank with my big gold drive
center from Stubby Lathe USA. They are no longer available. If I wanted to
purchase one today, I would have to go with a Elio-DR Safe Drive or Big
Bite Chuck Spur. See my
"Best Drive Center" blog entry.
You can also see that the chain saw cut on the end of the log was a
bit off. It is not very square. This and the knot are going to make the
blank out of balance when I turn the lathe on. See next photo.
 Powermatic 3520C Stability Video
I was pleasantly surprised to find my new lathe was able to spin this sort
of out of balance log at 500 rpm. Almost not problem. See the video at
right. Take note of the glass of water on the bed of the lathe.
The log was sort of out of balance due to the NON square cut on the
end of the log and the bit knot. See previous photo.
I strongly believe that all lathes can be vastly improved by adding
200+ lbs of weight to a shelf on the bottom of lathe. This makes them run a
lot more stable. In this video I have NOT added any weight yet. Thus I was
not expecting it to be this stable.
I will be adding a shelf with 200+ lbs of weight to this lathe. I
have already done it. Stay turned for a future blog entry.
Note: One data point does not really prove anything. Your mileage
may vary! I am sure my mileage will vary. Maybe the piece is not really all
that far out of balance.

This photo shows how I moved the new movable control box for the lathe. While I was truing up the end of the log. I am getting ready to mount a face plate.

This photo shows the end of the log after I trued it up. I am getting ready to mount it on a face plate.

The new PM banjo that comes with the new PM 3520C is better than the old PM
3520B banjo. But, I still really do not like the offset design of the PM
banjo.
I strongly prefer the NON offset design of the Oneway banjo shown
in this photo. It allows me to get the banjo in there with out having to
crank the quill in the tailstock way out. For more info see
Oneway Banjo
section of "My New Powermatic 3530C Lathe
Verses My Old Powermatic 3520B" blog entry.
The stock PM tool rest is ok. But, it is to tall to fit in a Oneway
banjo. PM make their banjos extra low to accommodate there tool rest.
The tool rest you see here is the one I prefer. It was custom made
for me. It is very similar to the one I really love on my big VB36 lathe. I
like my tool rests to be at least a 1/2" wide and almost flat on top
so I can feel when my bowl gouge is straight across on top of the rest. I
also prefer really beefy and strong tool rests. So there is absolutely no
flex or vibration out near the end of the rest. Thus I like my rests to be
made out of a 1/2" thick by 2" wide STEEL bar. With a 1"
post that slopes off at 45 degrees, 3/4" of an inch below the top of
the rest. With a really big and beefy weld between the post and steel bar.
I like to have 4", 9" and 14" long tool rests for each
lathe.
I do NOT like the Oneway tool rests or the Robust tools rests with
the silly little round bar on top. "To each is own!"

This photo shows me attaching a Oneway face plate after truing up the end
of the blank.
I strongly prefer to use face plates rather than chucks. With
proper screws they are the most secure way to mount something on the lathe.
I like to use #14 stainless steel sheet metal screws. I prefer
square drive. www.mcmaster.com item
#93945A071 for 1.5 inch long screws. I can easily drive the screws in with
a Cordless Impact Driver. You can see my Makita impact driver in the
background.

This photos shows the 3" PM face plate that comes with a PM 3520C
lathe, on the left. A Oneway 4" face plate is on the right.
The thin little crappy cast iron face plates that come with most
modern lathes, are worthless. They will crack almost instantly if you
really screw them down with decent screws. The PM face plate is thick and
beefy. Thus it is ok. A big step above what comes with most lathes. I some
times use it. But, for this size log the bigger 4" Oneway face plate
is a better choice.

Here is the blank mounted on a face plate. Ready to turn.
I ALWAYS use the tailstock when possible for safety. It takes like
20 seconds to put the tailstock in place. Going to the hospital to get
stitched up takes hours!

Here is what the blank looked like after I roughed it down to round.
I like to use a John Jordan 5/8" V Bowl Gouge to rough turn
things. John's V shape is deep and wide open at the top. It just seems
to work better than anything else I have tried. It cuts really fast and
consistently throws a chip that I can easily aim to land directly in my
trash can.
For more info see
"My Modern Woodturning Tool Set" blog entry.

Here is what the blank looked like after I roughed in a shape.
I always start on the left. I remove a chuck of wood with a 45
degree angle cut this is big enough to get me back above the screws. This
way I known, latter when I turn my finial shape, the the bottom will NOT
end up in the screws. Then I extend the 45 degree cut a little more to the
right when my bottom shape will allow it.
I work on the right, after I get the left roughed in. I removed a
chunk of wood on the right with a 45 degree angle cut when my top shape
will allow it. Then I true up the top of the blank and make it a little
concave.
I usually do this step using my Jordan 5/8" V Bowl Gouge.

Here is the finished outside shape.
I find that cutting the shape using the "wing" on a
5/8" Ellsworth Bowl Gouge works best. I cut the rim detail using my
1/2" Hosaluk Double Bevel Detail Gouge.
In the past, I would then shear scrape with my Ellsworth Bowl Gouge
or an Al Stirt style shear scrapper. In really green wood, I have
progressed to the point where I can now cut the outside shape cleaner using
my 1/2" Hosaluk Double Bevel Detail Gouge. You can see in the photo
that the surface is pretty good. I have NOT sanded it yet.

The finished piece ended up being roughly 7-1/2" in diameter.
You can clearly see in this photo that the pith ended up being off
center. Some people would be upset by this. I have decided I really
don't care. I just don't want the pith IN the rim. Anywhere else in
the top, where it will get cut OUT, when I hollow is OK.
The pith regardless of where it is (on center or off center) in the
bottom will always cause cracks. It will also, always cause some distortion
in the rim. I don't really care. I have learned to love the distortion
it adds. It makes each piece unique and more artistic.

Here is a nice side profile shot. The finished piece ended up being roughly 7-3/4" tall.

I always drill out the center on my pieces using a 1" diameter morse
tapper shank drill. The drill mounts directly in the tail stock via the
morse taper shank.
Drilling out the center, establishes my inside bottom depth and
makes the hollowing process a lot easier and faster.
The funny copper thing attached to the drill is my laser guide. It
makes drilling the hole to the correct depth, fast and easy. A red laser
points down from the green tip. It shows precisely where the tip of the
drill is inside of the blank. You can not see the red laser beam in the
photo. But you can see the red dot from the laser on the very tip of the
drill if you look closely.

This photo shows my Hollowing Rid with TV Camera and TV Screen.
I ALWAYS hollow with the lathe running in reverse. Thus the cutter
head in this photo is set up to cut on the right side.
I use a Trent Bosch Hollowing Stabilizer rig with a Rolly Munro
cutter head.
I really love the Bosch Stabilizer. Because, it takes all the
stress out of holding the hollowing tool level and it does not let the
hollowing tool twist or roll over. However, It DOES NOT restrict my
movement. I still have a tool handle, like on my bowl gouges and free hand
hollowing tools. I can keep that tool handle up against my body, unlock my
knees and use my body to hollow out a nice shape. Just like, I do when
turning a bowl. Just like, I have practiced over and over again, while
learning to turn a bowl. I don't like any of the other hollowing rigs
(Jamieson, Elbo, Monster, etc) because they restrict my movement and I have
to maneuver the tools using just my arms. I can't use my body.
I use a "Munro Hollower II" cutter head with a carbide
cutter. I purchase the cutter head from Steve Sinner and supply my own
custom 3/4" steel bar. I like the older "Munro Hollower II"
rather than the new "Munro Wundercutt 10 Hollower". The new one
does not work as well for this application.
I have created my own TV system. Finding the right camera is a HUGE
problem. Thus I recommend people purchase the Trent Bosch Visualizer
system. It is not cheap at $650. However, making your own system may
approach this cost after a few miss steps, etc.
For more info on my hollowing rig click
here.

This photo shows the TV system in action. In the lower half, you can see
the Munro cutter head is just starting to hollow out the top of the piece.
Pointed to by magenta arrow in photo.
On the TV you can see part of the cutter head is exposed. The other
part is represented by the blue line on screen. Pointed to by the blue
arrow on photo.
The red line is my target wall thickness. Pointed to by the red
arrow in photo. The red line is 1/4" away from blue line in real life
down on the tool rest. Up on the TV monitor it is more like 1/2" due
to magnification of TV camera and monitor.
The green arrow on photo points to the tiny TV camera.
My TV camera works best in low light. So I normally shut most of
the overhead lights off. The bright light on the piece in photo is for the
photo.
I draw the red and blue lines on the TV screen with white board dry
erase markers. They did not show up well in my photo with the bright light
for photo. Thus I enhanced them (redrew them) in Photoshop. I also added
the red, blue, green and magenta arrows in Photoshop.

This photo shows the completely hidden cutter head represented by blue and
red lines on TV screen. The blue line is the outline of the cutter head.
The red line is my target wall thickness.
In the real world, after I draw the red and blue lines on the TV
screen they ALWAYS move in sync with the cutter head. Because the TV camera
moves in sync with the cutter head. i.e. the TV camera is always directly
over and pointing down at the cutter head. Back up 2 photos to see TV
camera mount. For more info see "Trent Bosch Visualizer" on
YouTube.
In this case, I want my finial wall thickness to be roughly
3/16". Thus I have drawn the red line so it is 1/4" away from
blue line. I will rough the wall thickness to 1/4" by going to the
outside of the red line. Then. I will come back with a finish cut to the
inside of the red line. The red line on screen is roughly 1/16" of
wall thickness wide. Thus I will end up with a 3/16" finial wall
thickness.
Note: I enhanced the red and blue lines in this photo in Photoshop.

This photo shows the inside of the hollow form after I have hollowed it out partially. The rim is pretty much finished. The side walls are still a little thick. The depth hole, I drilled in the center is still visible.

In this photo I am double checking the wall thickness with a $10 Jansjo LED
light from Ikea. The really bright part of the piece is the white sap wood
on the Cherry log. The darker part is the brown heart wood. The WET sap
wood always transmits more light than the heart wood.
Everything looks good here. I am done hollowing.
This photo also shows my normal almost dark lighting in the room.
You can see on the TV screen that my TV camera is real happy with this
level of light.

This photo shows the bottom cleaned up. Ready to be sanded and then parted
I used a bowl gouge to start finishing up the bottom. I removed any
extra wood I left earlier to support the piece while hollowing. Then I
sand.

This photo shows the piece after it has been sanded to 220 then buffed with
synthetic steel wood and a towel.
I started with a green (aka soaking wet) log. But, in this case, it
was not to wet. Thus I got away with sanding and buffing it on the lathe.
First I sand with red 80 and 120 grit Sia Soft cloth & foam
back sand paper from "Vince's Wooden Wonders". I use 9 or 10
3" x 4" pieces of Sia Soft. At first, each piece jams very
quickly with a short of brown mush because the wood is wet. You get brown
mush rather than saw dust. However, friction dries the SURFACE of the wood
as you go. Eventually the sand paper comes away almost clean.
Then, I switch to 3" round Mirka AutoNet Mesh sanding disks
from "Buff Daddy". I sand thru 120, 180 and then 220 grits. I
never go beyond 220. I buff beyond 220! AutoNet is very similar to AbraNet
made by Mirka. AutoNet is cheaper. Otherwise I can't tell the
difference.
Then, I buff with Carl Ford Medium and Fine synthetic steel wool
(nylon mesh pads, scotch brite pads, etc). I prefer the Silicon Carbide
stuff that is for use on metals. I use it on wood. No problem. I get it
from McMaster Carr, item # 4659A17 and 4659A18. Mcmaster calls it ulta,
super dupper, extra fine or something crazy like that. I just call it
medium and fine.
Finally, I buff with a blue Surgical Cotton Huck Towel from Amazon.

Another photo of the piece after it has been sanded and buffed.
The circular grain on the right is the knot from the branch. See
photos at beginning. The white on the left is the sap wood. The brown is
the heart wood.

This photo shows a jam chuck that is the perfect size for my stretch wrap plastic trick. Just a little smaller than the piece. See next photo.

This photo shows the piece being held on the jam chuck via stretch wrap.
This will allow me to finish the bottom with out a vacuum chuck. I
try to avoid using my vacuum chuck system when the piece is wet green wood.
Because, the vacuum sucks the water unevenly out of the piece.
You can purchase stretch wrap in 4" wide rolls from local
office supply store.

This photo shows the piece after I removed the face plate and cut away the excess wood with a 1/2" bowl gouge. I like to use a 1/2" bowl gouge with an Al Stirt grind to remove most of the wood. I then use my 1/2" Hosaluk Double Bevel Detail Gouge to cut off the last little nib and finish up.


This photo shows why some people waste a ton of money on stupid stainless
steels ways for their lathe. They think this is rust. NO WAY! This is not
rust.
I was turning a nice green (i.e. wet) cherry log. The sap in a
cherry log is a thin brown colored liquid. When you turn a wet cherry log
on a lathe the sap comes flying out and lands on the ways. When it drys on
the ways it looks like this. Yea, it may look like rust. But, it is not!
You can easily clean this mess off with a little WD40, a chunk of
synthetic steel wool, and a paper towel. See next photo.
You have to clean this mess up EVEN if you have stainless steel
ways! Yea, that's right! Stainless ways DO NOT stop the mess from
happening! You have to clean the ways even if they are stainless. So why
waste a ton of money on stainless?
Stainless steel ways cost big bucks. I can purchase a ton of WD40
for a lot less.

1st Plate Bowl on New Powermatic 3520C Lathe

The first thing I turned on my new Powermatic 3520C Lathe is what I call a
plate bowl. A plate with a little bowl in the center. I like to turn this
shape and then use it as a canvas that I can decorate.
Here is the finished plate bowl.
10" diameter. 1-1/2" tall. Maple wood. Lathe and hand
carved rings and grooves. Red stain. Gold acrylic paint. Acrylic lacquer finish.
Turning this on my new Powermatic 3520C was as “easy as pie”. No
mounting problems. No vibration problems, etc. This piece is small and
easy. Thus, I was not expecting any problems.
Note: I am teaching a plate class at the
Brookfield Craft Center
on Saturday and Sunday, May 5 and 6, 2018. We will be making similar plates or plate
bowls in that class.

Here is what my new lathe looks like.
For more info see
"My New Powermatic 3530C Lathe Verses My Old Powermatic 3520B" blog entry.

Here is the blank mounted on a screw in my chuck. The
blank is a chunk of hard maple wood. Roughly 2" thick by 10-1/2"
in diameter.
I just cut the corners off on the band saw. I made absolutely no
attempt to make the blank round on the band saw. I have a lathe for making
things round!
Here I am getting ready to true up the face of the blank.
You can see here why I do not like the stock Powermatic banjo with
its offset tool post design. I have to crank the quill in the tailstock way
out to get the offset Powermatic banjo in there. The quill is way to far
out for safety in my opinion.
This is why I strongly prefer the NON offset design of
Oneway banjos. For more info see
Oneway Banjo
section of "My New Powermatic 3530C Lathe
Verses My Old Powermatic 3520B" blog entry.

Here I roughed out the bottom of the plate bowl. I am ready to turn the
blank around and work on the front.
First I turned the outside round and slightly down hill from the
top. The top is on the headstock side. Then, I turned a tenon on the bottom
that matches my Oneway Stronghold Chuck. I left the rest of the blank
pretty thick so I can cut grooves on the other side. If I made the plate wall
thin now, then it would flex to much, when I tried to cut the grooves.

Hind site is always 20/20. I wish I took more photos. I forgot to take some
photos of top side trued up. Then another photo of me cutting the bowl.
In this photo, I am getting ready to paint the gold rings. Painting
between well defined lines is easy with the lathe running. Thus, I first
cut some shallow coves to hold the gold paint and then some V grooves on
either side to create well defined lines.
At this point I have NOT thinned out the plate. The bottom is still
thick, like in previous photo. I am going to thin it out latter, at the
very end.
Power Carve the Radial Grooves
I removed the CHUCK from the lathe. I left the piece in the chuck! Latter, I want to be able to remount
the piece and still have it run true.
I laid out the radial lines with a pencil. Then I carved the lines with a V chisel in my Ryobi power carver.
After carving, I removed any left over pencil lines and eased over any hard edges with a 3M radial bristle disk.
For more info see my
"Power Carving Textures" blog entry.
Unfortunately, from this point on I forgot to take step by step photos.
Stain It Red
I stained the entire top and sides with red alcohol based stain. I forced the stain into all of the rings and grooves.
I let the stain dry for a while. Or, did I let it dry over night? I really don’t remember.
Paint the Gold Rings
After the stain dried. I put the chuck with the piece still mounted in it, back on the lathe. I painted the gold rings that I turned in with gold acrylic paint. With the lathe running slowly. With a 1/4″ round paint brush. I wanted the red stain to show thru the paint a bit, but not to much. Thus I adjusted the thickness / thinness of the paint with some air brush medium.
I then removed the chuck again from lathe.
After the gold paint dried I sealed the entire top surface with a couple of coats of rattle can lacquer.
Paint the Gold Grooves
After sealing, I painted the grooves that I carved in with gold acrylic paint. I used a 1/4″ round paint brush. This was not easy. I had to dork around a lot. Wipe it off some. Paint some on, again. Until I ended up with the paint, just in the groves, with some red showing thru.
I sealed the entire top surface again, after the paint dried, with a couple of coats of rattle can lacquer.

Here is what the piece looked like when I mounted the chuck back on the lathe. I turned the lathe on and used some synthetic steel wool to remove any dust in the lacquer and buffed it with a soft cloth.

I turned the piece around and mounted it on a vacuum chuck. So I could
finish the bottom. I thinned out the bottom to match the top. Then I
stained it, sealed it, etc.
Here is what the finished bottom looks like. The picture was taken at a
slight angle so you can see some of the details.
I really wish I had remembered to take a lot more photos for my
blog!
My New Powermatic 3520C Lathe verses my Old Powermatic 3520B

I decided to replace my old Powermatic 3520B Lathe with the new C Model.
Here is my unpacking and set up experience. Plus some comparison of
the B and C models.
I purchased the new model C on 2/1/2018 for a little less than the
$4400 list price.
I am a long time (10 years) Powermatic 3520B owner and a big fan. I
purchased my model B on 4/1/2008 for $2700.
I am writing this blog entry because I was frustrated by the lack
of real photos on the web before purchasing my Powermatic 3520C. There were
some glamour shots put out by Powermatic. But, not much else.
Note: I also own 2 Oneway 2436 lathes, a VB36 lathe, a mini lathe and a metal lathe.
In a Nutshell
After a month or so of use, I think I am going to
also be a long time big fan of the new Powermatic 3520C Lathe.
There are some things I don't like. Like it does not come with
a power cord. It still has the offset Banjo that I can't live with.
But, overall I am really happy.
It is really nice to see a company make a new model that is beefier
than the old model rather than making things more flimsy to cut costs! For
example, the base of new headstock is wider than the old one and it weighs
more!
In my not so humble opinion the new model C is is at least as good
as the old model B and probably a little better.
From now on I am going to abbreviate Powermatic as PM. Model C is PM 3520C. Model B is PM 3520B.
 New PM 3520C Lathe Specs for Reference
Click on the photo at the right for new model C specs that I do not
mention in this blog entry.
I downloaded this info from the PM web site.
Part 1: Unboxing and Set Up

The lathe comes nicely packaged on a Pallet. It fits in a small pickup no
problem.
I had help loading it. I unloaded it on my own by unpacking the
pallet while it was still on the truck.
I mostly set up the lathe on my own. I needed help turning the
stand over after bolting on the legs. And I needed help lifting the
Headstock up onto the bed.

The PM web info says the lathe weights 726 lbs and the label on the box
agrees.
The label says the shipping pallet weight is 770 lbs.
I weighed each of the parts as I unpacked things. I used a modem
electronic bathroom sale so all weights are approximate. Probably +/- 2
lbs.
Here is what I found for the new model C:
Headstock: 160 lbs
Tailstock: 53 lbs (the Old model B Tailstock is 46 lbs)

Banjo: 34 lbs
Tool Rest: 5 lbs
Box of Parts: 18 lbs

Main Leg: 70 lbs each
Leg Riser Block: 28 lbs each

Bed: I can't lift the Bed so here is my guess:
726-160-53-34-5-18-70-70-28-28 = 260 lbs
The above weights are with the cast iron triangle shaped
duplicating bracket installed on the headstock and NOT installed on the
tailstock. i.e. the way the lathe is shipped.
Note: Should I call it the lathe "bed" or
"ways"? I decided to go with "bed". Same as PM spec
sheet. The "ways" are just the top part of the "bed".

The shipping carton was made to be easily removed. Just cut the straps and
lift it up.
The photo shows what I found under the cardboard carton.
Lathe bed in the middle with legs in cartons on each side. The
small carton that fell down is the all the nuts, bolts, and other small
parts.

Each leg is 22-1/4" tall and weights 70 lbs. (Leg height with out the
silver feet that go on the bottom.)
Nicely packaged. Easy to remove. No shipping grease or oil BS that
I need to deal with.
When I first saw a photo of the new model C, I did not like the new
leg shape. Not as sexy?
I fell in love with the new shape when I built my own self to go
under the lathe. The new leg shape makes shelves easier to enclose. No
stupid big opening (hole) in the leg that collects dust and shavings. The
new legs don't have a funny curve that gets in the way of things stacked
on the shelf and thus gives you more room on the shelf. Stay tuned, for a
new blog entry coming soon with my new weighted shelf design.

Each riser block is 4-1/4" tall and weights 28 lbs.
Thus the legs with riser blocks weight 70 + 28 = 98 lbs.
I have the riser blocks installed on my lathe with the silver feet
screwed all the way in. From floor to bottom of riser is 5/8". Thus
the silver feet on the bottom add 5/8" minimum. Note: I DO NOT have
the nut installed between the top of the feet and bottom of leg. The nut
would add another 3/8".
From floor to top of ways (bed) is 34-3/4". The distance from
top of ways (bed) to center of spindle is 10-3/8". So the center of my
spindle is 45-1/8" above the floor.
If no riser blocks it would be 45-1/8" minus 4-1/4" =
40-7/8" above the floor. This is very close to the 40-5/8" spec
on PM web site.
The bed is 7-3/4" tall.
If you wanted to make the lathe taller you can crank out the feet a
few inches. Or, I see no reason why you could not add more riser blocks.
See "Installing The Riser Blocks" below.
The PM web says the riser block adds 6". This is about right
if you crank out the feet, under a 4-1/4" riser block.
The old model B only had one leg option. No riser block. The
lowest possible spindle height was 45" above the floor. I just
measured it on my old PM 3520B.
Note: The distance between the feet on the bottom of legs is the same
on model B and C. 21″ center to center.

The lathe only comes with one tool rest. It is 14" long and weights 5 lbs. Same as model B.


I really like the owners manual. PM ships 3 SEPERATE owners manuals. One in English.
One in Spanish. And one in French?
I am stick to death of owners manuals with just a couple of pages
of English text and then a ton of useless paper in other languages.
The Owners Manual has one very serious problem. It does not tell
you how to hook up the power cord that you MUST supply on your own. More
about that later.
 Headstock, Banjo and Tailstock
This is how they ship the Headstock, Banjo and Tailstock.
They are just locked down to the bed via the silver handles. No
extra, nuts, bolts or other BS you need to remove. It seems to work just
fine.
I was also VERY delighted to find bare metal surfaces coated with
just a light coat of machine oil. NOT that heavy crap you have to remove
with kerosene. Like, the stuff you find on cheap tools shipped from China,
etc.


Removing the banjo and tailstock was easy. Then the pallet was light enough that I could slide it out.

I slide the pallet back in a little and then removed the Headstock. I let
it sit on end of tailgate while I got up my nerve.
It feels a like a lot more than 160 lbs at this point. It is not
easy to grip, but not to bad.

I set the headstock down on to a dolly and rolled it into my studio.
This went ok. But, I decided there was no way I was going to be
able to pick it up and install it on bed. I could pick it up. But, I could
not pick it up and align the big washer on the bottom of headstock with the
ways on my own. I was going to need help.

The bed is to heavy for me to lift by myself. To awkward.
I think it is 260 lbs. Not really sure. See "Cast Iron is NOT Light Weight"
above.
I got my 2×10 ramps. The ones I use to load and unload my snow
blower, rototiller, etc.

I decided that removing the bed from the pallet was going to be awkward in the truck. So I just slide the pallet down my ramps. No problem

Here are all the big parts after I unloaded everything.
Eventually I just rolled the bed off the pallet onto some rubber
floor mats.
Note: The model B big useless metal Guard Assembly (that sort of looks like
a metal spider web) no longer ships with the model C lathe. It is now an
option. So, you no longer have to pay for this big waste of money.

Here is what was in the parts box after I unwrapped things.
The new model C still comes with the very good "Jet"
knockoff of the Oneway heavy duty dual ball bearing live center. The black
thing above the big yellow wrench in the photo. The Oneway center is my
absolute favorite. The Jet knockoff is a very close second. What's the
difference? The threaded part on the Oneway is made of steel. On the Jet it
is aluminum. The Jet only comes with the small aluminum cone.
Note: Jet and PM are owned by the same parent company.
The silve sliding hammer knock out bar with brass tip is best of
breed. The model C one is the same as the model B.
The new model C lathe comes with the same cast iron face plate as
the model B. They are identical. Ok, but not great. Not shown in this
photo. See headstock photos above.

I really like these feet.
Most feet these days are hard plastic with a steel stud sticking
out of the top. These feet are mostly steel with just the hard plastic part
on the bottom. They look real sturdy.
I removed the nuts you see on the feet before I installed them.
This allowed me to crank the feet all the way in and get the lowest
possible spindle height with the riser blocks. My floor to center of
spindle height with riser blocks is 45-1/8". I wanted my new PM 3520C
spindle height to be the same as my old PM 3520B spindle height of
45". Because, I have grown to like that height.
See "A Leg Riser
Block" above for more measurement info.

Here you can see I rolled the bed off of the pallet onto a rubber mat.
The legs are easy to install with a Allen wrench. You just have to
put in the 4 black socket head cap screws.

Here I show 2 options for the photo. I show one of the silver feet
installed directly in the leg and one installed in the riser block.
The bottom of the legs are threaded to accept the feet. The bottom
hole in the riser block is a threaded like hole in leg to accept feet. The top
hole in the riser block is NOT threaded. You just install a bolt (socket head
cap screw) thru unthreaded hole in riser block into the threaded foot hole
in leg.
I really like the riser block design. It is simple and cost effect.
I really don't understand whey more lathe manufactures don't go
this way. The new Oneway adjustable legs are really expensive. Like twice
the cost of the old non adjustable legs.
I see no reason why you could not add more riser blocks if you want
to make the lathe taller. I would just make my own. Go to my local steel
supplier and ask them to cut me some 3/16" wall thickness, 4"
square hollow tub to length. Then drill some holes in them to line up with
existing leg foot holes. My steel supplier has lots of scrap cut offs for
cheap. You can get 4×4, or 2×4 or 4×6 square tub. 3/16" or 1/4"
wall thickness.
The adjustable legs on the Robust lathes, etc are nice. But, lets
face it. You probably are only going to adjust them once or twice. Adding
or removing a riser block is simple and cost effect. Robust and PM are the
same when it comes to changing leg heights. You have to jack up the lathe.
If you want more leg height adjustment in finer intervals then you
can just crank the feet on the bottom of the legs in or out.
See "A Leg Riser
Block" above for more measurement info.
Note: The distance between the feet on the bottom of legs is the same
on model B and C. 21″ center to center.
 Legs, Riser Blocks, and Feet Installed
Ready to go. But, I decided that thus sucker was to heavy for me to turn up
on my own. I would also need help installing the Headstock. So, why take a
chance?
Time to find some friends.
Note: In this photo and previous photo I still have the nuts
installed between the feet and bottom of leg (riser block). Eventually, I
removed those to take the spindle height down to 45-1/8". Like my old
B model at 45".

It's a thing of great beauty!
Well, not really ready to go. I can’t plug it in and give it a go because the PM people
DID NOT ship it with a power cord and plug. Err……!!!
See "Main Power On/Off Switch" below.
See "A Leg Riser
Block" above for spindle height measurement, etc.

Part 2: The Details and PM 3520C verses 3520B
Powermatic 3520C Lathe verses Powermatic 3520B Lathe

Here is what the new headstock looks like.
It still has the same nice silver hand wheel.
Note: This photo was taken recently, after I installed my new shelf
on top of the headstock. Ignore it for now. I will talk about it in a
future blog append.
New and Old Headstocks Side by Side

I put 2 different photos together here in Photoshop. So things don't
line up perfect. But, they are good enough.
The PM 3520C is on the left. The PM 3520B is on the right.
Basically they flipped the controls and belts from left to right.
They added a new spindle nose on the right of the model C (pointed
to by red arrow) by removing the funny overhang on the left of the old
model B (pointed to by blue arrow). I really like this. The new spindle
nose makes it easier to turn things close to the headstock.
I also really like it because they did not change the distance
between the in board and out board bearings. i.e. the distance between the
green arrows on both headstocks is the same. Roughly 11.5". The
bearings on model B and C appear to be the same great bearings.
Having a nice big bearing on the out board side, in addition to the
in board side makes the spindle a lot more stable when you mount pieces on
the lathe. It is what makes the PM lathes a lot better than the Jet, etc
"look alikes". Often the "look alikes" use a smaller bearing
on the out board side or no bearing at all!
The bearings on the PM lathes put them in the high end class, with
Oneway, Robust, etc.
Note: In the photo, the "out board" side is on the left
where the hand wheel mounts. The "in board" side is on the right.
The base of the new model C headstock is 10" wide. That is
roughly 2" wider than the old headstock. This improves the stability
of the headstock.
The model C is 15" tall. This is 1/4" taller than the old
model B.
The distance from top of ways to center of spindle is the same
10-3/8" on model B and C.

Photo of the new movable control box for on/off, direction and speed in
the DOCKED position. Pointed to by red arrow.
The new model C uses on/off buttons. I am having a little trouble
getting use to this. However, I still think it is an improvement over the
model B that used a single red mushroom button that you had pull out for on
and push in for off. The push in for off was probably better. However,
pulling the old model B button out was really hard. It took like a team of
strong men to pull that button out. That, is why I replaced it on my old
model B with a nice twist switch. Visible in the previous photo.
The magnet on the back of the control box is good. Not to strong
and not to weak. The entire back of the box is covered with a nice thin
layer of soft foam that appears to be fairly tough. No photo of back because
I already have to many photos in this blog entry.

This photo shows the new movable control box removed from the dock.
The red arrow points to the nice dock. It is recessed so the docked
control box does not stick out..
Note: A moveable control box is a nice safety improvement. However,
I still feel, that for safety reasons, all lathes should be equipped with a
second emergency off switch that lives on the tailstock end of the lathe.
It is ALWAYS there when you reach for it in an emergency. Regardless of
where the other control box may have gotten to during daily use.

This is often one of the first things I look at on lathes. To many people
pay to much attention to just the HP of a lathe. They fail to look at the
belts, bearings, etc. If you JUST put a big engine in a VW Bug car then you
still have just a VW Bug. Because the suspension, tires, etc can't
handle all of the HP of a big engine.
The new model C has the same great belts and pulleys as the model
B.
The BIG belts and pulleys is another thing that puts the PM lathes
in the same high end class as Oneway, Robust, etc.
The PM lathes have great motors with belts and pulleys that are
really up to the job.

The new spindle lock knob is above the control box. Pointed to by red
arrow.
It is big and easy to use. Just twist it to lock or unlock the
spindle.
On both the model B and C, there is no micro switch attached to
spindle lock that prevents you from turning on the lathe. I don't think
this is a big problem. We all drive cars. You just got to known, when the
light is red you don't pull out! You wait for the green. When the
spindle is locked. Don't try to turn the lathe on!
Note: The old model B originally had a spindle lock that people did
not like. Because you had to manually hold it in. I agree it was a pain.
Eventually PM came out with a nice little fix. A sliding piece of metal
that held it in. You can see it in the photo above of B and C headstocks
side by side.

This photo shows how the spindle lock is implement. The red arrow points to
the round washer where the spindle lock pin engages.
No change here. Basically the same on model B and C.
I like what I see. The spindle lock has nothing to do with the
indexing mechanism. It is a big robust spindle lock. So when you screw
things on and off of the spindle you don't put any stress on the
indexing mechanism.

The red arrow in photo points the new model C index pin. The index is now
implement like most other lathes. The index pin goes into holes in the
pulley wheel. See next photo.
The index pin is held out by a spring. If you want to engage it you
just push in. If you want it to stay engaged you have to thread the pin in.
Indexing on the old model B was a big mess. On the in board side,
you had to screw a pin into holes you could not see. There was more than
one hole for index pin … It was basically, totally useless. The new model
C is a big improvement.
Note: Initially I had trouble getting the pin to thread into the
hole. It just would not thread in there. Now, it seems to work. I am
baffled. I think the threads in the cast iron headstock are not the best.
This is the only manufacturing or shipping problem that I ran into with the
new lathe.

The red arrow in photo shows the index pin coming thru the headstock. See
previous photo.
The blue arrow points to the holes that the index pin engages.
There are 48 holes. For me, this is WAY MORE holes than I need!
I generally only need 12 or less holes. More holes JUST leads to
more mistakes. Trying to use every 4th hole to get 12 divisions. Always
gets me all screwed up. I really prefer to use an after market external
indexing wheel. I can then easily mark every other hole with a red magic
marker, every 4th hole with a blue magic marker, etc.

The model C comes with a new digital index feature. You activate it by
pushing the "Index / Indice" button pointed to by blue arrow in
photo.
When engaged the digital display (pointed to by red arrow in photo)
shows the index number. 1 to 48. In photo it is showing index position 42.
When you turn the spindle the index number changes.
I don't known of any other lathe that has this feature.
I am sure, some people are going to love it. It does not do much
for me. If I could tell it, I want only 12 index positions and it took care
of skipping to every 4th hole it would be of more interest to me.
Note: I tried several times, I just could not
get a good photo here. In the real world the digital display that is hard to read in
the photo is bright and easy to read.

The big silver disk and black box pointed to by red and blue arrows in this
photo are all new on the model C.
I think they have something to do with the new digital index
function. On the old model B there is just a small laser and sensor that
senses the actual spindle speed of the square spindle lock washer.
Behind the blue arrow in photo there is a black plastic box with
wires and a circuit board. I am happy to see it is protected from the
pulleys by a steel plate.
On top of the steel plate there is a laser and sensor that uses the
hole in the silver disk to sense the actual spindle speed.
The model B and C lathes sense and display the ACTUAL spindle speed. If you
hand rotate the spindle with the motor off the digital display shows your
hand rotation rpm. This is a lot better than cheap lathes that do not show
the actual speed. They just show you were the variable speed knob (dial) is set.

Some people refer to the "Variable Frequency Drive" (VFD) as the
"motor controller", etc
The VFD on the back of the model C headstock is now enclosed in a
new fancy plastic box. My feelings about this are mixed. Will the VFD
overheat when it does not get enough air flow? I am hoping PM knows what
they are doing here.
The VFD on the back of the old model B headstock was not enclosed.
This made securing the wiring a little more problematic and time consuming
to manufacture?
New or foreign safety standards, etc may have led PM to add the
enclosure. The PM web says "Fully enclosed VDF for increased user
protection."
Note: A VFD allows you to get high torque out of a motor at low
speeds by using a 3 Phase (rather than a Single Phase) motor. The VFD
converts 220 volts Single Phase input power (standard household current) to
220 volt 3 Phase power for the motor. It varies the frequency of the 3
Phase power to control the motor speed.
The on/off, direction and speed, control box on the front of the lathe sends low voltage (typically 24
volts AC) control signals to the VFD on the back. So
all high voltage wiring is limited to the back of the lathe. This is pretty
much standard today on all high end lathes.

Here is what the VFD looks like with the covers removed. I am an Electrical Engineer. So, you known, I just had to take that cover off.

Here is the VFD model number in photo. It looks like it is a E series VFD
at www.deltaacdrives.com
The VFD is made by "Delta". I am not really sure, but I
don't think this "Delta" company is the same as the old Delta
Power Tools company. Or maybe it is spin off?
Delta VFDs are not as widely known as other brands because they do
a lot of OEM stuff. However, they are known to be a good brand.
The VFD on my old PM 3520B was a Delta VFD. An older model. It
works good. No problems!

The Knob under the VFD on a silver background is the Main Power On/Off
Switch. It is unconventional. But it is a nice high quality switch.
The old model B did not come with a main power switch. The VFD was
always powered on if the lathe was plugged in. This was a huge over site in
my not so humble opinion. I added my own on/off switch to the back of my
model B. Thus, I am really glade to see the new switch on the model C.
On the other hand the PM people really irked me. No, that is not
strong enough. They really, really, really pissed me off by not shipping
the lathe with a power cord. I could not plug the lathe in when I was ready
to show it to my friends who helped me set it up! I had to wait a day, go
to the store again to get a cord and plug, … I was pissed!
I payed $4xxx.00 for this lathe. They could not afford to ship it
with a $10 power cord? Come on?
We have standards in the USA. The lathe power plate says 230 volts,
10 amps, 1 phase, 60 hertz. i.e. for USA sale only. The manual says it
should plug into a 20 amp circuit. In the US the standard plug is a NEMA
6-20 for 250 volts, 20 amps with ground. The lathe should come with this
cord and plug!
Yes, there are some industrial places were they might use other
plugs, or direct wire, but those places are 3 phase, etc. They ship this
lathe with a single phase VFD, and plate says 1 phase … thus there is no
excuse for not shipping a NEMA 6-20 cord and plug! If someone does not like
that plug then they can cut if off!
To top it all off. There is ABSOLUTELY no place in the PM Manual
they shipped with the lathe that shows how to wire up that switch!!! And it
is a non standard switch! The manual says you should hire an electrician!
They want me to hire an electrician, wait for him to show, pay him
$100 or more, … Because, they did not want to ship a $4xxx.00 lathe with
a $10 power cord? Err…..!!!
I added the blue cord you see in photo and my own standard NEMA
6-20 plug from Home Depot. Note: The plug is NOT shown in photo.

See photo for all the lathe plate information.
It correctly shows the lathe should be connected to a 1 phase, 220
volt power source.

See photo for all the motor plate information.
I am glade to see here they are correctly showing the motor as a 3
phase motor. The VFD converts from 220 volts 1 phase to 220 volts 3 phase
for the motor.
The motor on my old model B has been a great motor for 10 years. I
think it is really a good old fashion 2 HP into a load. Rather than foreign
crap where they falsely label motors as 2 HP when they can not deliver that
under load.
The motor on my old model B is one of the lathes biggest selling
points! It appears the motor on the new model C is the same motor. It looks
the same and all the plate numbers, amps, HP, etc are the same.
However, it
seems like the fan built into the new model C motor moves more air. This could
be just my imagination. More air is a better thing. Better cooling. However, I have
never had any problems with the model B over heating.
New and Old Tailstocks Side by Side

The PM 3520C is on the left. The PM 3520B is on the right.
The model C tailstock is a huge improvement over the model B
because it has Acme threads in the Quill (the part that screws in and out).
It took like forever to crank the old mode B tailstock in or out. The new
model C is faster.
The PM web site says the model C has a "anti-rotation"
key. Well, the old model B also has one. The new one on the model C looks
like it might be better. But, I never had any complaints about the old
model B one.
They both have the same great hand wheel. They both have the same
good quill locking mechanism (the black handle on top).
The model C has a new very nice silver locking handle.
They both have the same hidden compartment with door that some
people love. I absolutely hate it when people hide things in there!
The model C tailstock is 53 lbs. The model B is 46 lbs. I
personally could do with out the extra weight. The old one was already on
the to heavy side when I wanted to remove it. However, on the plus side,
the new one is not some light weight piece of junk.
The new model C quill is marked in both inches and millimeters. Good type size
nice and dark but still sharp. Easy to read.
The new model C is obviously wider than the model B at the bottom.
The model C is 9" wide at bottom. The model B is 7". At the top,
where the quill goes thru they are both the same 8-1/4" wide. Both
models are the same height. 13.25" to the top of the hand wheel.
The new model C sticks out more on the left. I am really not
thrilled with this because it means I can't get the Banjo as close to
the tailstock as I would like. More about this latter.
However, it is nice to have a bigger tailstock base in contact with
the bed. It makes the tailstock more stable.

Here is what the bottom of the tailstock looks like. The model C and model B are very similar.
New and Old Banjos Side by Side

Oneway 2407 banjo on left. PM 3520C is in the center. PM 3520B is on the
right.
The new model C banjo is roughly the same size and weight as the
old model B. The model C has a nice new silver handle. The model C features
a new tool rest clamp. More about that latter.
Both the model B and C have an offset tool rest post that I really
DO NOT like! They are also to short.

This photo shows why I do not like the PM banjos with a offset tool rest
post.
I turn mostly bowls and hollow forms from green logs. In this photo
I just finished facing off the end of a log so I can mount a face plate.
With my Oneway banjo in there I have to crank out the quill on the
tailstock roughly 2". Blue arrow in photo. This is reasonable and
safe.
If I had the PM banjo in there (see previous photo) then I would
need to crank out the quill another 2" to get the offset tool rest
post in the same space. That would extend the quill to roughly 4". Way
to close to the max quill extension of 4-1/2". At 4" the quill is
not secure enough for strength and safety because it is extended to far.
When the quill gets to the end of the threads a 4-3/4" it just slides
out. If I have to do this once and a while then ok. But, every day, no way!
In my not some humble opinion the Oneway banjo is still best of
breed. Still way better than the model B or C PM banjo because it is not
offset.

The top of the new model C banjo features a new tool rest shaft clamp. It
is huge improvement over the old model C. It holds the tool rest post, rock
solid, even under heavy loads.
This photo shows the new design slid out so you can see what it
looks like. The next photo shows it installed.

The red arrow points to the jaws that actually clamp down on the tool rest
post. It looks almost the same as a Oneway banjo when you look down the
tool post hole.
The new PM design is as good as the Oneway tool rest clamp and
probably a lot cheaper to manufacture.
Note: The old model B design really sucked! It was just a knob with
a screw that screwed in or out. See photo above. It was like the one you
find on most cheap lathes. It allowed the tool rest to move around or drop
down while you were trying to turn. Extremely frustrating when you have to
stop the lathe to fix the tool rest position.

The bottom of new model C banjo looks the same as the old model B. Same
good design on the bottom.
I really like the big black ROUND black washer (red arrow in photo)
on the bottom of the PM model B and C headstock, tailstock and banjo. It is
way better than the square washers used by most (all other?) lathe
manufacturers.
Round washers DO NOT have any sharp corners that hang up when you
slide things around on the lathe bed (ways). The PM round washer is big and
beefy!
The square washers use by other lathe manufactures have sharp
corners that hang up and prevent you from easily sliding the banjo around.
I really hate how the square washer banjos start to stick after they have
been used for a while. This seems to be aggravated by using washers that
are NOT big and beefy. Over time they bend and distort? Eventually, you
have to remove the square washer from the bottom and file off all the sharp
edges. Then it still is not as good as the big beefy PM round washer.

The banjo on the new model C is still way to low. Just like it was on the
model B. This has not been fixed.
The banjos on PM lathes are roughly 1-1/2" lower than the
banjos on all other lathes by all other manufactures. See red arrow in
photo. PM tools rests are extra tall to compensate for this.
This is NOT a great feature. It means that if you purchase an after
market tool rest from any other manufacture it will NOT work on a PM lathe.
The tool rest post will be to short because the PM banjo is to low!
It is often necessary to purchase after market tool rests for
shapes and lengths not offered by PM. Purchasing special rests with longer
shafts, cost extra and limits your options.

See next photo for old model B bed and leg holes.
Like I already said. After getting use to it. I like the shape of
the new model C leg. It works better when you make your own shelf under the
lathe.
However, some users may not be happy with the new screw hold
pattern. The red arrows in this photo and next photo points to holes that
are in the same location on model B and C lathes. They are 4" apart
and 2-3/4" down from top of bed.
The blue arrows point to new holes on the model C. They do not
exist on the model B. The model B only had one hole in the middle. See
green arrow in next photo.
I think this means you CAN NOT mount the old model B bed extension
#6294727B on a new model C lathe. Well, maybe you still can, but you
can't use all 3 holes, just the top 2. Or you are going to have to
drill your own center hole
You can get a new model C bed extension. PM # 1353002.
I think the old model B Tail Stock Swing Away #6294721 accessory
will work on a model C. Because it only uses the top holes. The PM model C
manual seems to imply that.
I don't want to be negative here! Lots of people have Tail
Stock Swing Away. I do not known of any one who has a bed extension on a
model B. You don't really need one because you can just slide the
headstock down to where you need it for outboard turning. So the new model
B hole pattern is probably not a big deal.
Note: The distance between the ways is the same on model B and C.
2-1/2" inches. The distance between the feet on the bottom of legs is also the same
on model B and C. 21″ center to center. The feet are NOT shown in these photos.

See discussion under previous photo.
The End
Like I already said above.
I am big fan of the old PM model B and a long time owner. I think,
after a month or so of use, I am going to
also be a long time big fan of the new PM model C.
The only real thing I don’t like and can’t live with is the PM banjo. I am going to
continue to use a Oneway banjo on my new model C lathe, like I did on my old model B.
It lists some new classes that I will be teaching at the Brookfield Craft Center and Peters Valley School of Craft in the next few months.
Click here to check it out.


Updated 1/20/2018: I filled the opening. There was only 1 opening. So anyone else who contacts me will go on a waiting list for the fall.
I had a student cancel at the last minute due to medical reasons. Thus I am now looking for 1 more student for my “Woodturning Workshop” class in my Studio in Poughkeepsie NY.
Please contact me ASAP if you are interested. Email [email protected]
The Details
Instructor: Carl Ford – Studio Woodturner – www.carlford.us
Level: All Skill Levels (Novice and Beyond)
Dates: Any 10 out of 12 Thursdays between January 25 to April 12th, 2018 (Jan 25, Feb 1, 8, 15, 22, Mar 1, 8, 15, 22, 29, Apr 5, 12, 2018)
Time: 9am – 3:30pm with a 1/2 hour break for lunch
Tuition $650.00 ($650 / 10 days = $65 per day / 6 hrs per day = $11 per hour, A really good deal! )
Location: At Carl Ford’s Studio in Poughkeepsie NY. 3 Danspence Road, Poughkeepsie, NY 12603

Same class format as “Woodturning Workshop” at Brookfield Craft Center. Click here for BCC class description.
Students must supply there own wood for the class or help me scrounge it up. Same deal as Brookfield Craft Center.
I made a video to help promote my Woodturning Workshop class at the Brookfield Craft Center. The same info applies to the class in my studio. Click her for my “Woodturning Workshop” video.
I have liability insurance for my studio classes thru the American Association of Woodturners (AAW).
My Studio
My studio is better than the shop at Brookfield Craft Center. I have better lathes! Great lighting and dust collection. Etc.

- My studio is a bright and cheery environment!
- Two Oneway 2436 lathes and a Powermatic 3520B lathe for students.
- Complete set of turning tools for each student! Ellsworth, Stirt, Jordan, and Hosaluk gouges, etc.
- Munro, Ellsworth and Jamieson hollowing systems. All with laser pointers and a Trent Bosch Stabilizer.
- Great lighting
- Good natural light via a bank of windows
- Good overhead lights
- Good lights on each and every lathe
- Good heat and AC
- Very good and QUIET dust collection on each and every lathe! My cyclone dust collector is outside!
- Lots of finishing options. Alcohol method for green bowls. Milk paint, acrylic paint, colored stains, danish oil, poly, lacquer, etc.
- Good lunch room with full kitchen. We eat on the deck or in a nice sunny dinning room.
- Modern bathroom with indoor plumbing.
Click here for directions to my studio at 3 Danspence Road, Poughkeepse NY, 12603
Google says my studio is:
- 1 hr 10 min drive north of Purchase NY
- 1 hr north east drive of Danbury CT
- 45 min south drive of Kingston NY
A picture is worth a thousand words. Click here for pictures of my studio.
]]>I made a video to help promote the class. The video is 13 minutes long (11 minutes of talk + 2 minutes of slide show). Here is the video:
The Details
Instructor: Carl Ford – Studio Woodturner – www.carlford.us
Level: All Skill Levels (Novice, Intermediate or Expert)
Dates: Any 10 out of 12 Tuesdays between January 23 to April 10th, 2018 (Jan 23, 30, Feb 6, 13, 20, 27, Mar 6, 13, 20, 27, Apr 3, 10, 2018)
Time: 9am – 3:30pm
Tuition $700.00 ($700 / 10 days = $70 per day / 6 hrs per day = $12 per hour, A really good deal! )
Location: At The Brookfield Craft Center in Brookfield CT (10 minutes north of Danbury CT)
Sign Up At: www.brookfieldcraft.org
Woodturning Studio Tour 2017
I also made a video that shows people what the Woodturning Studio at the Brookfield Craft Center looks like and has to offer.
The video is 6.5 minutes long. The video is here:
The video is 6.5 minutes long. Here is the video:
 $12 Carbide Cutter for Munro Hollower II
A replacement Carbide Cutter for the Munro Hollower II is $20+ from
numerous commercial retailers.
The "12mm Round Shear Insert Fits 4 Tool RD12S" from Az
Carbide is the same product for only $12.
I have several of them from Az Carbide and they work fine!
The Az Carbide web site says it is for #4 Hunter Tool. It does not
mention Munro Hollower II. This is bad marketing. The Munro
Hollower II and #4 Hunter Tool use the same cutter.
Note: This cutter will NOT fit the new Munro Wundercutt10 Hollower.
It uses a 10mm cutter. The "10mm Round Carbide Shear Insert RD10S Fits
3 & 5 Tool" from Az Carbide may work. I DO NOT KNOWN! I have not
tried it.
 Az Carbide Shopping Cart
You can purchase things from Az Carbide's eBay store or directly from
www.azcarbide.com.
Prices
are little cheaper and shipping is flat rate $3 at www.azcarbide.com.
Note: Az Carbide is just one of several vendors who are selling carbide cutters on eBay.
 Munro Hollower II
The "12mm Round Shear Insert Fits 4 Tool RD12S" from Az Carbide fits the Munro Hollower II. The one in the photo on the right.
 Get a Carbide Cutter
One of the tips in my "Munro Hollower Demo" write up is:
"Get a Carbide Cutter for your Munro Hollower!
At $24 the carbide cutter for the Munro Hollower2 is not cheap. But
it is a great investment because it will really speed up the learning
process.
The HSS cutters that come standard with the Munro Hollowers suck
because you have to stop often to rotate the cutter to a new sharp area or
sharpen the cutter. Sharpening the cutter is extremely frustrating!
Each time you stop to dork with the cutter and then go back to
work. It is like you have a completely new tool that
you have to learn to use all over again from scratch!
…"
See http://www.carlford.info/pages/demos_classes/munro_hollower/Munro_Hollower.pdf
 Groz UG100-3 Drill Press Vise
Long ago I got this drill press vise that I really like. It is a Groz
UGL100-3 made in India.
My friends and students also really like this vise when they use
it. They want to get one. But, until recently I had to tell them they were
out of luck. I could not find anyone still selling it.
That changed recently when I found a very similar one on Zoro
(www.zoro.com) made by Dayton #4CPG1.
I used this vise mostly for drilling metal things. But, I also use
it for plastic pipe (often) and wooden things (not very often).
 Why I Really Like It
I really like this drill press vise, because it is:
1. The right size and weight.
2. It has both horizontal and vertical V slots that allow me to
securely hold round stock while drilling.
3. It has a ledge at the top of the jaws that allow me to securely
hold bar stock up at the top of jaws where I can see it while I drill it.
4. There is a lot of space between the "ways" on the
vise. Thus I can drill all the way thru things with out hitting the ways.
Note: If I don't want something to drop thru the ways then I add a crap piece
of wood across the ways.
 What I Did Not Like and How I Fixed It
The only thing I did not like about this vise is the handle is hard to
tighten up really tignt because it does not have a cross bar (tommy bar).
The vise comes with just a small hole in the handle. See photos
below of new vise at Zoro.
I solved my problem by drilling out the hole so it was large enough
to take the "Red Bar" that comes with Oneway Chucks and
Faceplates.
Now I really like the vise handle. For most things, just hand tight
is good enough. I don't need the red bar. When I need it really tight,
I get the red bar.
Note: No cross bar (tommy bar) on the vise handle means you can
easily position it anywhere on the drill press table with out having to
dork around with the cross bar.
 Horizontal V Slot In Use
Here is an example of the horizontal V slot in use.
 Vertical V Slot In Use
Here is an example of the vertical V slot in use.
I rarely use the vise for this. Because, I do most of this thing
kind of drilling in my metal or wood lathe. But, when I need it. It is
there.
Note: You can't really see the middle vertical V slot that is
being used in this photo. It is to the left of the aluminum blank being
drilled out. The drill press vise has 3 vertical V slots. A left one,
middle one, and a right one. Only the left one is visable in the photo.
Take a look at the other photos above to see all 3 slots.
 Ledge In Use
Here is an example of the ledge at the top of jaws in use.
Notice how you can drill a hole all the way thru something near the
end. The work is still well supported in the middle of the vise. It does
not drop thru the "ways" of the vise.
 Plywood Table
This is the same photo as above. Notice how I secure this drill press vise
to my drill press table with just 1 big screw into a plywood table that
fits over the cast iron table on my drill press.
I REALLY like this set up. Because, I can quickly install or remove
the vise by just lifting up the plywood table.
I can also just take the whole table over to the trash can and
empty any shavings into the can.
For most things 1 screw is secure enough and allows me to easily
position the vice. I add a 2nd screw once in a blue moon when needed.
 Bottom of Plywood Table
Its not pretty. But it work goods.
The boards that I attached to the bottom of the plywood hold the
vise securely in place via its own weight. The boards prevent the vise and
plywood from twisting out of my hand if a drill "catches". I
don't need to waste time bolting the vise down each time I use it.
Note: There is no little board in the back right hand corner. It
split on me and broke off. Maybe some day, I will replace it. But, I doubt
it.
 Cast Iron Drill Press Table
Here is what my raw drill press table looks like.
Thus the boards on the bottom of the plywood table just fit over
the square table.
If I had a round table, I would do the same thing. I would leave a
board sticking down where the table connects to the main drill press post.
This would stop plywood rotation on the round table.
 Dayton 4CPG1 Drill Press Vice at Zoro
Dayton 4CPG1 horizontal and vertical dril press vice.
This one is very similar (the same?) as the Groz UG100-3 drill
press vice I have.
It is avaialble from Zoro (www.zoro.com) as Zoro #G1791151. $96 on
10/29/2017.
 Dayton 31LZ65 Drill Press Vice at Zoro
Dayton 31LZ65 horizontal only drill press vice.
If I had it to do again, I might get this one. It is very similar
to Dayton 4CPG1 horizontal and vertical drill press vice. But, it is a
little less money and I never use my vice in vertical mode.
It is avaialble from Zoro (www.zoro.com) as Zoro #G9193581. $82 on
10/29/2017.
Note: Dayton also makes a smaller (3") and a larger
(4-3/4") version of the same vise. They look ok.
Dayton also makes a similar looking 31LZ68 vise. It is green. I
don't like the looks of that one. It only has one set of vertical V
slots. The horizontal V slot looks to high to me. It also does not have a
ledge at the top of the jaws.
 Close Up of Dayton 4CPG1 Drill Press Vise
Horizontal and vertical dril press vise.
Very similar to (the same as?) Groz VG100-3.
Very similar to Dayton 31LZ65 vertical only drill press vise.
Dayton 4CPG1, Zoro G1791151
Jaw Width 4", Jaw Opening 3-1/2", Throat Depth
1-3/16", Height 2.37", Length 10.86", Made In India
 Close Up of Dayton 31LZ65 Drill Press Vise
Horizontal only drill press vise. Very similar to Dayton 31LZ65.
Dayton 31LZ65, Zoro G9193581
Jaw Width 4", Jaw Opening 4", Throat Depth 1-1/4",
Height 2.5", Length 11", Made in India
Note: Dayton also makes a smaller (3") and a larger
(4-3/4") version of the same vise. They look ok.
Dayton also makes a similar looking 31LZ68 vise. It is green. I
don't like the looks of that one. It only has one set of vertical V
slots. The horizontal V slot looks to high to me. It also does not have a
ledge at the top of the jaws.
]]>

I like to keep my Power Sanding Drills handy by hanging them on the front of my lathe.
My friends and students have copied this idea. Thus it must be a good one?

Here is how I do it. I turn a simple knob out of scrap wood and mount it on the front of my lathe. I drill and tap a hole for a 1/4″ bolt. See photo.
It looks like I goofed. Both sanders in the photo appear to have a 2" mandrel on them. Normally I keep a 2" mandrel on one of them and a 3" mandrel on the other.

Then I carefully drill a hole in the case of my drill and run a piece of flexible electrical wire thru the hole. I drill the hole in a corner where they is really nothing inside of the case. In the photo you can see some scrap number 18 gray wire with a green stripe. One half of a chuck of brown lamp cord (zip cord) would work just as good. Stranded wire is more flexible than solid wire.
Note: I like to use a 55 Degree Close Quarters Drill for power sanding. I get my drills from the Sanding Glove (www.thesandingglove.com) because they test their drills before selling them and they have metal gears. All of the ones on Amazon, etc get lousy reviews due to plastic gears or bearings that don’t last long!

Here is some information I put together for a Power Carving Textures demo that I am doing at my local woodturning club.
I learned most of the stuff presented here in various wood turning symposiums and classes. Mostly from Al Stirt.
Hand Carving
First, lets get this out of the way. Hand carving on turnings often does NOT work good because they are round. When hand carving you have to pay attention to and follow the grain. On round turnings the grain often changes directions and thus is hard to follow. Carving across the grain requires a lot of effort and force that is hard to control.

Hand carving textures is to time consuming and tedious. Power carving works a lot better for textures.
Note: I own a set of good Swiss made Pfeil hand carving tools. If I was purchasing a set today, I would probably go with FlexCut tools. Something like the "FlexCut 21 Piece Starter Set" shown in photo. For around $150 on 1/5/2017. I really like the FlexCut tools. Good tools at a good price. They were not available when I purchased my Pfeil tools a long time ago.
Reciprocating Power Carving
Like I said above, hand carving does not work well. Thus I use a power reciprocating carver when I want nice straight or curved lines with nice clean edges. The reciprocating action (quick small back and forth movements like a hammer drill) of a power tool is used to drive a little chisel similar to a hand tool chisel. Controlling a reciprocating tool (starting and stopping the cut) is often easy. They cut across grain a lot easier than a hand tool and create less tear out.
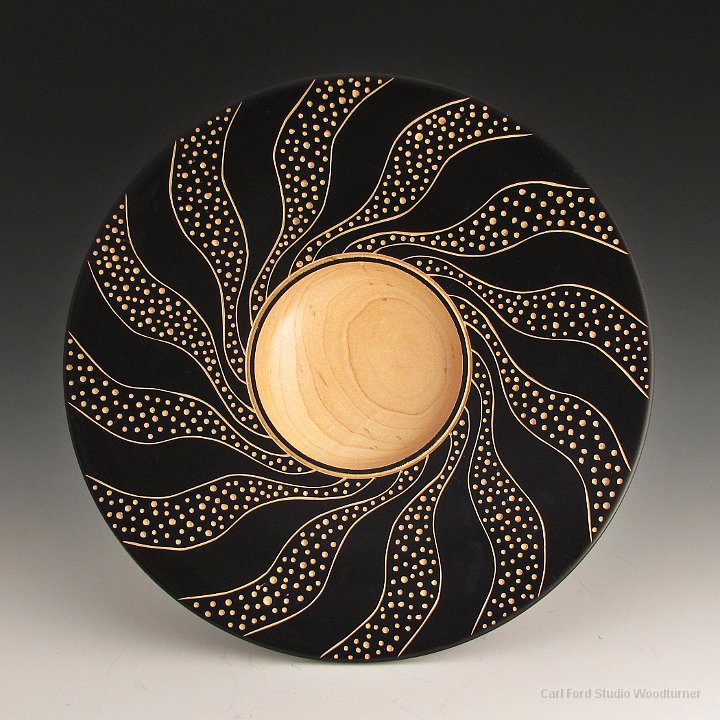
I often use a power reciprocating carver with a V-tool to cave lines that define the boundaries of an area that I then fill with a rotary carved texture. The photo shows an Al Stirt style piece I did after taking a class with Al. The curved lines where carved with a FlexCut V-tool in my Ryobi DC500 Detail Carver. The dots were created with a round ball burr in my Dremel tool.
Reciprocating Power Carving Tools:
FlexCut "Detail Set" Power Gouges – Around $30 on 1/7/2017. Everyone pretty much agrees that the gouges that come with power cavers (Ryobi, Proxxon, etc) are junk. You should replace them with a set of FlexCut gouges designed to fit in a power carver.
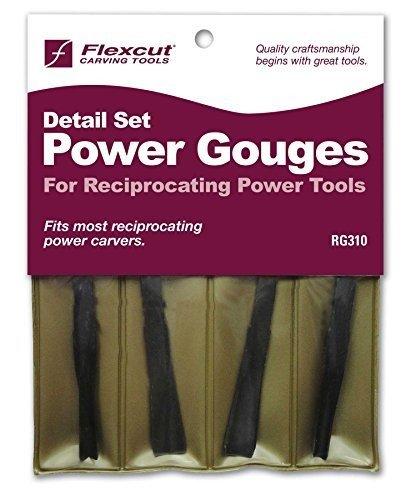 FlexCut "Detail Set" Power Gouges – Around $30 on 1/7/2017. Everyone pretty much agrees that the gouges that come with power cavers (Ryobi, Proxxon, etc) are junk. You should replace them with a set of FlexCut gouges designed to fit in a power carver.
FlexCut makes a "Detail Set" and a "Roughing Set". I rarely use anything other than the V-tool in the "Detail Set". Thus you probably do not need the "Roughing Set".
The FlexCut "Power Gouges" fit directly in Ryobi, Proxxon and Mastercarver handpiece. You may need an adapter for Automach, Wecheer, etc. See FlexCut web site.
You should also get a FlexCut RG102 handle so you can use the gouges like a hand tool.
 You should also get a FlexCut RG102 handle so you can use the gouges like a hand tool.
Ryobi DC500 Detail Carver – Hands down the best option. It just takes a little bit of forward pressure to start cutting and it does not overheat. Well, like any other tool, it will overheat after a couple of hours of continuous use.
 Ryobi DC500 Detail Carver – Hands down the best option. It just takes a little bit of forward pressure to start cutting and it does not overheat. Well, like any other tool, it will overheat after a couple of hours of continuous use.
DISCONTINUED! They stopped making the Ryobi quite a while ago. I have one and I love it. I just purchased 2 more of them on eBay for around $50 each plus shipping.
No one really knows why they discontinued the Ryobi DC500. The only good tool Ryobi ever made? They use to be common on eBay at often outrageous prices given they sold for around $20 when discontinued. They still come up on eBay once and while due to estate sales.
Amazon is now selling a "Ryobi DC-501 Electric Carving Knife". $82 on 1/7/2017. I don’t known what to say about these. They get very mixed reviews. "Great power carver". "Quit working after 30 minutes", etc. Cheap Chinese knock off? But Ryobi is cheap …
Proxxon Power Carver – I see there are now MSG and MOS models of the Proxxon Power Carver. Around $160 on 1/7/2017. The older models were known for overheating and thus not very poplar. The new models are ok?
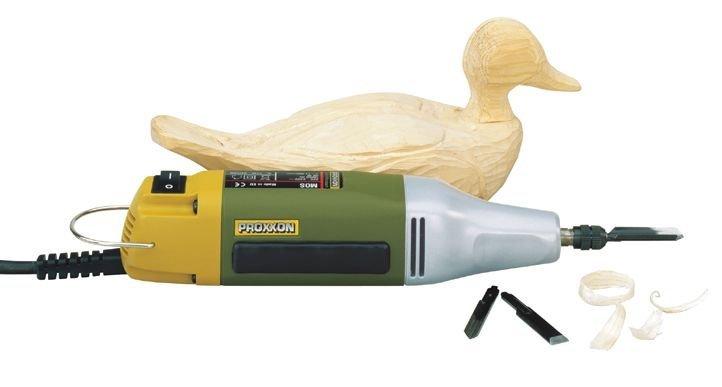 Proxxon Power Carver – I see there are now MSG and MOS models of the Proxxon Power Carver. Around $160 on 1/7/2017. The older models were known for overheating and thus not very poplar. The new models are ok?
I don’t know if the MSG or MOS model is better. I think one is a little bigger than the other. I would probably get the smaller one to carve textures on my turnings. Smaller is easier to maneuver? The larger one is better for carving big things like duck decoys? The Proxxon is probably your best choice if you can not find a Ryobi DC500 on eBay.
Automach Power Carver – The $310 price turns most people off. It has a reputation for overheating but it is not clear what people are using it for when it overheats. It may be a good tool for big stuff. Duck decoys, etc Not worth the price for wood turners?
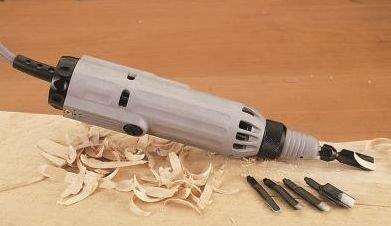 Automach Power Carver – The $310 price turns most people off. It has a reputation for overheating but it is not clear what people are using it for when it overheats. It may be a good tool for big stuff. Duck decoys, etc Not worth the price for wood turners?
Reciprocating Hand Piece – If you already have a Flex Shaft tool (Mastercarver, Foredom, etc) then you can get a Reciprocating Hand Piece that fits on the flex shaft. Just snap it on to the end of the shaft. The hand piece converts from rotary flex shaft to reciprocating. The Mastercarver, Foredom and WeCheer brands of reciprocating hand pieces all seem to be about the same. But, I don’t really known.
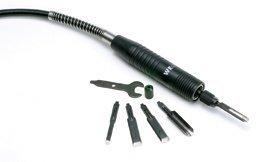 Reciprocating Hand Piece – If you already have a Flex Shaft tool (Mastercarver, Foredom, etc) then you can get a Reciprocating Hand Piece that fits on the flex shaft. Just snap it on to the end of the shaft. The hand piece converts from rotary flex shaft to reciprocating. The Mastercarver, Foredom and WeCheer brands of reciprocating hand pieces all seem to be about the same. But, I don’t really known.
I have a Mastercarver one that I don’t use much. It works ok. I just find that dragging around the flex shaft gets in the way. Hard to maneuver. I prefer my Ryobi.
Rotary Power Carving
I use a Rotary power caring tool to create most of my textures. I like to use a Dremel with mostly a square cylinder burr or round burr. (Note: Burr = cutter or bit, etc.)

Power carving with a rotary burr is fast. You can carve with the grain or across the grain. No problem. The only problem is the rotary burrs often create a lot of tear out. Splinters that stick up where the burr exited the wood. I clean these up with 3M Radial Bristle Discs. I also use the bristle discs to soften the hard edges crated by rotary burrs.
The photo shows an Al Stirt style piece I did after taking a class with Al. The lines where created using a Square Cylinder burr in my Dremel tool. The dots were created using a ball burr. The craters were created using the end of a Kutzall cylinder plunged into the wood like a router bit. The craters are a good example of how you have to play around with all the burrs you have. Try them at different angles, etc.
Power Carving Burrs
Wood Magazine has a good Power Carving Bits summary here.
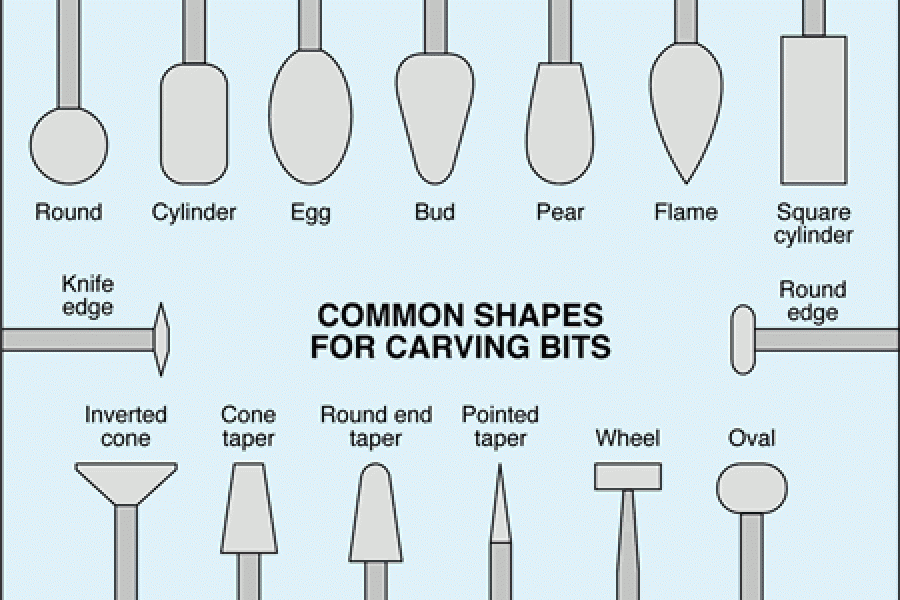
I mostly use Square Cylinder, Round, and a Inverted Taper Cone shapes.
Note: The Inverted Taper Cone shape I use is not shown in diagram. Take the Cone Taper and Invert it. This shape is often not part of sets and hard to find. The very common Square Cylinder is almost as good.
Caving burrs come in tons of different shapes and sizes. For carving textures I generally like burrs that are roughly 1/4" in diameter, 1/2" tall when applicable, with a 1/8" shank for Dremel. I don’t care if they are steel or carbide. I have mixed feelings about single cut or double cut. I often favor single cut over double. I like my cutters to cut fast. Some times the double cut are to slow. However, double cut is easier to control and creates less tear out.
Dremel has a "115 High Speed Cuter" (square cylinder single cut burr) that I DO NOT like because the flutes are to far apart. To course. It makes to much of a mess and is hard to control. Unfortunately, it is commonly available at Home Depot, etc. Avoid it.
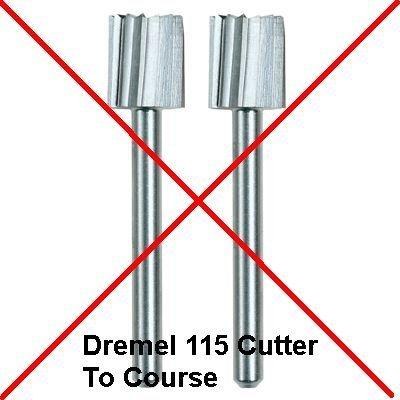 Dremel has a "115 High Speed Cuter" (square cylinder single cut burr) that I DO NOT like because the flutes are to far apart. To course. It makes to much of a mess and is hard to control. Unfortunately, it is commonly available at Home Depot, etc. Avoid it.
Other square cylinder single cut burrs with the flutes closer together (the way most manufacturers make them) are ok.
Rotary Power Carving Tools:
ZJchao 10 Pieces Tungsten Carbide Rotary Burr Set 1/8" Shank – Around $15 on 1/7/2017 on Amazon.
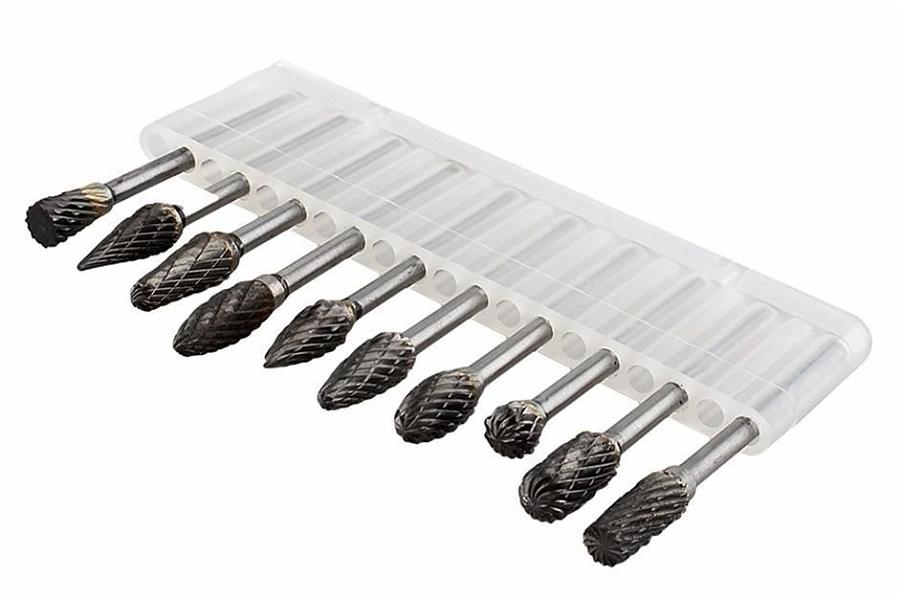 ZJchao 10 Pieces Tungsten Carbide Rotary Burr Set 1/8" Shank – Around $15 on 1/7/2017 on Amazon.
Updated 1/25/2017: BEWARE! I just got feedback from a good friend who purchased this set from Amazon. He was not expecting the best quality, but the set he received was terrible! Most of the bits do not run true. They oscillate and vibrate. I should reconsider recommending them. I agree. I should reconsider. But, I don’t known what to do. The set I received runs ok.
Updated 2/3/2017: I now own 3 sets of these cutters. All purchased from Amazon. My first set was all ok. The 2nd and 3rd sets have 2-3 burrs in each set that oscillate way to much! Thus I can no longer recommend these burrs! If you want a good set from a trusted retailer, then I suggest you purchase "10-Piece Carbide Burr Set 1/8" Shank 1/4" Head" item # 627001 from www.woodcarverssupply.com. Around $57 on 2/3/2017. However, given the price difference. I personally would, probably just purchase the cheap set and take my chances. The bad burrs in my 2rd and 3rd sets are ones that I don’t care about. Ones, that I personally will never use.
Their are lots of sets on Amazon. I chose the set show in the photo because it includes the hard to find Inverted Taper Cone shape I like. It is at the end on the left in photo. See discussion in previous section. I purchased this set from Amazon to confirm it really is what I like.
This set is a double cut set. Normally, I would prefer a single cut set, because they cut faster. However this set works good. It cuts fast enough to satisfy me. The cut is also pretty clean. Not a lot of tear out.
CMT Orange Bit and Blade Cleanser – I use this to clean my burrs. The orange formula is biodegradable ….
 CMT Orange Bit and Blade Cleanser – I use this to clean my burrs. The orange formula is biodegradable ….
I put this stuff in an old pill bottle and soak my burrs in there when not in use. When I want to use one, I take it out and clean it with a small cheap BRASS wire brush from local hardware store.
Brass is soft so it does little damage to the sharp edges of burrs. It is one of these things were you are dammed if you do and dammed if you don’t. If you don’t get the crud off the burr it will not cut. If you clean it with a brass brush then you may dull it a little.
3M Radial Bristle Discs – I use these to clean up any tear out splinters left sticking up after power carving.
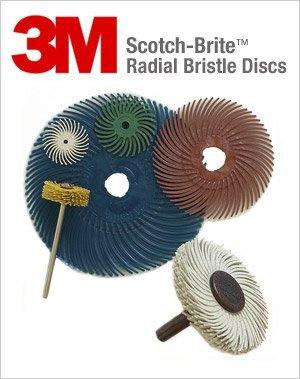 3M Radial Bristle Discs – I use these to clean up any tear out splinters left sticking up after power carving.
Mcmaster-Carr is the cheapest source for 3" diameter disks. However, Mcmaster does not tell you they are 3M brand on their web site. Trust me they are.
I use only the 120 grit 3" disks. 120 grit is white color disks. www.mcmaster.com 6 of # 4494A55 (disks) and 1 of # 4568A22 (arbor) around $23 total on 1/7/2017. Note: This is not the $22 3M arbor. I use a generic $4 arbor. Just cut the end off the arbor with a hack saw if it sticks out to much for your tastes.
The disks are only 1/16" thick with a 3/8" hole in center. I stack 6 of the disks on the arbor to create a nice 3/8" wide brush. Like the white one in the photo.
Beware! Rio Grande Jewelry Supply, etc sell small 3/4" disks that you can mount in a Dremel tool. The bigger 3" size disks are to big for a Dremel tool. To much mass. Drive them with a hand drill, a flex shaft tool or your variable speed lathe.
Updated 11/9/2019: I have found that the “Sanding Wheel Brushes” from McMaster-Carr are a good alternative to the “3M Radial Bristle Discs”. They are cheaper and last longer because they are tougher. See my “Sanding Wheel Brushes” blog entry.
Dremel Tool – I have an old Dremel 380 tool that I have been using for a long time. It was a fancy kit with variable speed, etc. I have done a lot of power carving with this tool. It is my favorite. Easy to maneuver. Plenty of power. It does not get hot. I almost always use it at full speed (one speed).
 Dremel Tool – I have an old Dremel 380 tool that I have been using for a long time. It was a fancy kit with variable speed, etc. I have done a lot of power carving with this tool. It is my favorite. Easy to maneuver. Plenty of power. It does not get hot. I almost always use it at full speed (one speed).
I recently picked up a new Dremel 200 at Home Depot for $30. On sale for Christmas 2016. Something for my students to use. I have been using it and I like it. This is one that I am now recommending. It is 2 speed (high and low). That is one more speed than I am ever going to need to power carve textures. I only use high speed. Around $50 on 1/17/2017.
I only use one speed so I may be able to make due with a Dremel 100 for $30 on 1/17/2017. I don’t have one of these. Thus I don’t know if they are junk.
I never use all the junk (I mean stuff) that comes in the kits. Thus I would just purchase the bare bones tool if available.
Tip: Attach a 12" long chunk of cheap 1/4" gold chain from local hardware store to center hole in your Dremel wrench to keep it from getting lost.
1/2 HP Mastercarver Bench-Top Basic Set (aka Foredom Flex Shaft Tool) – I like the 1/2 HP Mastercaver Flex Shaft Tool better than the 1/3 HP (or less) Foredom tools.
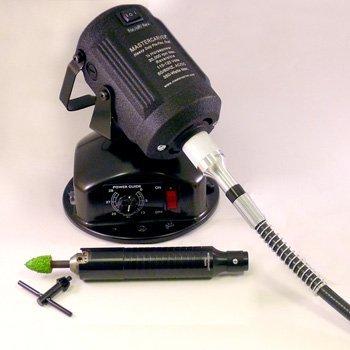 1/2 HP Mastercarver Bench-Top Basic Set
I have the hanging version. If I had to do again I would get the bench version. It now comes with the variable speed controller you need if you want to use 3M Radial Bristle Discs. You can hang up the bench model at any time with a piece of scrap wire.
I like this "Basic Set" because it comes with the small drill chuck hand piece (see photo). I have lots of hand pieces. I like the drill chuck one best. You can mount the 1/4 shaft of mandrels for 3M Radial Bristle Discs in this drill chuck. You can also mount any 1/8" shaft (or any other shaft size) style carving burr in this chuck. Some people don’t like this hand piece. They like smaller diameter hand pieces. I like the diameter of the drill chuck handpiece. It feels great in my hands. You can get additional hand pieces or purchase the "Ultra Set".
Mastercarver tools are only available from Wood Carvers Supply Inc.
Most Foredom and Wecheer hand pieces will fit on the Mastercarver shaft.
Also purchase a "Mastercarver Spare Inner Shaft", Item #797020. $11 on 1/7/2017. If you have one of these then you will never break the shaft on your tool and you will never need it. If you don’t have a spare then trouble is just around the bend.
Tip: Attach a 12" long chunk of cheap 1/4" gold chain from local hardware store to the drill chuck key to keep it from getting lost. Attach your Dremel chuck key to the other end.
Note: I don’t known if I really trust the HP ratings here. Over the years HP has become an almost worthless indicator of performance. Are they ratting the HP under load or no load? Etc, etc. So if a saw a good deal on a Foredom 1/3 HP tool I would go for it rather than pay a high price for 1/2 HP Mastercarver.
Beware: Foredom has a confusing mess of tool options and kits (1/3 HP, 1/4 HP, 1/6HP, etc) aimed at different industries (Jewelry, Woodworking, etc).
Enkay 115-C Flex Shaft with 1/4 Chuck – If you don’t want to spend a lot of money one of these will do the job. Around $26 on 1/7/2017 from Amazon. Drive it with a power drill or your variable speed lathe.
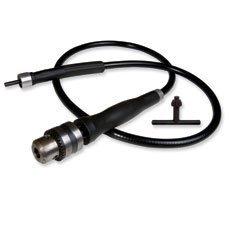 Enkay 115-C Flex Shaft with 1/4 Chuck – If you don’t want to spend a lot of money one of these will do the job. Around $26 on 1/7/2017 from Amazon. Drive it with a power drill or your variable speed lathe.
Running your lathe at really high speed 2000+ RPM is a bit unnerving. But is ok for short periods. It works reasonably good with 3M Radial Bristle Discs. But, is a little to slow for good power carving. So one of these plus a $30 Dremel for Power Carving can get the job done.
Note: A "Guinevere Flexibleshaft With Chuck" is very similar. But it is $80 on 1/7/2017. Made by King Author Tools available from Amazon.
You can mount it in the lathe headsock with a Jacobs Chuck (not a good option), a commercial Collet Chuck with a 1/4" collet or home made Collect Chuck like the one in the photo. Make a collet out of UHMW or hardwood with a 1/4" hole the fits in your 4 Jaw lathe chuck.
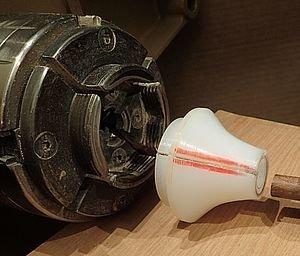 You can mount it in the lathe headsock with a Jacobs Chuck (not a good option), a commercial
 Any Micromotor Tool – The micromotor tools work great with small power carving burrs. You will QUICKLY burn them out if you try to use them to carve textures with the 1/4" diameter burrs shown above.
 Any Micromotor Tool – The micromotor tools work great with small power carving burrs. You will QUICKLY burn them out if you try to use them to carve textures with the 1/4" diameter burrs shown above.
Use a Dremel or Flex Shaft tool rather than Micromotor tool.
Carving Suppliers
Here are the woodcarving suppliers that I use.
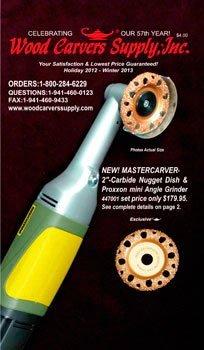
Wood Carvers Supply, Inc – An old well known company. They pretty much have everything. "Mastercarver" band tools are made by Wood Carvers Supply. I don’t like their current web site. Their print catalog is a lot better. I tend to get things from Wood Carvers Supply because I like their Mastercarver Flex Shaft tool better than less powerful Foredom tools.
Treeline USA – Wood Carving Tools – They have most things. A good web site and a very nice print catalog. No "Mastercarver" brand tools.
MDI Woodcarvers Supply – Another company that pretty much has everything other than "Mastercarver" band tools. Another web site that I don’t care for and their print catalog is a lot better.
Rio Grande Jewelry Supply – They have some carving stuff. When they have something you want like a Foredom tool or carving burrs it is often the lowest price available. They have a very good web site and print catalog.
Note: I find the above suppliers usually have better prices than Woodcraft. You can also get things on Amazon. There are good and bad deals on Amazon.
Pattern Layout Tools
Here are some of the tools I use to layout patterns and textures.
Polar Graph Paper – I use polar graph paper to layout equal distant divisions (lines) on a round bowl or plate. The Al Stirt way.
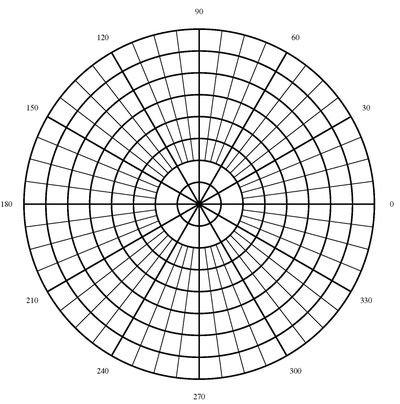 Polar Graph Paper – I use polar graph paper to layout equal distant divisions (lines) on a round bowl or plate. The Al Stirt way.
I generate my own Polar Graph Paper using an on line tool at https://incompetech.com/graphpaper/polar/
For 48 divisions, I use: PDF Document Size = 8.5 x 11, Minimum Border = .25 inches, Line Weight Wide = 2 points, Narrow = .75 points, Concentric Circles = 8, Primary Spokes = 12, Primary Labels = degrees, Secondary Spokes = 48, Center Style = Normal, Line Color = Black.
For 36 divisions change above to: Secondary Spokes = 36.
For 5 divisions change above to: Spokes = 5, Secondary Spokes = 20.
The number of "Secondary Spokes" should always be a multiple of the number of "Spokes" for best results.
I have found that generating anything other than 8.5" x 11" and then printing it on multiple sheets and gluing it back together is to much trouble. I just print 8.5" x 11" and then glue it on to the center of 1/4" x 15" x 15" plywood. Extend the lines by hand using a ruler and pencil.
Note: If you want to download a program then try "Graph Paper Maker" by www.blackcatsystems.com. It is virtually the same as the above on line program.
Updated 2/12/2018: Some of my students wanted to make templates for laying out patterns. So I created some new Polar Graph paper that prints on 16″ x 16″ paper and saved it as PDF files. I then took the PDF files to my local art store and asked them to plot it on cheap paper. Here is the menu settings I used to create the graph paper. If I had it to do again, I would make the Line Weight = 2 rather than 2.5

The PDF files are here:
polar_graph_36_spokes_12_major
polar_graph_48_spokes_12_major
polar_graph_40_spokes_5_major
polar_graph_28_spokes_7_major
Note: When you try to plot the above files the plotter may automatically fit the files to the largest paper size (usually 36″ wide). If this happens then they need to manually override the paper size when they print the PDF files. On the PDF print menu go to the bottom of the “Page Size” scroll down menu and select “Custom Paper Size”. Then input width = 16.0″ and height = 16.0″
Drafting Compass – I like to use a drafting compass to layout equal distant things. The little wheel in the middle allows me to easily adjust it by just a little bit.
 Drafting Compass – I like to use a drafting compass to layout equal distant things. The little wheel in the middle allows me to easily adjust it by just a little bit.
Around $9 on 1/7/2017 from local art supply store, craft store or Amazon. "Staedtler GeoStudent Compass" on Amazon.
Quilters Template Plastic – After I draw a shape that I like (triangle, etc), I use this to cut out a template. I then use the template to transfer shape to multiple places. The Al Stirt way.
 Quilters Template Plastic – After I draw a shape that I like (triangle, etc), I use this to cut out a template. I then use the template to transfer shape to multiple places. The Al Stirt way.
I also use this to create 1/4″ wide flexible straight edges that I use to layout spirals on hollow forms.
Around $4 for 6 sheets on 2/7/2017. Purchase from local fabric store or on Amazon.
Derwent Graphic 9B Pencil or a Stabilo All 8046 Black Pencil – When I layout a grid on a piece before I draw on a design, I like to use a #2 grammar school pencil for the grid.
 Derwent Graphic 9B Pencil or a Stabilo All 8046 Black Pencil – When I layout a grid on a piece before I draw on a design, I like to use a #2 grammar school pencil for the grid.
Then I draw on the design with a wide soft 9B pencil. The wide line is easy to see and distinguish from the grid. The soft pencil does not leave an impression in the wood.
The Stabilo All 8044 Black pencil washes off with water if surface is sealed first with shellac, polly, or lacquer. It will write on anything! Paper, Glass, Plastic, Metal. It makes a nice wide dark line like a 9B pencil.
Purchase from local art supply store, craft store, or Amazon.
Note: I did not learn this from Al Stirt. Al likes to use a Carpenter Pencil. I don’t like them because they are to hard. When I push to hard they leave an impression in my wood.
Derwent Watercolor Sun Yellow Pencil – I use a yellow water color pencil to draw designs on black things. The pencil will wash off with water if surface is sealed first with shellac, polly, or lacquer.
 Derwent Watercolor Sun Yellow Pencil – I use a yellow water color pencil to draw designs on black things. The pencil will wash off with water if surface is sealed first with shellac, polly, or lacquer.
Purchase from local art supply store, craft store, or Amazon.
Al Stirt taught me to paint a piece black with black acrylic gesso. Sand/buff it with synthetic steel wool. Seal it with lacquer. Then draw a design on it with water color pencil. Carve the design. Then wash off any left over pencil lines with water.
Circular T-Square – I made this circular T-square to help me layout patterns.

The small arm on the T-square has an angle in it that fits the outside of circles. It aligns the long arm with the center of the work. I think I got this idea from Al Stirt.
After I cut a pattern out of “Quilters Template Plastic”, I often tape it to the T-square. This allows me to easily repeat it after indexing with “Polar Graph Paper”.
Note the easy to see, dark lines in the photo drawn with a “Stabilo All 8044 Black” pencil.
Books
I don’t know of any really good books on Power Carving Textures on turnings.
Carving on Turnings by Chris Pye is a good book. However it only has a little bit of stuff on textures. It has good stuff on carving leaves, letters, low relief, spirals, furniture stuff, and other traditional carving stuff. It is mostly (all?) hand carving rather than power carving. Chris Pye is a big name in the wood carving world. This book is worth having. But, not if you only want to learn about power carving textures.
 Carving on Turnings by Chris Pye is a good book. However it only has a little bit of stuff on textures. It has good stuff on carving leaves, letters, low relief, spirals, furniture stuff, and other traditional carving stuff. It is mostly (all?) hand carving rather than power carving. Chris Pye is a big name in the wood carving world. This book is worth having. But, not if you only want to learn about power carving textures.
Decorating Turned Wood – The Maker’s Eye by Liz & Michael O’Donnell is another good book. However, only the last chapter really, has anything about carving textures.
 Decorating Turned Wood – The Maker’s Eye by Liz & Michael O’Donnell is another good book. However, only the last chapter really, has anything about carving textures.
DVDs and YouTube
I don’t know of any good DVDs. However Al Stirt is a well known master for power carving textures. You can check out some of his demos on YouTube.
In general I DO NOT recommend YouTube. Way to much dangerous stuff is shown on YouTube. Thus I am ONLY recommending the Al Stirt stuff on YouTube. For example "WGNC Demo: Al Stirt carved square platters" on YouTube.
]]>
Today 8/31/2016 was my last day at IBM. I started on 6/13/1983.
I voluntarily retired after 33 years, 2 months and 19 days. Approximately 8347 working days (no weekends or public holidays).
I am looking forward to my 2nd career as a full time Studio Woodturner.
]]>
Here are some hollow forms I turned over the winter of 2015/2016. All of the hollow forms were once turned from Cherry or Black Birch logs. I also roughed out 30 bowls and finished turned 15 bowls.


The entrance to Aladdin's Cave

The view of Aladdin's Cave from just inside of the door.
First of 8 photos that shows a 360 degree view of my studio taken from the middle of room.
This photos shows the work area around my Oneway 2636 lathe.
Note the work bench, tool racks and black dust collector hood.

This photo is kind of boring. It shows the main entry doorway, workbench and tool racks.

This photo shows the work area around my VB36 bowl lathe with Long Bed tailstock.
Note the tool racks, green light over lathe hanging from ceiling, black dust collector hood, black air gun hose hanging below dust collector hood.
All of my lathes have very good dust collection and air gun.

This photo show the area between my VB36 and Powermatic 3520B lathes.
It shows my Grinder, AC, exhaust fan and vacuum pump. The exhaust fan is below AC, behind the grinder.
The windows let in lots of good natural light. It is a cloudy day outside. If it was sunny, I would not be able to take photos because the sun streaming thru the windows would over power my camera.
This photos shows the work area around my Powermatic 3520B lathe.
Note the black light on the headstock, sanding drills hanging on front of lathe and jam/vacuum chucks stored under lathe.
All of my lathes have very good overhead lighting and a very good light mounted on the headstock or handing from the ceiling.

This photo shows my non turning tools, tool wall and belt sander.
Note the overhead lights. I have lots of lights in my studio. I use warm white light bulbs in all of my fixtures to create a nice warm and inviting feeling in my studio.

Another kind of boring photo. This photos shows my Red Mini Lathe and Modine heater unit.
I have very good heat and AC in my studio. The heat and AC are distributed by an overhead air cleaner.

This photo shows my metal lathe.

This photo shows a better view of my Mini Lathe and the rolling workbench for my Powermatic 3520B lathe.
The rolling workbenches (tables) in my studio are located so there is a convenient place to set down your turning tools while working at the lathe. You just have to turn around and the bench is there, with in easy reach.
Everything in my studio, except for the lathes is on LOCKING casters.

This photo shows my Band Saw, Drill Press, Planer, and Table Saw.
I only need a 14" band saw with a riser block because I rough out all my turning blanks with my chain saw.

This photos shows the air cleaner located in the middle of my studio.
I use it to clean the air and distribute the heat and AC in my studio.

This photo shows my home made 2 HP cyclone dust collector. It will suck the chrome off the bumper of your car!
It is located outside. This keeps the noise and dust outside!
It is nice and quite inside when I run the dust collector.
When I empty the dust collector it does NOT fill the room with dust.

This photo shows my log storage and prep area outside.
I like to store my logs outside in the shade where they get rained on.
The bench in the middle is my horizontal chain saw bench.
The Rube Goldberg in the back is my vertical chain saw bench.
Updated: 7/8/2017. Change bars in Purple on left. Add new “Parts of a Lathe” section with link to AAW video.
Updated: 2/5/2017. Change bars in Blue on left. Summary of updates:
1. The new version of the 10″ Penn State Mini Lathe is still my favorite Mini Lathe.
2. I do not like the new Jet lathes. Add them to the list of “Lathes I DO NOT Recommend”.
3. The new 110 volt version of Laguna Revo 18/36 lathe has won me over. Move it to my list of “Recommended 110 Volt Lathes”.
4. The 220 volt version of the Laguna Revo 18/36 is now my low cost “Recommended 220 Volt Lathe”. It replaces the 220 volt Jet 1642 EVS that is now longer available.
5. The US economy has been stuck in neutral. Thus, lathe prices have not increased by much, if any, in the last 2 years.
Updated: 8/9/2015. Change bars in Green on left. Add Laguna lathes to not recommended list. They are close but no cigar.
First published on 7/31/2015.
What lathe should a newbie purchase?
Here is a long winded answer I gave to a student who had a Shopsmith and decided it was time to buy a real lathe.
For the record. I personally own a VB36, a Powermatic 3520B, two Oneway 2436s, and a Penn State TCLPROVS lathe. At various schools and clubs I have turned on Stubby, Vicmarc, General, Delta, Rockwell, Jet, Grizzly, Vega and old metal cabinet lathes.
 In a Nutshell
Hands down the best lathe out there in my not so humble opinion is the Powermatic 3520B with a Oneway Banjo.
The list price is still $3999 on 2/5/2017. It was the same price back on 7/26/2015.
10/28/2017: The Powermatic 3520B lathe is being replaced by a new “C” model. i.e. the Powermatic 3520C. The B model is no longer available from retailers. They sold out in Aug 2017. See Powermatic 3520B below for more info.
Parts (Anatomy) of a Lathe
Before we get started. Newbies may want to watch this video that covers the names of the different parts of a lathe.
 Generally, I do not recommend videos. This one is very well done. It is at a very basic level. The video was created by the American Association of Woodturners (AAW). It features one of the lathes that I recommend below. A Delta 46-460 Midi Lathe.
Rent a Lathe (Consider the Resale Value)
I started out with a Delta 1642 Steel Bed lathe. I liked it but the sliding headstock was no good for Metal spinning. So, I sold it and purchased a Powermatic 3520B with a rock solid sliding headstock.
I don’t remember how much I payed for or sold my Delta for. But, I do remember the difference was $1200. I owned the Delta for 6 years. So, it was like I rented the Delta for $1200 / 6 years = $240 per year.
If you and your wife went away for a weekend. How much would the room and meals cost? More than $240?
Is $240 a year for a hobby really so bad?
If you purchase a good lathe (like a Powermatic 3520B) and then you sell it in 5-6 years when you lose interest or want a new one. How much do you lose?
6 or 7 years ago, I purchased my 3520B for $2900. The current list is $3999. I bet I could sell it today for $3000 and make $100 profit. Because the 3520B is a great lathe, in high demand with a reasonable list price.
Things to Look For
First, a few things you should look for.
1. Variable speed. With 2 or more belt speeds.
Changing belts on non variable speed lathes, gets real old, real fast.
2. Headstock and tailstock with #2 MT (Morse Taper) or #3MT.
3. Headstock with 1-1/4″ by 8 threads.
Oneway standard is M33. But they will do 1-1/4″x8 for no additional cost?
Note: M33 and 1-1/4 x 8 are virtually the same size! M33 is just a tiny bit larger than 1-1/4. Thus M33 is not bigger, better, stronger, etc.
4. No gap in the ways near headstock.
5. 16″ or 20″ of swing. 12″ is not enough.
Greater than 20″ swing over the ways is overkill! Once in a blue moon, If you need more than 20″ swing then do it outboard or with a sliding headstock.
12″ of swing is ok for 8″ to 10″ bowls. But only 12″ of swing creates issues when you try to lower the back end of a gouge handle while turning bowls. The handle runs into the ways of lathe. 16″ of swing is really the minimum.
6. Forward and Reverse.
7. Variable speed adjustable via a knob. No speed up/down buttons like on Nova lathes!
8. Sliding headstock for bowl turning or outboard.
Oneway lathes are the only ones on which outboard is really usable.
9. Motor is stand-a-lone. Not part of the headstock like Nova Lathes.
10. 2 HP or more. (or DC motor with control box on Mini lathes)
Note: The Oneway 1.5 HP lathes are ok. Because they use a very good motor and motor drive. Motor drive = Control Box / Inverter.
11. Adjustable leg height.
 Oneway just added adjustable height legs to all of there new lathes. See Oneway web site.
Robust also offers lathes with adjustable height legs.
I have found the one and only leg height for the Powermatic 3520B is a very good and livable compromise.
Things you definitely DO NOT need
Beware! Sacrilege ahead. But, just a little.
1. Stainless Steel Ways! Currently all the rage. Biggest waste of money on the face of the earth!
For years the lathes at Purchase college have been ridden hard and put away wet by students. The lathes show lots of signs of wear. But, rust is not a problem!
That brown stuff you see on the ways of a lathe after turning green wood is NOT rust. It is sap, that came out of the green log! Sap that dries overnight looks just like rust. The sap from Cherry logs is brownish, it looks like rust.
2. Tilt away or swing away tail stock! Currently all the rage.
Tilt away tail stocks tilt the headstock down and out of the way.
Swing away tail stocks just swing the tailstock around behind the lathe.
I am willing to yield ground on this one. It is not a complete waste of money for some people with strength issues. However, membership in a gym, may be a better use of money.
An easy and cheap alternative. Is a long chunk of pipe hung from the ceiling over ways of the lathe. With a chunk of rope or chain hanging down. Hook the chain around the tailstock and just slide it off. Let it hang in space. Slide it down the pipe and out of the way.
The 17″ aux bed for turning outboard on a Oneway lathe costs the same or less than tilt away tail stocks. Why not just turn outboard on a Oneway?
3. Digital speed read out. Currently all the rage.
If a lathe has it fine. DO NOT let this drive which lathe you purchase.
When you are driving your car. How often do you check the speed? Only when you see a cop car? After you have been driving for a few months, probably almost never. You just known when you are going the correct speed. Lathes are the same way.
Just because you were turning a bowl yesterday at 700 rpm does not mean you should do it again today! No 2 blanks are the same!!!
For safety! You should always start at the lowest possible speed and then turn the speed up until you are happy with the speed or the lathe starts to shake. If it shakes, then back off. What the stupid digital speed dial says is a HUGE don’t care!
4. A fancy $100 to $200 stand to go under your Mini or Midi lathe with no storage.
Use an old bathroom or kitchen cabinet, or puchase one at Home Depot. You will get storage and a place to set down your tools.
Second Hand Market
Local AAW woodturning clubs are the best source for used lathes that are not antiques or cheap junk.
You can look on Ebay and Crags List. Buyer beware! Shipping can be a huge problem and expense. If it is in a basement, who is responsible for getting it out? It may cost less to buy a new late due to shipping issues and cost. Who much is a hospital stay for a wrecked back?
I personally would ONLY purchase a lathe that has ALREADY been removed from a basement and is in a garage.
Most good lathes are sold thru local woodturning clubs, long before they would be listed on Ebay or Craigs List. Thus, waiting for a good buy to come up on Ebay or Craigs list is often a miss guided strategy that is doomed to failure.
I don’t need a “serious” professional model
If you don’t want an antique, junk or cheap crap then you probably do need a professional model. Because the serious enthusiastic and professional models/market are one in the same.
Stick to lathe models with 16″ to 20″ of swing with a sliding headstock or outboard turning on a Oneway lathe. You definitely don’t need to pay for anything over 20″ of swing.
Also you do not need a “Vector” 3 phase motor. Just a regular TEFC 3 phase motor is good enough. I known, speak english. Basically, you don’t need the fancy motor used on Robust lathes. Also used on Oneway lathes?
110 Volt verses 220 Volt Lathes
I really DO NOT recommend going with 110 volts.
You really need 220 volts. Get it installed in your workshop now and you will save a ton of money in the long run.
I have seen way to many people who are seriously sorry they settled for that 110 volt lathe. Its not big enough or powerful enough. A few upgrade to a 220 volt lathe. But most, suffer on, or they give up on wood turning. Either way the money spent on that 110 volt lathe and a ton more on tools is all just wasted money.
I do not understand why people are afraid of 220 volts. It’s dangerous right? Really? People use hair dryers and electric shavers, etc in bathrooms all over Europe where 240 volts is standard! Are people all over Europe dying from electrocution? I don’t see it on TV news. All the governments in Europe must be cooperating (1st time ever) on this big conspiracy to keep the danger of 240 volts out of the news. Further more, all the people in the US are not rubbing there nose in how much better the US is because 110 volts is standard in the US.
Recommended 110 Volt Lathes
1. Penn State KWL-1018VS Midi Lathe. $370 on 2/5/2017. (It was $400 on 7/26/2015)

The Variable Speed one! The 10″ one. Not the 12″ one!
Penn State is now calling this a Midi lathe. But, it is really only a Mini lathe in my world!
If you compare this lathe to other mini lathes then note how this mini lathe has a real METAL hand wheel on the tailstock. Easy belt change on the headstock and a easy to use spindle lock with 24 indexing positions.
This is a GREAT little lathe. I really fail to understand why people pay a lot more for the Jet and Rikon mini lathes!
You really don’t need more than 3/4″ HP or 10″ of swing in a mini lathe. There are sensible limits to what you can do on a mini lathe. The lathe bed, banjo, tool reset, etc are not heavy enough to handle 12” work. 8” bowls are pushing the limit on a mini lathe. Thus 10” swing and 3/4 HP is adequate.
Note: The old Penn State mini lathe use to be #1 MT. The new KWL-1018VS is #2 MT. Click here for more info.
2. Delta 46-460 12-1/2″ Midi Lathe. $580 on 2/6/2017. (It was $610 on 7/26/2015)
 Midi not Mini. Midi lathes are a little bigger than Mini.
I known someone who has this lathe. He really likes it, but he also has a larger lathe. I have turned on it. I like it. But, it can only handle small bowls. 8″ or less. Cut edge only. No natural edge bowls. You can do bowls bigger than 8″ or natural edge. But, you can also drive your car at 120 mph. At least that is what is says on the dash board!
http://www.woodturner.org/?page=DiscoverWTAnatomyZen
3. 110 Volt Laguna Revo 18/36 Lathe. $2400 on 2/6/2017.
 Beware. I have only seen this lathe in photos and talked to people who have used one. I have never seen it up close or turned on it.
Laguna offers a 110 volt and 220 volt version of the Revo 18/36 lathe.
I have always sort of liked this lathe. In the past I gave it a “close but not cigar” rating. I said that if they had a 110 volt version I would recommend it. So, now I am recommending it. It looks similar the Powermatic 3520B but I don’t think it is as good. Not as beefy. Better than the old Jet 1642 and definitely better than any of the new Jets lathes or Nova lathes.
The 110 and 220 version of this lathe are almost identical. The 110 volt version is 1.5 HP. The 220 version is 2HP. There is only a $100 difference in the price!
When you look in the owners manual and the parts list the only difference is the motor and the VFD (Variable Frequency Drive, they call it an Inverter in the parts list.)
Note: It is only a guess on my part, but I think there really is no difference in the motor or VFD. Other than a 110 verses 220 switch on the side of the VFD that is preset to either 110 or 220. They are just running the VFD in voltage doubling mode. Voltage doubling allows you to run a 220 volt 3 phase motor on a 110 volts single phase input via the VFD. Most of the modern low HP VFDs support this. If, I had a good 220 volt lathe design that already had a VFD, then this is what I would do! I would expand my market by offering a 110 volt version via voltage doubling. Voltage doubling is sort of ok, if you are willing to live with a 30% reduction in motor efficiency (aka HP). Well, using 220 volts is really better! The 110 version is 1.5 HP and the 220 version is 2 HP. This is consistent with 30% loss due to voltage doubling. I really don’t understand why more manufactures don’t do this. A 110 volt version of the Powermatic 3520B would sell like hot cakes.
I really want to make it clear that this lathe DOES NOT change my opinion about 110 volts. I DO NOT recommend going with 110 volts. You should upgrade to 220 volts. See “110 Volt verses 220 Volt Lathes” above.
Recommended 220 Volt Lathes
1. Powermatic 3520B Lathe. $4000 on 7/26/2015 and still $4000 on 2/5/2017.
Hands down the best lathe out there for the money! Nick Cook helped Powermatic get everything right on this lathe! It is built like a tank.
This is still my favorite lathe for the money!
10/28/2017: The Powermatic 3520B lathe is being replaced by a new “C” model. i.e. the Powermatic 3520C. The B model is no longer available from retailers. They sold out in Aug 2017. I have not seen a 3520C yet in person. Only on the internet.
On 10/28/2017 the 3520C is currently not available for purchase. Thus, no official list price yet for the 3520C. Word on the internet is $4400.
Currently, I can not find official 3520C info on the web. It is only in the PRINT version of the “Craft Supplies USA” catalog. It says:
– Movable control box
– Redesigned spindle lock
– Adjustable riser blocks for 6″ of height adjustment
– Digital spindle indexing readout
– ACME thread tailstock quill
– Increased weight for stability
So far, I like what I see. They did not screw up the best features of 3520B. They changed the tailstock to ACME thread. A much needed improvement! More positions in the spindle lock wil be nice. The 3520B only has 2 positions in the spindle lock. I don’t care much about the other changes. I like the location of controls on 3520B. Thus movable control box on 3520C is no big deal to me.
I would have really liked to see fully adjustable legs or at least legs that adjusted in 2″ increments. I am really hoping that “Adjustable riser blocks for 6″ of height adjustment” means the new 3520C legs are 6″ shorter than 3520B legs. The 3520B legs are a little to tall for me. But, 6″ lower would be to much. I am hoping I can replace the 6″ riser blocks with my own 4″ wooden riser blocks if I only want it 2″ lower, etc.
Only available in 2 HP. More than enough HP because Powermatic uses a good motor with a good motor drive.
The only problem with this lathe is the legs only come one height. However, I have found the height to be a good compromise. Short and tall people seem to agree the height is not ideal, but it is ok. On the other hand, only one leg height, helps keep the price down.
 The banjo on the PM3520b sucks. It is way to big and heavy for a 20″ lathe. I STRONGLY recommend replacing the PM banjo with a Oneway 20″ banjo. Do this BEFORE you start buying additional tool rests and you will save a lot of money. Because the PM banjo requires special tool rests with an extra long tool post and thus they cost more.
 The Oneway banjo design is simply the best out there. No contest. Order the banjo directly from Oneway via there web site under “Toolrest Base Retrofit for Other Lathes”. I have a Oneway banjo on my PM3520B and people love it! The price on 9/2017 was $310 plus shipping of $40 to TX.
Feedback from a reader in 2017 indicates that Oneway will say that you need “Oneway Part No. H0082 – 16″ Banjo For 16″ Swing Lathes”. This causes confusion because the PM3520B is a 20″ swing lathe. I have the “Oneway Part No. 2407 – 20″ Banjo For 20″ Swing Lathes” and it works just fine. This is the one I recommend if you want to use standard tool rests on your 3530B. If you want to use the extra tall tool rests that Powermatic ships with the 3502B then you need “Oneway Part No. H0082 – 16″ Banjo For 16″ Swing Lathes”. Note: This is also confusing because the Oneway part number on there web site is 2407. But, the part number cast into the side of the actual 20″ Oneway banjo is 2408.
Note: The rumor is they redesigned the banjo on the new PM3520C model. They are reusing the banjo from PM90 lathe that has better tool rest height locking mechanism. This would be a welcome improvement. However, the banjo will still not be as good as the Oneway and it will be to low for standard tool rests.
 If you need more than 20″ of swing the 18″ Bed Extension ($450 on 7/26/2015). This will increase the swing to 36″. The bed is 18″ long. It can be mounted in line with existing main bed or in a position that is 8″ lower than main bed.
The new PM2020 (short bed version of 3520B), I guess is ok if space is an issue. But you really don’t save any money!
The PM2448 is overkill. Not worth the money.
Powermatic is a big name dealer, with lots of products. It does not have to make all it’s money on lathes. So it can sell a really great lathe like the PM3520B for a great price.
By from a local dealer to get the best price and delivery options.
2. Stubby S750 (No longer available)
 I really like the Stubby design with a John Jordan stand. It is a very stable lathe. I like the sliding bed ways.
But, I can’t recommend it, because you can not buy one. The company that made it is out of business.
3. Oneway 1640, 2HP is $4510 on 7/26/2015 and still $4510 on 2/5/2017.
 Many people over look this lathe because it is not Oneway’s top of the line. It is the best Oneway lathe for the money in my opinion.
However, the Powermatic 3520B is less money and a better lathe. So the only reason to pick this lathe is if you want to rough out your bowls between centers and then finial turn them outboard. Removing the tailstock and sliding down the headstock on Powermatic 3520B (or any other lathe) is not hard but it can get really old, really fast.
The Oneway wins out over the Vicmarc VL300 because you can turn outboard on the Oneway.
I don’t like the other Oneway lathes. See Lathes I DO NOT recommend below.
Unverified feedback from a reader in 2017 indicated that Oneway no longer offers lathes with a 1-1/4 x 8 threads.
Special order from Oneway with 1-1/4 x 8 threads. DO NOT settle for the standard M33. Spindle adapters suck! No charge for 1-1/4? I don’t care what it costs. M33 is dead! Extra cost for 1-1/4″ x 8 will save you a bundle in the long run!
By from a local dealer to get the best price and delivery options.
4. Vicmarc VL300. $6200 on 7/26/2015 and still $6200 on 2/5/2017.
 Vicmarc lathes are very good. Lots of people like them. But current US prices are on the high side.
I don’t known any good reason to pay extra for a Vicmarc when you could get a Powermatic 3520B for less. You can turn outboard on a Oneway. But not on a Vicmarc.
The new Vicmarc lathes have a swivel headstock. Does this weaken the headstock? I would go with the older, solid headstock on VL300.
5. Magma Black Titan 400. $9000+ Not available in USA.
 This is my dream lathe. The ultimate lathe! The only thing I have seen that comes close to my VB36 lathe or even surpasses it. VB36 quality and built like a tank. With a swivel head that is also a great spindle turning lathe.
6. 220 Volt Laguna Revo 18/36 Lathe. $2500 on 2/6/2017.
The 220 volt version of the Laguna Revo 18/36 is now my low cost “Recommended 220 Volt Lathe”. It replaces the 220 volt Jet 1642 EVS that is now longer available. I don’t like the new Jet lathes (Jet 1640 EVS, 1840 EVS or 1840 DVR). See my reasons below.
At this point in this blog I use to tell people. “If I was held at gun point and I had to recommend a lathe under $3000, I guess it would be Jet 1642. I would not be happy about it!” I don’t feel that strongly about the Laguna lathes. I think the Laguna 18/36 is a little better than the similar Jet 1642. The Powermatic 3520B is definitely a better lathe than Laguna or Jets. The 3520B is worth the extra money.
See 110 Volt Laguna Revo 18/36 Lathe above for more comments.
Bowl Turning Lathes (220 Volts)
1. Outboard turning on a Oneway 1640 with a 24″ Bed Extension.
2HP is $4510 on 7/26/2015 and still $4510 on 2/5/2017. +$460 for 24″ Bed Extension.
 Currently I think the best bowl lathe is just turning outboard on a Oneway 1640 lathe. The price and HP is right!
I actually known people who have done this. At least one of them has never used the inboard side of his Oneway 2436.
The Oneway lathes 1640, 20xx, or 24xx are the only ones where you really can turn outboard. Because they have full size bearings in the headstock on outboard side and full size spindle threads.
You can rough out a bowl between centers on the inboard side of a Oneway. Then mount it on a faceplate or chuck on the outboard side of the lathe. Beware! This is going to require a lot of floor space for the lathe and space around the lathe.
The Oneway 1640 is very attractive for outboard turning because the bed extension on the outboard side is lower than the main bed on inboard side. See photo. Thus the swing on the outboard side is 24″. This should be plenty for most bowl turning!
 If you need more than 24″ of swing then remove the outboard bed and use a stand-a-lone Powermatic 520B Outboard Turning Stand ($520 on 7/26/2015.) Outboard turning stands get mixed reviews. The PM is the best of the lot. The best solution is really the floating tool rest beam on a VB36 lathe.
See #3 above for my comments about ordering the lathe with 1-1/4 x 8 spindle rather than M33. M33 is dead!
2. Sliding Headstock Lathes
You can side the headstock on Powermatic and Robust lathes and then turn bowls off the end of the lathe bed. This works. But, turning more than one bowl in a session becomes real old, real fast!
Because doing the following repeated, becomes tedious. Starting out between centers, removing the tailstock, sliding down the headstock and banjo, turning the bowl, sliding the headstock and banjo back, reinstalling the tailstock, finishing the bottom on a jam or vacuum chuck.
The headstock on my Powermatic 3520b is heavy. It takes a lot of effort to slide it. If the bed is a little dirty from turning green wood or a little saw dust gets in the way then things get ugly.
Turning outboard on a Oneway avoids all the sliding headstock BS. But, it requires a lot of floor space.
3. VB36 $9000 on 7/26/2015
 I have a VB36 and I love it. It is the best lathe out there for turning bowls. But, I can not recommend it because you need to purchase a VB36 with a tailstock for safety. With the tailstock the price is over $9000 in US due to exchange rates, etc. To much!
Even with a tailstock the VB36 is really only good for bowls. The bearings in VB36 headstock are great for bowls. But really suck for spindle work, even with the tailstock.
I absolutely love the bayonet head, the floating tool rest beam and tilt away tailstock on my VB36. These features drive my friends and students crazy. But, I love them and wish all lathes had them!
If you get a VB36 then you must get a Benson Adapter for tool rest! A VB36 without a Benson Adapter sucks. With a Benson Adapter, it is the best tool rest on any lathe!
The VB36 is now made by Steinert in Germany. The old manufacturer in England was very good the new manufacturer is probably even better.
Lathes I DO NOT Recommend
Beware! Lots of sacrilege here!
There are going to be lots of people who do not agree with what I have to say here. They are entitled to there opinion. And I am entitled to my opinion.
1. Any Jet Lathe. Quality to low.
 Jet lathes are popular with new turners because the price is right and some models run on 110 volts. But, I just can’t recommend them. Some times I hear good stories. But, to many people, I known have been disappointed or very disappointed.
I known someone who has a Jet 1642 and likes it. But, he understands it has limitations and discounts them because he feels it is good enough for what he needs.
I have turned a lot on Jet 1642 lathes at the Brookfield Craft Center. I really hate the banjo on the Jet 1642 with a passion! It just will not stay put when I turn bowls. The STUPID little knob that is suppose to hold the tool rest firmly in the banjo does not even come close! The tool rest is always moving around. Err… The banjo is also always moving around on the ways. Because the banjo hold down and locking mechanism is also Micky Mouse! Err…!!! If I owned a Jet 1642 I would replace it with the Oneway 16″ banjo in a second! See my Oneway Banjo comments above under Powermatic 3520 lathe.
In this blog I use to tell people. “If I was held at gun point and I had to recommend a lathe under $3000, I guess it would be Jet 1642. I would not be happy about it!” The Jet 1642 is no longer available. So, I guess I dogged a bullet. I now recommend the Laguna Revo 18/36 for a lathe under $3000.
I don’t like the new Jet lathes that replaced the Jet 1642. Even at gun point I would NOT recommend one of the new ones. I don’t like the new Jet 1640 EVS, or the Jet 1840 EVS or the Jet 1840 DVR. I DO NOT like rotating headstock lathes. They have a well deserved bad reputation. I DO NOT like DVR lathes. They have a well deserved bad reputation. All the big names lathes (Powermatic, Oneway, Robust, etc) use belts, because belts work better! They don’t use rotating headstocks because there is no way to make the headstock dead rock solid and there is no good way to get the tool rest into the right position and make it dead rock solid.
Avoid any Jet lathe that does not have variable speed.
 Avoid the Jet 12xx an 1442 lathes like the plague! The motor in back interferes with the swing on right side of head stock! The rotating part of the headstock is to wimpy, etc, etc.
The Penn State Mini lathes are better than Jet. Well, at least, less money.
The Powermatic lathes appear to be similar to Jet. But, have better bearings, etc. Powermatic is a far better choice then Jet and worth the extra bucks!
2. Any Nova Lathe. To wimpy.
In particular I do not like the Nova DVR lathe. Pushing AND HOLDING the buttons to go faster or slower, drives me crazy and is a HUGE waste of my time! I known I am not the only person who feels this way! And yea, I known you can program it to avoid this. Years have gone by, and I am still waiting to meet the 1st person who has SUCCESSFULLY programmed it.
The new “Dial-In Speed Knob” on the new Nova Galaxi DVR 1644 Lathe is a much needed improvement. But, is it really an improvement? Or did they just fixed a really crappy design. They now have, what all other lathes have had for a long time.
The new Galaxi DVR 1644 still has a wimpy bed and a sliding and rotating headstock that has a bad reputation for not being dead rock solid.
The bed of Nova lathes is to wimpy. To thin and flexible. So the banjo and tool rest flex to much. The screw in the tailstock is to wimpy. The stand is wimpy. The headstock locking mechanism sucks. etc. etc.
I known lots of people who own a Nova DVR lathe and love it. If they love it, then generally they like to do small things and don’t push the limits.
I also known people who have burned out the motor in headstock or have issues with the electronics. They are really screwed because everything is built into the one piece headstock and can not be replaced at any reasonable price. They love to do big things or they learned to love doing big things and pushed the Nova’s limits. They learned the hard way that the Nova swing may be 16″, but, you really can not do lots of bowls over 8″ to 10″.
People primarily purchase Nova lathes because they are 110 volts and the price is right. I think they should just upgrade to 220 volts and spend the extra bucks for a great lathe. Like, a Powermatic 3520B. See my 110 volt my comments above.
No resale value? Nova lathes are hard to sell because they may have been ridden hard and put away wet. They don’t hold up well due to, wimpy bed, etc.
If you are looking for a lathe in the Nova price range take a look at the new Laguna Revo 18|36 lathe. I don’t recommend it (see below), but it is a lot beefier.
3. Oneway 1224 Lathe
This lathe is generally not liked by most people. I turned on one for a week at a craft school. It is not as bad as people say. But, I understand why people don’t like it.
The design is old and tired. The 1″ spindle sucks. Only 12″ of swing on any lathe causes issues when you try to turn bowls with the handle in down position.
4. Oneway 24xx and 20xx Lathes
Big time sacrilege here! I own 2 Oneway 2436 lathes, 1.5 hp. And I have turned on lots of Oneway 24xx lathes.
Realistically, I don’t think anyone needs more than 16″ to 20″ of swing. So 24″ of swing is over kill.
Only 1.5 hp or 2 hp is not an issue in my experience. Oneway uses good motors and vector drives that make it’s 1.5hp lathes out perform other lathes.
The Oneway 1640 is a very good lathe. The best Oneway lathe. If/when you need more than 16″ of swing then turn out board.
The Oneway lathes 1640, 20xx, or 24xx are the only ones where you really can turn outboard. Because they have full size bearings in the headstock on outboard side and full size spindle threads.
I my not so humble opinion M33 is dead! No other lathe manufacture has picked up on the M33 thread spindle size. All of the European lathe manufactures go with 1-1/4 x 8 threads.
M33 and 1-1/4 x 8 are virtually the same size! M33 is just a tiny bit larger than 1-1/4. Thus M33 is not bigger, stronger, etc.
If you get stuck with a M33 Oneway lathe then you can not exchange chucks, face plates, and accessories with your buddies, club members, etc. M33 to 1-1/4 spindle adapters are a pain to use, introduce problems and are not cheap. Special ordering your Oneway lathe directly from Oneway with a 1-1/4 threads will save you a lot of headaches and money in the long run.
5. Any Robust Lathe
Major, major, major sacrilege here.
Currently, all the big name woodturners can’t do enough to sing the praises of Robust lathes. Why? My guess (and it is a guess) is because they are getting really sweet deals on new Robust lathes for there woodturning schools and/or there is lots of room for sales commissions in Robust’s over inflated prices.
Robust lathes have adjustable legs. A long overdue advancement. Otherwise, I don’t need to pay the big bucks they want for Robust lathes. I don’t need Stainless Steel Ways, digital speed read out, etc.
6. Powermatic 4248B
The big bucks for this lathe just don’t make sense. It is just a bigger version of the 3520B for a lot more money.
If you need more than 20″ of swing then get a PM 3520B with the 18″ Bed Extension ($450 on 7/26/2015). This will increase the swing to 36″. The bed is 18″ long. It can be mounted in line with existing main bed or in a position that is 8″ lower than main bed.
If you want the Gary Sanders light stand on the PM 4248B then you can order it direct from Oneway ($289 on 7/26/2015).
7. Any Lathe NOT sold by Packard Woodworks or Craft Supplies USA.
i.e. Grizzly, Harbor Freight, Shop Fox, Rikon, Apprentice lathes, etc.
In the same class as Jet Lathes? Or are they really in the Harbor Freight junk class? You will not be happy!
Grizzly may be a cut above the others. But, I still think you will not be happy in the long run.
The crappy aspects of these lathes will just hold you back. Sooner or latter you will give up on woodturning or decided to buy a real lathe.
The new Apprentice 812 VS Mini Lathe sold by Craft Supplies with that crappy plastic tail stock hand wheel and #1 MT is a copy of a really old design with a well deserved really bad reputation.
8. Any Metal Cabinet Lathe
i.e. any lathe mounted on top of a metal cabinet. Any lathe with motor in a metal cabinet under the headstock.
The noise from the rock rattle and roll of any lathe with a old fashion metal cabinet will drive you crazy.
This pretty much rules out, all of the old lathes on Ebay, etc.
9. Any Vega Lathe.
Bare bones, industrial lathes for companies who hate there employees.
The banjo handle on the Vega bowl lathe is a real ball buster and huge pain in the back side. It flops all over the place when you are trying to use it. The tailstock is a complete joke!
No sacrilege here. Everyone pretty much agrees.
10. Laguna Lathes (added on 8/9/2015)
I don’t recommend any of the Laguna lathes. They come close but no cigar.
Beware. I have only seen these lathes in photos. I have never seen them up close or turned on them.
The Laguna mini lathe simply costs to much. The Penn State TCLC10VS is a better deal. Easier to change belts, etc.
The Laguna 16-43 and 18-47 lathes, look like more expensive versions of the same old tired designed offered by Jet and Grizzly.
The Laguna Revo 18|36 looks like the old Delta 16-42 Steel Bed lathe with a different headstock. The Delta was 110 volts. If it was still available it would be at the top of my recommend 110 volts lathes. Unfortunately the Laguna 18|36 is 220 volts and thus it does not really stand out. It is probably better than the Nova lathes in the same price range due to being a lot beefier.
Updated 2/6/2017: Laguna now offers a 110 volt version of there Laguna Revo 18/36 lathe. It is now my recommended 110 volt lathe. See “Recommended 110 Volt Lathes” above. The Jet 1642 lathe is no longer available and I don’t like the new Jet lathes. Thus, the 220 volt version of the Laguna Revo 18/36 lathe is my now my low cost “Recommended 220 Volt Lathe” above.
The Laguna 16-43, 18-47, and 20-36 lathes appear to no longer be available. No real loss here. I have not changed my mind about the Laguna 24-36. See comments in next paragraph.
The Laguna 20-36 and 24-36 lathes appear to be lesser copies of the Powermatic 3520B design for virtually the SAME price. For the same money why not go with the well known and loved PM 3520B?
I seriously question the headstock on the 20-36 and 24-36 lathes. It appears not to be as beefy as the PM 3520B. And the beefy headstock with beefy bearings is one of the great features of the PM 3520B. The belts and pulleys inside of the Laguna headstock are definitely not up to the PM, Oneway, etc standard and definitely don’t look like they are wide enough to drive 3HP (or even 2HP).
The 2 HP of the PM 3520B is plenty. You don’t need 3 HP.
The ability to mount the optional bed extension on the front of the lathe near the headstock is of little value in my experience. You can do this on Stubby lathes. But, I suspect, most people don’t. Because it gets in the way and putting it on and taking it off is way to much trouble. I turn on the headstock side of my PM 3520B all the time. I just move the banjo up next to the headstock and turn the tool rest to be perpendicular to the ways of the lathe. It works great. No bed extension in the way. I don’t need a second banjo, etc.
People say I have never seen an idea, I can’t improve. They may be right. I liked the “use cloth shower curtains” idea but the track, hooks and string shown in the article were to wimp and expensive for me. I decided to make my own long and cheap hooks and hang them from cheap EMT pipe.
Here is how I did it.

Two white linen shower curtains in use.
My VB36 lathe is behind the curtains.
Note the pile of wood shavings on the floor. The shavings stop where the curtains stop.
The curtains do not go all the way to the floor because it is not necessary. Curtains that drag on the floor get dirty and are a pain to deal with when you want to clean up the shavings. Or, store the curtains out of the way, etc.
The curtains, also do not go all the way to the ceiling because it is not necessary. Throwing the shavings over the curtains while turning is not likely.

This photos shows what was beind the curtains. My VB36 lathe and a few shavings.
The curtains did their job. They stopped a lot of shavings from being spread all over the studio.
I like linen (aka cloth) curtains rather than plastic! You DO NOT need plastic to deal with green (aka wet) wood! Water just runs down the linen curtains. That's why they call them "Shower" curtains!
Plastic curtains suck. They smell bad. The hook holes tear out. To much weight and bulk. They are a pain to deal with. Hard to slide around and hard to store up out of the way (see last photo).
Plastic curtains make your studio ugly and dark. White linen curtains reflect light and make your studio a nice place to work.

A made a few shavings here. 2 to 3 bowls worth.
The ash logs were green and wet. Lots of water came flying out when I ran the lathe around 700 to 1000 rpm.
The water made a mess on my faceshield but was handled by the linen curtains, no problem. You don't need plastic curtains.

This photo was taken, looking out, from inside of the curtains. You can see that the shavings stop were the curtains stop. You DO NOT need curtains that go all the way to the floor.
Bfore the shower curtains, I used a painters tarp. The tarp was to long. It dragged on the floor. It got dirty and looked ugly. It was a pain to deal with. To heavy. To much bulk. Cleaning up the shavings was difficult because I had to move the tarp out of the way or hold it up, etc.
Now I can just push the curtains out of the way with my broom or shovel when cleaning up the shavings because the curtains stop 6" above the floor.

I hang the shower curtains from home made hooks that hang on a pipe that is hung from the ceiling.
I make my own hooks from welding rod (see next photo).
I adjust the lenght of the hooks so the curtains hang 6" from the floor. The hook end that goes over the pipe is big and open so I can easily slide the curtains along or quickly remove them.
The pipe is 3/4" EMT Electrical Conduit (aka thin wall galvanized steel pipe) from local big box hardware store. It is cheap and comes in 10 foot lengths. I like to be able to slide my cutains the entire lenght of the 10 ft pipe so I just hang it from the ends. With light weight linen shower curtains, and 3/4" EMT, sag is not a problem. 1/2" EMT would sag to much.
I hang the pipe from ceiling using #12 SOLID THHN copper wire (see latter photo).

I make my own hooks out of 1/8" RG45 Gas Welding Rod. The rod is copper coated steel. It is sold in 36" lengths by the pound.
The rod use to be available at any local welding supply store. But, it has gone out of fashion and is now hard to find. I get mine fromwww.mcmaster.com #7972A123, $7 for 1 pound on 3/26/2015.
I cut and bend the rod with 9" Linemen's Plyers from local big box hardware store. You need a full size (9") set of Linemen's Plyers to deal with 1/8" steel wire. Not the cheaper mini ones they try to sell you these days. Or you can make due with a vise and hacksaw.

I use a vise to close the hook on the curtain.
I don't want the hooks to come off and get lost when I take down the curtains to get them out of the way or move them to a different location in my studio.
I only put a hook in every other eye in the curtain. This allows the curtain to fold nicer and take up less space when you slide it out of the way (see last 2 photos).

I like to be able to easily install and remove the curtains.
Remove them to keep them clean. Or move them to another location in my studio.
I use a green twist tie to keep the hooks organized when I remove the curtains. The twist tie is semi permently attached to one of the hooks so it does not get lost when I spread the curtains out (see green tie in next photo).
I can easily slide or remove the curtains because my hooks are just big enough to fit losely over the pipe.

In my first photo you may have noticed that my curtains cut across the room at a 45 degree angle.
This photo shows how the cross pipe intersects the main pipe at a 45 degree angle and is just hung from the main pipe with a fancy locked hook I made out of RG45 welding rod.
The other end of the pipe is hung from another pipe on the other side of room with a similar hook. Thus I can easily move the cross pipe by sliding it along the main pipes. Or, I can easily remove it by just sliding the end out of fancy hook.
Notice the blue filter in the background. This is the output from my dust collector. It is mounted in the middle of my studio. It can shoot its output over my curtains. That's good, because the air is clean and I use the dust collector to distribute the heat and AC in my studio.

Here is how I hang the pipe form the ceiling. I use #12 THHN solid copper electrical wire from local hardware store. It must be SOLID wire rather than stranded.
I attach the wire to the ceiling using a long dry wall screw and fender washers. I have found that dry wall screws are simpler and cheaper than screw hooks.
Note: This is a bad photo angle. The silver screw hook in the background is attached to the black wire that is holding up my air cleaner. It has nothing to do with the pipe. I hang the air cleaner so fan vibration is not transmitted thru the ceiling to the rest of my house.
The pipe is electrical EMT. I put an EMT coupling on the end of the pipe or pass the wire thru the pipe to keep it from slipping off.
I only support the pipe at each end so I can slide my curtains the entire 10 ft length of the pipe.

Here is what the curtains look like when they are slide over to be stored out of the way.
There are 2 curtains here. Each of them is 6 ft by 6 ft. The nice light weight linen shower curtains don't take up much space.

Here is what the curtains look like when I loop them over a big red hook to really get them up and out of the way.
The big red hook is from local hardware store. They sell them for hanging up ladders and bikes.

The shower curtains I use are: "Croscill Fabric Shower Curtain Liner, 70-inch by 72-inch, White" by Croscill. $11 each from Amazon on 3/26/2015.
You are probably going to need 2 or more 6 ft wide curtains.
Updated: 5/24/2018. Add “Project Books” section and Jordan “The Aesthetics & Properties of Wood” DVD.
Here are the books and DVDs I recommend to students when I teach a class.
You may be able to get these books from your local library, otherwise purchase from Packard Woodworks Inc or Craft Supplies USA or Amazon. I often save money by purchasing used books via Amazon.
Spindle Turning
Book: Woodturning: A Foundation Course by Keith Rowley
 This is my goto book for Spindle Turning and the “Laws of Woodturning”
Everyone should have a copy of this book for the “Laws of Woodturning” chapter. The woodturning world seems to generally agree these are the safety laws that should not be violated for any reason! The laws are simply stated and then succinct explained in words with good diagrams.
This book also has good descriptions of the spindle tools (roughing gouge, parting tool, spindle gouge, skew, etc) for beginners. Good step by step diagrams of how to use the tools to turn beads & coves, etc. Also good photos.
The bowl turning (faceplate turning) stuff in this book is useful but dated. Most people now use bowl gouges with an Ellsworth/Irish/Sinde grind rather than the Traditional grind shown in this book. Thus I prefer the Ellsworth book shown below.
DVD: Keith also has a DVD. Same tile and image. I think the DVD is good for beginners. A little slow for experienced people. The DVD does a good job showing the “Laws of Woodturning”.
The traditional grind bowl turning stuff on DVD is not my cup of tea. The goblet project on the DVD is good for beginners and there is also an interesting lamp project on the DVD.
The book is a must have. The DVD is nice to have if you can pick up a used copy on Amazon for $20 or less. You can check out the preview on YouTube.
Bowl Turning (Faceplate Turning)
Book: Ellsworth on Woodturning: How a Master Creates Bowls, Pots, and Vessels, by David Ellsworth
 This is my goto book for Bowl Turning, Hollow Forms and Sharpening.
This book is a MUST HAVE!
Very good chapters on Sharpening, Faceplates, Cut Rim & Natural Edge Bowls, Hollow Forms and Sanding. Definitely worth reading cover to cover.
All of the photos and diagrams in the book are top notch and very useful.
 DVD: The Ellsworth Signature Gouge & Sharpening Jig
This DVD is a MUST HAVE!
It is a fantastic learning aid because the TV camera is over David’s shoulder. So you see, what David is seeing. You feel like you are looking thru his glasses.
You can see precisely how David is holding the gouge and manipulating it. You can see the angle of the gouge, where and when David rotates the gouge, etc.
I took David’s beginner class at his studio in Bucks County, PA. I loved it. But, it was a lot to absorb in a short time. I really learned to turn by watching this DVD. I would watch the DVD. Try something on my own. It would fail. Then I would go back to the DVD and watch it over and over, forward and reverse. Until, I understood why it works for David. “Oh Look: Right there! He rotates the gouge just a little bit, and it opens up and cuts, no problem!”
Note: This DVD actually first came out as a video tape long before the above book. It now, very nicely, complements the above book.
Check out the preview on YouTube before purchasing.
Book: The Art of Turned Bowls: Designing Bowls with a World Class Turner by Richard Raffan
 It is always good to get a second opinion. This book complements David Ellsworth’s book nicely.
The pictures in the book are gorgeous. However, the reason I really recommend this book is for the “Profile Templates” drawings that show several different variations of basically the same bowl design. The good and bad points of each variation are discussed in the text. There are lots of great drawings.
There is some good “Design” stuff in Ellsworth’s book. This book really goes a lot further into “Design”. It also has 2 good chapters on Surface Decoration.
Project Books
There are no fixed (must do) projects in my Woodturning Workshop classes. You can do anything you want. However, some students need something to help get them started. I use the following books in my classes. Listed below in the order I like them.
We do the projects in the books as is. Or use it as a source of inspiration. Then improvise on the theme. Like Jazz music.
 Book: Weekend Woodturning Projects: 25 Designs To Help Build Your Skills by Mark Baker
I really like this book because the projects all have really great lines/shapes. It is really head and shoulders above all other project books.
Great book format. Great full page photo of the project on the left with a very good full page drawing with dimensions on the right.
All of the photos in Mark’s books are of REAL projects. NO Sketch Up (or what ever) 3D renderings of things the author has not turned.
 Book: Woodturning Projects: A Workshop Guide To Shapes by Mark Baker
I also like this book, but not as much as the above book. This was Mark’s 1st project book. The above book is Mark’s 2nd project book.
The format of this book is also very good. Photo of project and text on left with drawing with dimensions on the right.
The projects in this are NOT the same as the above book. This book has a lot more projects students often want to try. It has 10 Boxes, 10 Bowl, 10 Platter, 10 Hollow Form and 10 Natural Edge projects. All with good photos and drawings.
Both of Mark’s books suffer from being Metric first, then translated to English dimensions with stupid 1/32″ accuracy. So you see dimensions like 31/32″ rather than 1″ in the project drawings. I just round everything off to 1/8 of an inch. Anything less than 1/8 of an inch is to small for me to worry about.
Book: Bert Marsh: Woodturner by Bert Marsh
 When my students with some experience flip thru this book they always fall in love with something. The shapes of the bowls and vases in this book are just fabulous.
Thus we often use this book as a source of inspiration. The overall sizes of pieces are given. But, there are no drawings with dimensions, how to text or photos, etc. It is really just a picture book.
This book is listed again below under “Picture Books”. See my comments there on how to find a copy.
Book: Woodturning Forms and Materials by John Hunnex
 This is a picture book that students with some experience like to use as a project book. Students are drawn to some of the surface decoration stuff, exotic woods, turning plywood, and laminated platters.
There are good pictures of over 100 pieces. The format of the book is 1 piece per page. Photo on top with brief text on bottom. The text shows overall size of piece then a brief description of the piece. There are NO step by step directions or drawings with dimensions.
Picture Books
Book: Bert Marsh: Woodturner by Bert Marsh
Last year, I attended a woodturning symposium at which a well known Irish demonstrator suggested that if you want to turn a great looking bowl just pick out anything in Bert Marsh’s book. I agreed with him wholeheartedly.
The shapes of the bowls and vases in this book are fabulous.
This book has been out of print for a long time. Used copies shipped from the UK, use to be around $150. You can now get a used copy in the US on Amazon for around $10.
Book: New Masters of Woodturning: Expanding the Boundaries of Wood Art by Martin & Wallace
 This book is a fabulous picture book with artist profiles. The format and layout of the book is very appealing and the photos are really inspiring.
Everything in the book has been enhanced with surface embellishment (carving, painting, etc). If you are looking for simple things you can turn then look elsewhere! (Like in the Raffan book, I recommend above.)
If you are looking for inspiration then this is the book! If you are looking for artists that you want to see in demos or take a class with then this is the book!
This book is currently out of print and around $36 used on Amazon. I purchased mine new for $30.
Book: Masters: Woodturning: Major Works by Leading Artists by Lark Books
 This book is similar to the above book. Great photos of highly embellished work with artist profiles. This book has more photos for each artist. But, I like the above book better.
At only $20 on Amazon it is hard to go wrong with this book.
Note: I think this book replaces the old “500 Wood Bowls: Bold & Original Designs Blending Tradition & Innovation by Lark Books” that is now out of print and definitely not worth the $50+ used price on Amazon.
Hollow Forms
I believe people should learn to hollow using a set of SMALL Ellsworth style hollowing tools. After you have mastered the small tools then switch to a more modern Rolly Munro style tool held in a Trent Bosh “Hollowing Tool Stablizer”
I am not a big fan of Captured Bar Hollow Systems (Jamieson, etc).
I don’t known of any books that cover Munro or Captured Bar Hollowing Systems.
Book: Ellsworth on Woodturning: How a Master Creates Bowls, Pots, and Vessels, by David Ellsworth
There are two good Hollow Form chapters in David’s book using his Ellsworth style hollowing tools. See my comments above under “Bowl Turning”
DVD: Tape ‘T’- Tools for Hollow Turning by David Ellsworth
 This is a very dated video. Circa 1994. The fundamentals of hollowing have not changed, thus this tape still has lots of good stuff for beginners. It features hollowing with LARGE Ellsworth style tools. I recommend using SMALL style Ellsworth tools rather than LARGE. Everything on this tape applies to SMALL or LARGE tools.
Check out the preview on YouTube before purchasing.
 DVD: Hollow Turning by John Jordan
This is another good dated video. John Jordan’s method of finding his way around inside of a hollow form is different than Dave Ellsworth’s.
I use a mix of the two methods. It is always good to get a second opinion thus I like recommend this DVD for beginners.
Check out the preview on YouTube before purchasing.
Others
 It is hard to go wrong with any DVD by Mike Mahoney. His “From Tree To Table” is one of my favorites. It is now out of print. His “Heirlooms” DVD is the closest replacement.
It is hard to go wrong with any book by Richard Raffan. However, he uses a Bowl gouge with a Tradition grind rather than an Ellsworth/Irish/Side grind.
Wood
 DVD: The Aesthetics & Properties of Wood by John Jordan
What is the best way to cut up a log to make a bowl or hollow form? Why do my finished projects crack? Why do my bowls go oval? Why do the rims of my bowls distort? What is the best way to orient the grain in a log?
This very good DVD by John addresses all of the above questions plus a lot more. It is full of simple and PRACTICAL advice on how to avoid a lot of problems and pain.
Learning Versus Demo DVDs
In my opinion there are 2 general types of DVDs. “Learning” and “Demo”. I prefer “Learning” DVDs. All of the DVDs I have recommend above are “Learning” DVDs.
In “Learning” DVDs the video camera is mounted above the bed of the lathe or over the shoulder of the turner. This allows you to see how the turner is holding the turning tool, moving the tool, tool angles, etc. Thus you can learn from the DVD.
In “Demo” DVDs the video camera is facing the turner, like being in the audience at a demo. You get a feel for what the turner is doing, and maybe some inspiration. But, you really can not see how the turner is using a tool and thus really can not learn from the DVD.
]]>They sell it to protect fancy tile and wood floors in houses while they are building them or remodeling.

Ram board comes in 38 inch by 50 foot rolls. At $30 it is close to my price limit. But, I like it. It is thick and tough. After a couple of days it lays flat.


www.ramboard.com

It cuts good and easy with airplane snips.

It makes a good workbench cover. Thicker and thus tougher then the Red Rosin paper I use to use. I had to temporarily tape it down flat. I will remove the tape in a few days after the Ram Board and carpet under it flatten out.
Long ago, I covered my workbench with a chunk of carpet to make it softer. I don’t like to break turned bowls, etc when I accidentally drop them while working on them. I also don’t like them to slide around.
Then, a few years latter I covered the carpet with a chunk of Red Rosin Paper. Because, I got tired of wood chips and saw dust sticking in the carpet. To hard to clean. The paper also keeps my workbench clean when I paint things. I often use acrylic paint or milk paint to decorate my wood turnings. When I have students, I often explain things by drawing on the paper.
But the Red Rosin Paper was to thin. It needed to be replaced to often. Because, I often tour it or cut thru it by accident.
For years I have been looking for something heaver, that was cheap and did NOT have a slick surface. I have used this new Ram Board stuff now for a few months and it works great!

I really like the “Print This Page” link at the bottom of each project page. It allows me to print out all of the photos with captions. This allows me to take the print outs down to my studio and give them a try.
Under the “Projects” pulldown menu on main page there are good sub categories for faceplate work, hollow forms, etc.
Note: I don’t like the way their web page links use a database number like “page.asp?p=1943” rather than a page name. When they change things around the links in this post will probably stop working. Ugg!
]]>I have created a new handout that covers MY suggestions for a Modern Tool Set. It is on my website here:
http://www.carlford.info/pages/jigs_tools/modern_tool_set/modern_tool_set.pdf
Real Hard Maple needs to be species Acer Saccharum. Which is commonly known as Hard, Rock or Sugar Maple. Soft Maple is Silver, Red, Striped, Bigleaf Maple or Box Elder.
I like the figure in Hard Maple. It makes nice spindle turnings. Soft Maple does not thrill me. But, In general, I don’t like Maple because it is to hard to sand and people always give me ugly Soft Maple.
I found a nice “Wood Database” article on the web that explains the difference.
“Differences Between Hard Maple and Soft Maple”. Click here for web. Click here for PDF.

The Wood Database has some other interesting articles here. Like “The Ten Best Woods You’ve Never Heard Of”.
]]>
 Handy Sandpaper
Here is how I keep my sandpaper handy. I attach it to 1/8" plywood
boards and hang it up.
When I am ready to use the sandpaper I take the board over to the
lathe and set it on the "ways" of the lathe.
Then all the grits are handy for quick changes.
I have one board for 2" disks and another board for 3"
disks. I recently added a third board for chunks of my Stikit sandpaper.
 Sanding Board
I use one board for each size disk.
This board is for 3" disks. The grits are marked in the
center. The disks on the left are on SOFT foam interface pads. The disks on
the right are on HARD interface pads. See next photo for a better view of
interface pads.
I like the blue sanding disks and foam pads from Vince's Wooden
Wonders. For more into see my "Greate Polyurethane Finishes"
handout at http://www.carlford.info/pages/demos_classes/great_poly_fi
nish/Great_Poly_Finish.pdf
 Velcro on Sanding Boards
I only use hook and loop (aka Velcro) disks. I attached them to boards via
velcro. The blue arrow in photo points to velcro.
I purchase a roll of sticky backed velcro at local big box store. I
attach the hook side to the boards in two long strips. The glue on velcro
is wimpy. Thus, I use 1/2" long tacking staples to make it permanent.
The silver bars you see in photo on black velcro are the staples. The
staples are way to long, because I use 1/8" plywood. I just let the
staples go thru and then bend them over on the back.
Note: I only use the hook and loop side of velcro I purchase. I
discard the fuzzy side.
I like the 1/8" birch plywood because it looks nice and light
weight. Any old plywood will do. The thinner the better.
Disks and interface pads are from Vince's Wooden Wonders. I
like the disks that are with "white" rather than
"black" on the bottom because I can write the grit on them.
Otherwise, I have to write the grit on the side.
 Bent Over Staples
The blue arrow in photo points to the staples I just bend over on the back.
Note: I use to have just one board. With velcro on both sides.
2" disks on the front and 3" disks on the back. This DID NOT work
well. The disks on the bottom side always came off and got lost when I set
the board down on the "ways" of the lathe or workbench.
Spindle Turning Sandpaper
When I hand sand or just hold a piece of sandpaper up to something spinning
on the lathe I like to use Stikit sandpaper. See http://carlford.i
nfo/blog/2014/11/stikit-sandpaper
I like to cut up the Stikit
sandpaper into small sheets in advance (more on this latter) and store it
in "Large Binder Clips" (aka large paper clips). I get the clips
at local office supply store.
I use to hang the clips up individually. But, then they would float
around on my work bench while using them and drive me crazy.
Recently, I got smart and attached them to chunk of 1/4"
plywood. Now I can hang up them all at once and place them on the
"ways" of the lathe while using them.
Note: 1/8" thick plywood is to flimsy. It flexes to much when
you try to open the clips. Don't ask me how I know!
 Attach Clips to Plywood
I attached the large binder clips to 1/4" plywood using short 10-24
pan head machine screws (aka bolts).
The blue arrow in photo points to the holes I drilled thru clips.
First, I drilled a hole big enough for shaft of machine screw all the way
thru and then enlarged it on JUST the front side to be big enough for head
of machine screw. Tip: Snap the clips over a chuck of 1/2" scrap
plywood before trying to the drill holes.
I added the 120, 80, etc grit labels using my "Brother
P-touch" label maker.
 Nuts and Lock Washers
On the front side I put a nut between clip and plywood to space the clip
off the plywood a little.
Next to the plywood on front and back I put a multi tooth lock
washer and then a nut on the back. Grind the bolts off flat. No flat
washers. The lock washers dig into the plywood and keep the clips from
spinning around.
Note: The space between clip and plywood is shown latter in
"Store in Binder Clips Photo".
 Husky Tool Cabinet
I store all of my new sanding disks in a tool cabinet next to my lathe.
When I am standing at my VB36 lathe this cabinet is directly behind me. I
put my turning tools down on top of this cabinet when I am adjusting the
tool rest, etc. I open the top draw to get out a new sanding disk when I
need one.
I just got this cabinet. I usually build my own cabinets out of
used low filing cabinets and plywood. But, when I recently went to Home
Depot to look for some nice 7 or 11 layer yellow pine plywood, I could not
find any and this cabinet was on sale for $280? Good steel case filing
cabinets are $100 used and they only have 2 or 3 draws. 2 of them would be
$200 plus casters, etc. So, I went for it.
The cabinet is a Husky "46 in. 9-Drawer Mobile Workbench with
Solid Wood Top". The 18" top it comes with it is nice, but to
narrow for what I had in mind. I replaced it with my own 24" wide top.
The draws are not as heavy duty as filing cabinets, but they are ok and the
draw sizes and heights are good.
The 4" high drawers take my tote boxes, chucks, and face
plates. The 2" high draws are good for turning tools.
 Tote Boxes from Mcmaster
I use "Create-Your-Own Compartmented Plastic Tote Boxes" from
Mcmaster-Carr all over my shop. The size of shelves, cabinets, etc in my
shop are designed to use these boxes.
The box in the photo is 16-1/2" long, 10-7/8" wide, by
3-1/2" tall.www.mcmaster.com
item # 40355T55, $8 on 12/30/14. Dividers are 40355T83 $2 and 40355T52 $1.
Lid is 40355T96, $10.
I like these boxes because they are rugged, the divider slots are
deep and frequent, and the price is right. The price for the boxes and
dividers is good. But, the price for the lids at $10 is a bit steep.
I like the lids (not shown in photos). But, I don't use them
that often because I keep them in drawers or on shelfs where the shelf
above the box is close enough to prevent dust or chips from getting in. I
only use the lids for transport to demos, classes, etc. In photo you can
see there iis lip all the way around the top of these boxes that allows
them to be stacked. You can also use the lip to make your own lids out of
1/4" plywood.
I have a big stack of dividers that I don't use. I bought way
to many when I purchased the boxes. You can make your own dividers out of
1/8" plywood and they often better for long uninterrupted spans.
Because, the plastic dividers need to be intersected. Otherwise they are to
flexable.
The boxes come in 3 sizes and lots of heights. I like the 16-1/2 x
10-7/8 boxes. The smaller 10-13/16 x 8-5/16 boxes are ok, but tend to be to
small. I only use these to fill up a shelf. The large 22-3/8 x 17-3/8 boxes
are way to large. If you fill up one of these you are gonig to need a crane
to lift it.
The boxes come in 2-1/2, 3-1/2, 5, 6, and 8" heights. The
2-1/2" high boxes are to low for most things. I have and like the
other heights.
Note: For smaller, light weight things like scraps of sand paper,
etc. I use "Sterilite 16068024 Storage Tray" from Amazon. Roughly
9" x 6" x 2". Not shown in photos.
 Efficient Use of Stikit Sandpaper
I have found that the best way to make efficient use of my Stikit sandpaper
is to fold it over and cut it up in advance. Here is how I do it.
I start with a roll of sandpaper that is sticky on the back and a
old pair of scissors that I only use for sandpaper.
Note: The pink velcro in photo that keeps the roll closed and thus
clean until needed.
 Tear Off a Chunk
Tear off a chunk about a foot long. Longer chucks waste less paper.
 Fold Over
Fold the sandpaper over on itself. This creates a chuck of sandpaper that rough on both sides. Thus it will not easily slip out of your hands when you hold it up to the lathe.
 Cut Into Small Chunks
Cut up the paper into small random width chunks. Anywhere from 1/2" to
1-1/2" wide.
I like small chunks of sandpaper. Because, I am often trying to
sand up close to some detail that I can't get close to with my sanding
disks. You need lots of edges to get up close to details. A big chunk of
sandpaper has to much middle that can not be efficiently used.
I also like small chunks because I like to use up every inch of the
paper before throwing it away. I can use up all of a small chunk in one
shot and then just throw it away! Thus, I don't have to deal with
storing lots of bigger partiually used chunks.
 Grit on Both Sides
I like my chunks of sandpaper to have grit on both sides so they don't
slip out of my hands when I hold them up to work spinning on the lathe.
Tip: If you want to have good looking hands for photos then
don't dye things purple, red, blue,etc and then wash your hands in
lacqure thinner before taking the photos.
 Store in Large Binder Clips
I like to store the sandpaper in large binder clips (aka paper clips) after
cutting it up.
Note: The space between binder clip and plywood in photo. The space
makes the binder clip easier to use. It is created by a nut between the
binder clip and plywood. Multi tooth lock washers on either side of the nut
to keep the binder clip from spinning.
 Grit Trick
I learned this trick from one of my Wednesday night friends.
After you fold over the sandpaper on itself, you normally can not
see the grit that is now inside. But, you can see it if you hold the
sandpaper up to a light!
 Efficient use of Sheet Sandpaper
I learned this method from Buster Shaw.
It makes efficient use of standard 9" x 11" sandpaper
sheets. I like it, because the method creates the grit on both sides that I
like.
In the photos I am using a sheet of 600 grit Carborundum sandpaper
that I had laying around. This paper is ok, but I like the Norton 3X
sandpaper use d by Buster, better.
Start by dividing the 9 x 11 sheet into 4 equal parts. See black
lines in photo.
Note: I personally never sand raw wood beyond 220 grit. If, I was
using 600 grit sandpaper it would be to sand a poly finish between coats. I
would use a 6" 500 grit red Abralon disk, rather than sandpaper. See
http://carlford.info/blog/2013/01/great-polyurethane-finishes-demo/
 4 Equal Parts
The 4 equal parts after cutting up the sandpaper.
9 x 11 divided by 4. Equals 4 of 4.5 x 5.5
 Fold in Three
Fold the 4.5 x 5.5 sheet into 3 equal parts along the 5.5" dimension.
 3 Equal Parts
You now have grit on the inside and outside. The way I like it. When you
hold this sandpaper up to something spinning on the lathe it will not
easily slip out of your hand.
Open up the sandpaper, to expose the 3rd side after using up the 2
outside parts.
 Grit Inside and Out
Ready to use with grit inside and out.
Or you can make more efficient use of the sandpaper by cutting it
up into smaller 1/2" to 1-1/2" wide chucks like I with my Stikit
sandpaper. See previous photos.

Over many years Andy Barnum developed a great woodturning program at Purchase College in Purchase NY (aka White Plains NY). Purchase is part of the State University of New York and well known for its Arts and Entertainment programs.
Andy is retiring at the end of this year. I will be replacing Andy in the spring. Wow! Wait. No body can replace Andy! I got to find a better way of saying this!
Everything has been finalized. I will be teaching the “Woodturning Workshop” at Purchase starting on February 23, 2015.
It is a “Continuing Education” class. Non credit. Adult students. 10 students are already signed up for the class and the class is limited to 11 people (there are 11 lathes).
I am really looking forward to teaching the class, because the students are a great bunch of guys and girls. Note: The same students tend to take the class over and over.
The $710 tuition may look a bit steep at first. But is really a good deal. It includes $150 for materials. The class is 6 hours a day for 10 Mondays. That’s ($710 – $150) / 60 hours = $9.34 per hour. Or $710 / 60 hours = $11.84 per hour. Just studio time with no instructor is often way more.
Purchase has a big woodworking shop with 11 lathes in the Visual Arts Building. The lathes are a mix of General, Powermatic, Oneway and Stubby. Mostly General and Stubby.
Here is the course description from Purchase Web Site:
Woodturning Workshop
Creating functional and nonfunctional lathe-turned objects. Woodturning has a long and rich history, the lathe being the earliest documented woodworking machine. This workshop examines the evolution of turning and explores how the lathe and its tools are used today to produce art as well as functional objects. A variety of processes are introduced, including: wood selection and preparation, spindle turning, bowl and vessel turning, hollow turning, box making, off-center turning and finishing. Students at all levels are free to explore their own interests. Open to beginners as well as advanced enthusiasts. Tuition includes $150 for materials.
CED1040 / noncredit / $710
Discount: $685 (Purchase College matriculated students, employees, and alumni; and early registration discount)
Instructor: Carl Ford
Mon., 10 a.m.Ù–4 p.m.
Feb. 23–May 4 (10 sessions; no class Mar. 30)
Room: Visual Arts Building, Room 1029
For more info https://www.purchase.edu/departments/AcademicPrograms/ce/GeneralInformation/NoncreditCourses/arts.aspx#spring
]]>“The Art of Hosaluk in Woodturning” by Michael Hosaluk.
 At $60 the 2 DVD set is not cheap. But, I think it is reasonable because it is a 2 DVD set. Each DVD is 3.5 hours. Twice as long as most DVDs. So it is more like 4 DVDs for $15 each. Available from Michael or Packard (packardwoodworks.com).
1st DVD
The first DVD shows how to make (turn, band saw, carve, wood burn, paint, etc) well known Hosaluk projects from his demos and classes. A spin top, a base ball, offset turning, strange fruit, tea pot, footed bowl, and candle sticks.
There is lots of good detail. At the end you feel like you can make each of these projects, no problem.
The chapter on offset turning is one of the best I have seen. Michael and the overhead camera angle, make it look so easy and predictable.
The chapters on tea pot and candlesticks were very interesting. I have often struggled with how to band saw strange shapes safely and how to drill perpendicular holes in round shapes. Michael showed some great, easy and cheap tips that are definitely being added to my arsenal.
I didn’t think, Michael could teach me anything about bowls. I was wrong! He showed how to easily cut feet into the bottom of a bowl with a Japanese saw.
2nd DVD
The second DVD is covers making a sea form box, good form, surface enhancement, design ideas, painting, tools and photo gallery.
The Sea Form Box chapter is very interesting with lots of good tips. Good and simple demo of how to use a hook tool. Lots of band saw and glue up tips.
I of course loved the chapter on Painting because I love lots of color. All of my acrylic painted stuff uses the techniques I learned in a class with Michael.
The images in Photo Gallery were stunning. There are lots of other examples of Michael’s work scatter thru out the DVDs. With a good discussion of them in Surface Enhancement and Design Ideas chapters.
Summary
In the DVDs Michael explains how to use his double beveled detail gouge, roughing gouge, and a hook tool. He also uses a spindle gouge and skew in a few places.
The pace of the DVDs is good. Not to fast and not to slow. Michael “gets to the point” but there is no need to rush when each DVD is 3.5 hours. The shooting angles in the DVDs are very good. Good overhead shots show how Michael is using the tools. Cutting angles, etc.
There is a preview of the DVDs on Youtube at https://www.youtube.com/watch?v=xB9oaDMyjB4
]]>
 I use Porter Cable Stikit Sandpaper for all of my hand sanding.
Note: I use Blue Flex disks for all of my power sanding. See my Blue Flex Sanding Disks blog entry.
• I have 80, 120, 150, 180, and 220 grits.
I generally do not sand beyond 220 grit. If I do sand beyond 220 then I use 6″ Abralon pads by Mirka.
For more info see my “Great Polyurethane Finishes” handout at http://www.carlford.info/pages/demos_classes/great_poly_finish/Great_Poly_Finish.pdf
• I get it from Amazon. 4-1/2” x 10 yard roll. Around $18 on 11/18/2014.
Note: Some times Amazon shows “Stikit” in description and some times they don’t. I think the problem is “Stikit” is trademarked by 3M. Search for “Porter Cable sand paper roll”
• There are other sandpapers that are virtually the same. 3M Stikit? Klingspor?
They use to sell the Porter Cable Stikit sandpaper in local hardware stores. I like it. And I am to lazy to find something else I really like.

• Updated 12/8/24: I like the Norton 3X Sandpaper.
While attending a Learn & Turn last weekend I tried out some Norton 3X Sandpaper. I liked it. You can get this at Home Depot, etc so some day I may switch to this paper.
It comes in 9″ x 11″ sheets. I like the way a friend cuts it into 4 equal parts (4 of 4.5″ x 5″) and then folds the 5″ length into 3 parts so you end up with a 4.5″ x 1-5/8″ chuck of paper with 3 sides. 2 exposed sides and one inside.
]]>Recently someone asked me for advice on sanding disks. That is easy!
I like the “Blue Flex” sanding disk sold by Vince’s Wooden Wonders. http://www.vinceswoodnwonders.com
I have been using these for the last 4-5 years and I am very happy.
Note: Recently Craft Supplies USA started selling some “Deerfos” blue sanding disks. I don’t think they are the same. They are made by a different manufacturer. I found something I like and it’s not broke, thus, I am sticking with Vince.
• Blue Flex Disks
 I use 2-3/8” disks and 3-3/8” disks Blue Flex Disks. 80, 120, 180, and 220 grits. Around $8 for 50 disks on 11/18/2014.
Note: I have eliminated 150 grit sandpaper from my world. I use to sand 80, 120, 150, 180, 220 grit. Then, I decided that 150 grit was a waste of time. To close to 120 and/or 180. I no longer use 150 grit sandpaper. I now sand 80, 120, 180, 220 grit.
The velcro on Blue Flex disks is glued onto a very tough sandpaper. They work wet or dry.
Heat will build up and soften the glue if you sand aggressively with these disks. When you try to remove the disk the velcro will get screwed up. To avoid this problem you need Innerface Pads!
• Innerface Pads
 I use 2-3/8” & 3-3/8” to Innerface Pads that match disks.
I use 1/4” thick “Firm Yellow Tapered Innerface Pads” for 80, 120, and 150 grits.
I use 3/8” thick “Soft Blue Innerface Pads” for 150, 180 and 220 grits.
1 interface pad for each grit works best! Allows quick and easy grit change without screwing up the velcro.

I also really like the 2″ & 3″ “Intermittent Velcro Pad” from “WoodTurners Wonders” www.woodturnerswonders.com
• Low Profile Back Up Pads (aka Thin Back Up Pads)
Vince changed the name from “Low Profile Back Up Pad” to “Ultra Thin Back Up Pad”.
 I use 2” & 3” Ulta Thin Back Up Pads. The thing that you chuck up in the drill. 2” pad goes with 2-3/8” disks and interface pads. 3” goes with 3-3/8”
I like the “Ultra Thin Back Up Pads” (only sold by Vince?) better than the thicker pads. They are better are getting into the tight space between headstock and bowl.
If you are using interface pads to adjust softness of pad then you don’t need and really don’t want a thick back up pad with lots of flex.
• Angle Drill
 I like to use a low profile angle drill for my sanding on the lathe. I have 2 of them. One for 2″ disks and one for 3″ disks.
One of the $40 ones available from Amazon, Harbor Freight, etc.
I no longer recommend the angle drills from Amazon, Harbor Freight, etc because they have a bad reputation for plastic gears that melt and quickly fail.

I now recommend the angle drills from “WoodTurners Wonders” www.woodturnerswonders.com that have metal gears.
• More Info
For more info see my “Great Polyurethane Finishes” handout at http://www.carlford.info/pages/demos_classes/great_poly_finish/Great_Poly_Finish.pdf
]]>I like the looks of Elio better than the Big Bite, because you can adjust the dept of the points on the Elio. On the other hand the simplicity of just sticking the Oneway Big Bite into a Oneway Chuck really appeals to me. I DO NOT own either of these. Thus, I really don’t know.
Here is a picture that shows the 3 different sizes of Elio-DR Safe Drives that are available on 2/2/2018. I would go with the 2.5″ model shown in the center. I would probably also purchase the Drawbar Kit for Elio-DR. Then never use it because I don’t want to spend time removing the Oneway Vacuum Adapter from the headstock of my lathe.
Here is a picture that shows the Oneway Big Bit Chuck Spur on 2/2/2018.
Updated 10/3/2016: Change Stuby Lathe USA web address from http://stubbylatheusa.com/Online_Store/DriveCenterFlyer.pdf to http://praxislathe.com/slusa/lep/pages/products/other-accessories.php. I don’t really understand what is going on here and I am a bit dubious.
I was watching a woodturning video this morning. I agreed with the video when it mentioned that a 2 prong drive center works better than a 4 prong drive center on bowl blanks.
But, once again, I was not impressed by there wimpy little drive center. Why? Because I have one of these.

It is made by Stuby Lathe USA. I love this drive center because you can just screw it on to the headstock and you can remove 2 of the prongs. Thus, it can be used as a 2 prong or 4 prong drive center. I always use just 2 prongs. The center point can be adjusted in/out. The prongs are deep so you can really sink them into a log. 2″ wide is just the right size for rough bowl blanks. Not to small and not to wide. It is the best drive center for bowls in my not so humble opinion. I now use this center for all of my bowls when I start off by mounting a log between centers.
The only other center that comes close to the above center is the Oneway Big Bite Chuck Spur. It is ok. But I like the above one better. The spurs on the big bite are to far apart. Thus it is often hard get both spurs to engage on a round log surface when making a natural edge bowl.
2 prong centers should always be used with the prongs across the grain (rather than with the grain) to avoid splitting a blank.
I own other drive centers. Jumbo and standard size 2 and 4 prong drive centers. Steb centers, etc. I like to use a 1/2″ or 1″ steb center for spindle turning. The $20 steb centers work fine.
]]>When someone saw the following photo they asked me. Do you have a “color code” for the bands on your tools. I often get this question.
No I don’t. Long ago I started off in that direction. But, I just did not have the necessary discipline. I quickly ran out of colors (different shades of the same color are not good enough) and things get fouled up when you reuse a handle that was on a scraper for a new gouge. Etc.

I add the color bands to help me bring home the tools I bring with me to Classes, Demos, Learn & Turns, etc. And I like lots of color!
White Labels On Ferrules
The white labels that I added to the ferrules of tools are very useful. They say things like Ellsworth – 2″ or Jordan – Ellsworth – 2″
I added these one day when a student was having trouble keeping my different gouges and grinds straight in their head. Now, everyone who visits my studio likes them. One of my better ideas?
Jordan – Ellsworth – 2″ means that it is Jordan grind that I create using the Ellsworth jig with the tip of the gouge extended 2″ beyond the end of the jig (i.e. use the 2″ hole under my grinder).
When the grind and jig are the same then I just use Ellsworth – 2″. Ellsworth grind, Ellsworth jig, 2″ hole under grinder.
Note: Ellsworth grind has a wing. Like David Ellsworth shows in his book. Jordan grind does not have a wing. Like John Jordan shows on AAW sharpening video. I use the same Ellsworth jig for both grinds. Its all in the motion! Swing the jig/gouge less to create the flat Jordan grind.

 I create the labels using my “Brother P-Touch” label maker. Around $30 on Amazon. The printer is cheap so they charge you a fortune for the label tape.
I have no idea what a “Pie Iron” is but the price was right. It is just the right size for carrying my turning tools to club meetings, etc.

I have tried all kinds of things for transporting my turning tools. Tool rolls are hard to deal with. Take up to much space when unrolled. Get full of shavings and are a pain to roll up and fasten. Its hard to find the tool you want when end of gouge is stuck into the roll. I always seem to forget and put them in this way.
Buckets are kind of to big. They tip over when you have to stand them up in trucks and cars. When you drive down the road they drive you nuts due to endless rattling. They are heavy and awkward to carry.
I like this tool bag because it has a full zipper. I can find my tools easy and get them in and out easy. It’s light weight. I can zip it up easy to discourage shavings. The price was right!
I lined one end of the bag with an old cardboard box to discourage holes from points of tools. See photos.


New and Old Blog address is the same. No change.
blog.carlford.us (Preferred Address) or
blog.carlford.info
“GoDaddy is discontinuing Quick Blogcast on June 25, 2014 …” Err……!
- I went with Quick Blogcast when I started by blog because it had good easy subscriptions that sent out email when I posted a new blog entry.
- I was able to set up email subscriptions on WordPress so everything works the same. But, it was a pain. I had to install “subscribe2” package and configure it.
- Then I had to manually transfer all of the old subscription email addresses to WordPress. Everything should work the same. If you were subscribed then you still should be subscribed.
- I manually configured WordPress templates to recreate the look and feel of old blog. Not much fun. I had to install a bunch of packages on top of basic Twenty Fourteen template.
- I transferred all of the old Quick Blogcast entries to WordPress so no posts were lost. Some what manual process after searching for a solution on web.
- I did not transfer all of the old comments. Only a hand full comments existed and manually transferring them was not worth the effort.
Hopefully I am not going to get screwed again because my blog is now hosted on my own www.carlford.info site with my own copy of WordPress installed.
I have been busy writing some new articles for AAW Journal. I hope to be done with this soon and have more time to write Blog articles.
I am proud to report that my “Craters and Sun” square bowl is 1 of 30 pieces that has been selected by jury for the big Saturday Night Banquet Live Auction at the AAW National Symposium in Phoenix Arizona on June 13th, 2014.
Please bid early and often!
http://auction2014.woodturner.org/Craters-and-the-Sun-by-Carl-Ford_i19684074ml


Photos
I mad my own 12″ disk sander. For more informatin click on any photo. Each photo has a caption with more info.

|

|

|

|
Full Disclosure: Anyone who has visited my studio knows that I also have a big 6″ x 89″ belt sander that I use for most things. My students use the disk sander. I probably should use the disk sander more often because I get really frustrated when my high speed belt sand burns woods like cherry.
]]>
I like to use Morse Taper drills in the tailstock of my lathe to drill holes.
I recently purchased a 1-1/8″ #3 Morse Taper drill on ebay that I now use when turning hollow forms. I drill a 1/1-8″ center hole and it works great. Because the Roll Munro “Hollower2” fits inside the hole.
In the last few weeks there have been some nice assortments of Morse Taper Drills on Ebay Look for “Morse Taper Assorted Drills”. There seems to be lots of interest in big sets. So bidding on a small set is probably best.
Your changes of getting something by bidding directly on Ebay are low. You need to use www.actionsnipper.com to bid in the last 5 seconds.
Most modern lathes are #2 Morse Taper in Tailstock. Only Oneway and VB36 (any others?) are #3. So most people should look for #1 or #2 Morse Taper drills. You can use a #1 to #2 adapter on #1 drills.
Putting a big drill in a #3 to #1 Morse Taper Adapter is not a great idea! So if your lathe is not #3 then forget about the #3 drills. Note: A #2 to #3 adapter is ok. Small to large is always ok. Just DO NOT go large to small.
Most Morse Taper drills over 5/8″ are #3. But you can find some old drills that are #2. So looking at the old stuff on Ebay is a good pace to find them.
I use my Morse Taper drills to drill holes in wood. So I don’t care about the drill quality or manfacturer. Any old drill will do. Most of the drills on Ebay are old and thus made by good US or German manfactures.
If the price is right I don’t care if a set on Ebay has some #4 drills, etc that I can’t use.
You can geta good price on #1 to #2 Morse Taper Adapters on Ebay or from Victor Machinery http://www.victornet.com/
]]>I created a new handout for the demo. It is on my web site here:
http://www.carlford.info/pages/demos_classes/demos_classes.html

Please contact me if you would like me to present demo for your club or symposium.
]]>I like the “Big Gulp Dust Hood” from PSI (Penn State Industries) on Amazon, Rockler, etc. I have tried others and I have made my own. I like the Big Gulp because it catches lots of dust and it can be rigged up to hang nicely.

If you live in the Poughkeepsie NY area the best place to get your dust fittings is from Jim at Warren Cutlery in Rhinebeck. Jim tried to keep them in stock.
Hanging the Big Gulp
I hang the Big Gulp from an overhead pipe with a piece of gas welding rod. Hanging the dust hook allows me to quickly and easily move it out of the way or into position. See photos
Photos
Click on any photo to take you to my new photo gallery. Each photo has a caption with more info.
 |
|
 |
 |
 |
 |
No Grill
I don’t have any grill, wire mesh, etc. in front of the Big Gulp. Real men don’t need grills! They just get clogged up with wood shavings. I have found that paper towels, sanding paper, etc just shoot thru the dust collector. No big deal.
Gas Welding Rod
Gas welding rod has gone out of fashion. Everyone, Arc, MIG, or TEG welds these days. You can still get gas welding rod from Mcmaster item #7972A181 (1/8″ RG 45 Steel – Copper Coated). I can’t live with out. I use it for all kinds of things around the shop. But, you could make due with any old piece of 1/8″ steel or aluminum rod from local hardware store.
]]>It works good for protecting my reference papers while turning. The Neon Orange color makes it easy to find. It is made of tough clear plastic with a nice gromet that allows me to hang it up.
They are made by C-Line.com. Style #43912 Workshop Ticket Holder.
You can get them on Amazon. Around $4 each. Or 25 for $26. Search for C-Line 43912
 |
 |
 |

I really liked the “Forge” episode. The Silversmith and Metal Sculpture were interesting.
http://www.craftinamerica.org/tvseries/story_2252.php
I also liked the Potters on the “Crossroads” episode.
http://www.craftinamerica.org/tvseries/story_2224.php
Often things done by potters are easy to translate into Woodturning.
Currently they are rerunning the Craft in America series on WLIW21 Create TV channel in New York area.
http://www.createtv.com/CreateProgram.nsf/vProgramsByNOLA/CRIA?OpenDocument&tabnum=3&Start=#
I often find something of value in each episode. But, no episode is a complete winner.
]]>I turn bottle stoppers so I have some low end items to sell. I want to draw people in to look at my higher priced items.
Click Here to view the quick and easy process I use to turn Bottle Stoppers.
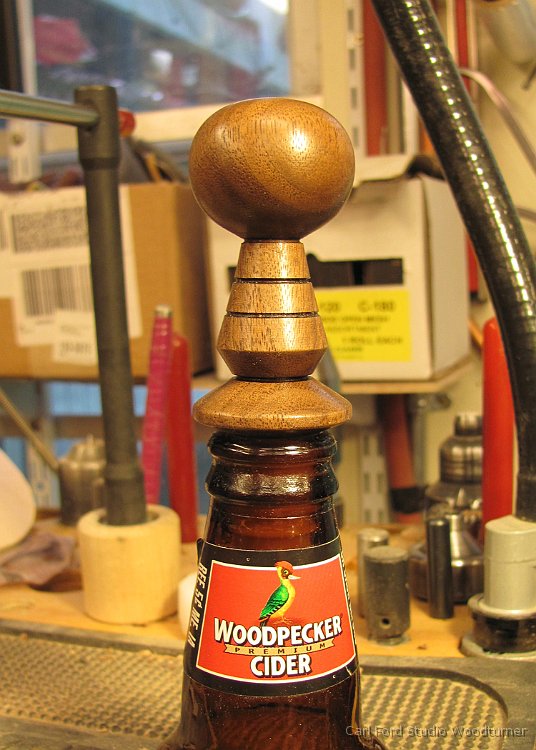
I like to create sharpening templates for my tools. The templates allow me to quickly and easily set up my grinder. I get a consistent grind every time.
Click here for PDF file of Tool Sharpening Templates.

How To Use
Here is how you use the templates.
Start by setting up the distance from grinding wheel to “V” arm.

Next set up the angle on the Wolverine Varigrind jig. Using the notches on the Varigrind Grinding jig can be confusing. They are not numbered. Which side of the notch? I avoid this confusion by just matching up the jig with the picture on my template.

The last thing you need to known is how far the Tip of the gouge needs to extend beyond the end of Varigrind jig.

I then decided it’s time to invest in one of those Pen Drilling Vises for my drill press. I need a vise that will allow me to drill center holes in pen and bottler stopper blanks, etc without a lot of dorking around centering each blank.
Pen Drilling Vises
I looked at the commercially available “Pen Drilling Vises” and decided they were all to light weight, wimpy and to expensive for what you get. See photos below. $50 for Aluminum and little wimpy screw threads? Do they really center things up? Are they rock solid?
Some of the “Pen Drilling Vises” out there only move only one jaw when you tighten them. The “other” is fixed. Or one jaw moves and the other is spring loaded? No good!
A REAL self centering vise should move BOTH jaws inward when you tighten it. Both jaws should be driven by a ACME thread crank screw. The vise should be rock solid, made of steel or cast iron.

Self Centering Vise
I looked for a self centering vise with “V” grooves in the jaws. The “V” allows you to easily center a blank in the jaws. I could not find a vise in my price range. So, I decided to just make my own replacement jaws out of wood.
I decided the Model D4064 Self Centering Vise made by Shop Fox (aka Woodstock International) was the cheapest one that looked good. I got my from Amazon.com for $149 with free Amazon Prime shipping.
A mental midget at Amazon shipped the 1st one to me in a box with no packing around the heavy vise. It arrived at my house with a broken handle. I complained and returned it. Amazon paid for returned shipping. They shipped me a replacement. Again in a box with no packing around it. Fortunately, it survived the 2nd time.

Installing the Vise

The right photo shows the vise being used to drill a LARGER bottle stopper blank. The masking tape on the drill is a depth stop.

I replaced the steel jaws with wooden ones that have a “V” in the center. The jaws are tall enough to completely support most pen blanks.
The “V” self centers blanks in the jaws.

I used a table saw, tiled to 45 degrees to cut the “V”. Then I used a band saw to cut a 1/8″ wide notch (see blue arrow in left photo) in the bottom of the “V”. If I had to do this again, I would cut the “V” on the band saw. It would be easier and safer.
The notch allows better centering of blanks that are not perfectly square. The vise centers on the sides of the blank rather than on the corners. The corners float in the notch.
I used one of the steel jaws “C” clamped to one of the wooden jaws to locate the mounting holes for the jaws. I drilled thru one wooden jaw. Removed the steel jaw. Then “C” clamped the two wooden jaws together with the “V” lined up. Then I drilled thru 2nd wood jaw.
The red arrow on the right photo points to a chunk of 1/4″ plywood. When I am installing a blank the plywood holds it up. Then it prevents the bottom of the hole from blowing out when drilling. The plywood just floats under the jaws.

- Start by loosening up the table clamps.
- Lower the drill into the vise.
- Tighten the vise on the drill. This centers the vise on the drill.
- Tighten the table clamps.

I always mount all of my vises on my drill press via a chunk of plywood with cleats. The cleats just drop down over the drill press table and hold the vise in place.
The vise is attached to the plywood by #14 SHEET METAL screws (not wood screws). This method allows me to quickly install or remove the vise without dorking around with bolts and clamps.
After I mount it the first time the vise is ALWAYS located in the correct place on the plywood. I just have to loosen the table clamp on the main post and swing the table left or right to align the vise under the drill chuck.

I also had to add some “C” clamps to clamp the plywood to drill press table to make everything rock solid. Because, my cleats are a little loose.

I currently own and use a Detail Master Excalibre (the silver one with 2 ports) with lots of different Fixed Tip Detail Master Vented pens (the silver aluminum ones). I also have a couple of Razertip Tips sets that I mount in a Razertip interchangeable tip pen.
If I was buying a new system today I would purchase a Burnmaster Eagle (the red one with 2 ports) with Burnmaster Replaceable Tip Pen and Tips. The 10 tips available from Burnmaster are good for beginners. In the long run you can add more tips by purchasing sets of tips from Razertip.
Currently the $259 Burnmaster Eagle Package available fromwww.packwoodworks.com and other retailers for roughly the same price looks real good to me. I like having 2 pens and only need one set of 10 interchangeable tips.
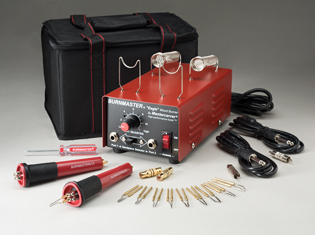
Detail Master
The Detail Master Excalibre and Sabre units are ok but I don’t like the Detail Master Pens.

I went with the Fixed Tip Detail Master Vented Pens because woodcarvers, etc said they were the best. The pens handles are made of aluminum. This sucks! Because, aluminum is one of the best and fastest conductors of heat.
I like to burn really hot and fast. i.e. with the Detail Master close to or maxed out at 130 watts. So, I hate the Aluminum Detail Master pens because the handles get to hot to hold to fast! I have tried all the tricks. The rubber finger protectors, the O rings, wrapping them with all kinds of things and still they get to hot to hold.

I have also tried making my own pens from dowels, PVC pipe, etc. These work better than Detail Master pens. Stay cooler. The problem is you have to figure out how to mount the tips and keep the mounting points separated so they don’t short out. The Burnmaster Replacable Tip Pen is very similar to my home made pens. At $27 it may be cheaper and it is definitely simpler for most people.
I also have trouble with the Detail Master not being able to keep up with me when burning long lines. Not enough heat.
Burnmaster
I don’t own a Burnmaster but I have tried them. I like the Burnmaster. The Detail Master and Burnmaster units are both rated to be 130 watts. But the Burnmaster seems to have more balls.
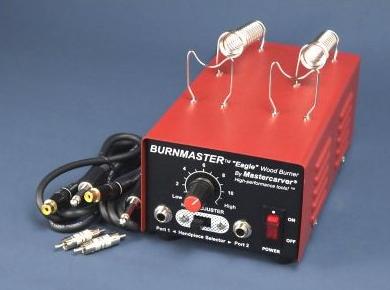
I like the plastic Burnmaster Replaceable Tip Pen a lot better than aluminum Detail Master pens. It does not get to hot to hold really fast.
Going with replaceable tips is a lot cheaper than fixed tips. I originally went with the fixed tip Detail Master pens rather than
replaceable tip Detail Master pens because people said the replaceable tips loosened up to easily and did not conduct heat well. My experience with Razertip Interchangeable Tips suggest otherwise. I have not run into any trouble.
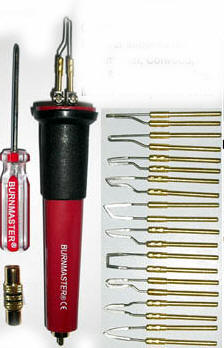
Razertip
I like the Interchangeable Tips from Razertip. They have lots of different sets available. Good low price solution. You can directly use the Razertip Interchangeable Tips in Burnmaster Replaceeable Tip Pen you don’t need to purchase a Razertip pen.
The Ball Tips – 5 Piece Set is probably the first set you should add after Burnmaster 10 tip set. You can use the smallest ball tip to sign your name. However, a magic marker works a lot better.

I do most of my burning with short and long Skew tips (any manufacture) followed by Razertip Small Ball tips.
In the past the Razertip Woodburners were to small and wimpy for me to consider. I like to burn HOT and fast! I see they now have some 10 amp wood burners. These may be ok. But, I don’t know. The Detail Master and Burnmaster only advertise 130 watts, not amps. There is not enough advertised data to convert watts to amps or vise versa. Is it 10 amps at 12 volts DC? If so then it is only 10 * 12 = 120 watts. If AC then we need a power factor to convert amps to watts. Is the 130 watts at the input or output? The bigger Burnmaster units with their cooling vents look like a better bet.

Colwood
I like some of the Colwood pens. But, there burners are to small and wimpy for me. I like to burn HOT and fast! The 130 watt Detail Master is not big enough for me. The Colwood burners are only 32 watts???
Signing your Name
Wood burners don’t work for me when it comes to signing my name. The grain in the wood always causes an ugly bump when I try to sign my name due to the curves in the letters “C”, “a”, “o”, etc in Carl Ford.
I like to sign my name with a “Ultra Fine Point” Sharpie permanent magic marker.
The “Writing” tips available from any of the manufactures definitely do not work for me! The only thing that comes close to working is the small ball tip sold by Razertip. It is like the ball
in a ball point pen.
The Burner from Hell
I made my own wood burner in a Graeme Priddle class that I call the wood burner from hell. It is a 15 amp Auto battery charger (NAPA Mode 85-439) with an old fashion light dimmer on the 120 volt input. It is really more of a wood brander than a wood burner. You get flames when you touch this sucker to wood.
The big problem with this burner is pens and tips. It melts them like butter. You have to make your own out of nichrome wire, etc.
If you are interested look around on the web for a Graeme Priddle class or demo. Or look for “DIY Graeme Priddle Style Wood Vaporizer System“. It is way to much burner for most people and I don’t want to be responsible.
Woodburning Books
Pyrography is another name for Woodburing.

Pyrography, Learn to Burn by Fox Chapel Publications is my favorite and the cheapest. It is really not a book. It is a Special Edition of a magazine. I like the “Experimenting with Texture” section by Sue Walters on pages 70 & 71. It shows 63 pictures of sample woodburning patterns. Pick the one you like and give it a try. The projects in this book are simple and can be applied to round wood turnings.
Great Book of Woodburning by Lora Irish is a good book. It has some pages that show different patterns but not as good as Fox Chapel book. The projects in this book are very appealing but a little complex and hard to apply to round wood turnings? Any of the books by Lora Irsh are good.

The Art of Woodburning by Betty Auth is very appealing. This book shows only a handful of basic woodburning patterns. The projects are middle of the road in complexity and some can be applied to round wood turnings.

I have turned lots of different shapes and use them often.
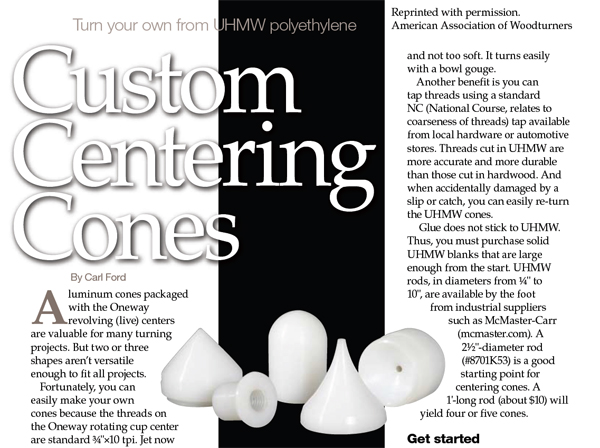
In 2007, I wrote a magazine artificial that explains how to turn your own cones out of UHMW.
See my “Custom Centering Cones” magazine article on page 49 of “American Woodturner, The Journal of the American Association of Woodturners, Winter 2007, Vol. 22, No. 4″ Or click here for PDF. (Magazine photos by Joe Larese)
]]>
Collets typically come in standard dowel sizes 1/4″, 3/8″, 1/2″, 5/8″, or 3/4″. So it is very easy to mount a chunk of dowel as a turning blank. Or you can mount a turning blank between centers and turn a tenon. I like to use 3/4″ diameter tenons when possible.
I own both the “Beall Collet Chuck” and the “Apprentice Collet Chuck”. The Apprentice Collet Chuck is sold under a number of different names by different retailers.
Apprentice Collet Chuck
I really like the Apprentice Collet Chuck better than the Beall Collet Chuck. Because the knurled rings on the Apprentice allow you to tighten and loosen it with out wrenches most of the time!
Avalilable from Craft Supplies USA, Penn State, Etc.

Beall Collet Chuck
The Beall Collet Chuck does not have any knurled rings. The smooth body on the Beall chuck makes it difficult to hand tighten and almost impossible to loosen with out wrenches. Using the wrenches on the Beall chuck is a pain!
The Apprentice chuck is cheaper and you can use wrenches on it if hand tighen/loosen is not adequate.
The Beall chuck is available from Packard, Craft Supplies USA, etc.

ER32 Collets
The Apprentice and Beall chucks use the same “standard” ER32 spring collets developed for the metal working industry. If you need more sizes of collets you can easily find them on Ebay, Mcmaster, MSC, Enco, etc.
There are lots of different ways to mount ER32 collets in metal lathes. I recommend you avoid these solutions. The Apprentice and Beall chucks are cheaper and easier. Just screw them on. No drawbar required, etc.

The “Collectors of Wood Art” is a club of people interested in collecting (purchasing) high end wooden art (woodturings, etc). Over the last few years they have been attending AAW International Symposium.
They have a good web site where artists show there work. Many of the big time artists have some great eye candy out there. See http://collectorsofwoodart.org/artist
Check out the work of
J Paul Fennell
Clay Foster
Christian Burchard
John Jordan
Jerry Kermode
Michael Mode – I love the castle like pieces he has been making.
Binh Pho
Joey Richardson
Hayley Smith
Steve Sinner
Keith Tompkins
Malcolm Zander
And many more.
I recently joined. My artist profile is here:  ]]>
]]>

People are always asking me where did you get that? And, my answer is always “Mcmaster”.
Mcmaster-Carr is an old time industrial supply company with a very efficient modern business model. It’s a big cut above all of it competitors like Travelers, Enco, MSC, Grainger, etc for the following reasons.
- Mcmaster has a great web site! The best in the industry!
- The Mcmaster web site defines the standard that all other web sites should be judged against
- It is really easy to find things. Even if you don’t know the exact technical names of things.
- There search engine is the best. It finds things even when you don’t really know what you want.
- They show good summaries at the top of things. For example if search on “steel plate” they will show you a summary that explains the grades of steel (A2, 1440, O1, etc).
- They show just the right amount of little pictures to guide you thru the process of seeing what is available and finding what you are looking for.
- Mcmaster often shows a sidebar that lets you zero in on the size of things. For example you can ask it to show you all the tubing they have in stock with a 1/2″ inside diameter. Then you select if you want copper, steel, plastic, etc.
- Mcmaster has CAD drawings in PDF format for most things. You can use these to check the part you are ordering is really what you want. Will the head on that bolt be to big?
- Mcmaster shipping is really fast!
- Mcmaster shipping is really cheap!
- Anything that fits in a 12″ x 18″ x 6″ box is only around $5 for shipping to Poughkeepsie NY. Weight does not seem to matter. When I order heavy steel items, it still cost around $5.
- Even when they ship things in bigger boxes it tends to be around $5. I don’t known how they do it, but I love it!
- When they ship steel to me in 6 foot tubes it is around $12 for shipping. Weight does not seem to matter.
- One thing about Mcmaster is you never get to see the shipping charge in advance. You just have to trust them. I have done business with Mcmaster for many years and there shipping charges are always very reasonable or down right cheap.
- It appears that Mcmaster does things the old way. Your order goes directly to the warehouse. After the order is filled it goes to the business office were they add shipping and tax.
- Mcmaster has a huge selection of good quality items.
- But, you can find what you want because there web site is really good.
- For most things Mcmaster does not show you the brand name. Don’t worry the quality will be good. It appears they use their own CAD drawings to get quality stuff from their suppliers.
- Mcmaster’s prices are very competitive. Often the lowest with shipping.
- If you want to buy new power tools (drill, circular saw, etc) then you should look on Amazon.
-
If you want to buy metal or machine shop stuff then suppliers like Travelers, Enco, MSC may be cheaper. But, maybe not with shipping.
Lower quality? Others are often cheaper because they stock more brands of lower quality cheap imports. Mcmaster often only stocks good American Made stuff plus one of the better imports.
If you compare apples to apples on quality, then Mcmaster is often cheaper.
- Pay by Credit Card
- If you order via Web and pay by Credit Card you don’t need a business account to do business with Mcmaster.
- You need a business account to get a catalog. But, who cares. Mcmaster’s web site is great and gives you PDF access to all of their catalog pages.
Mcmaster is far better than its competitors. Who want to show you 10,000 images of each bolt size, etc. Mcmaster shows just one picture of bolts, etc with all the different sizes in tables.
I live in Poughkeepsie NY. Almost everything I order arrives on my door step the next day from their warehouse in NJ. If I order before 8am it may come the same day! This is there standard shipping method. No extra charges.

Is it time to think about investing in a heater?
Are you tired of standing in a cold studio or work shop?
Are you letting $1000’s of dollars of turning tools sit idle because you are to cheap to invest $150 in a heater?
Main Heat
The heat in my house is base board hot water driven by a natural gas hot water furnace with 4 zones. The 4th zone is the main heater in my studio. It is a fan forced “Modine” hot water heater.
The Modine heater works great. It is the best solution because it is efficient and no open flame (pilot light) in my studio.
Note: “Modine” is the brand name. But, it is also commonly used to refer to and box heater that hangs from the ceiling. May be hot water or gas fired.
240 Volt Red Box Heater
It takes about 1 hour for the Modine to warm up my studio from 50 to 65 degrees. When I forget to turn it on early I use my red box heater for supplemental heat.
The red box heater I like is manufactured by Marley Electric Heating, Model# 402. Contractor Heater, 4000 watts at 240 volts. Roughly 11″ x 11″ x 12″. The same heater is sold under the Marley, Qmark, Berko and Fahrenheat brands. Just look for BRH 402 heater on Amazon. $150 on 2/8/2013

I like this heater because.
- Its red and rugged!
- It is fan forced. So it shoots a steam of hot air across the studio.
- It puts out a lot of heat!. But, it is not to hot. You can stand in front of it and feel very comfortable.
- It is portable. You just plug it in. It is easy to move around. Easy to store in summer. Not to big.
- You can easily hang it from wall or ceiling with wire, gas welding rod or chain.
- It is 220 volts. 120 volt heaters are to wimpy for me! I want heat now, lots of it!
- It has a knob on the back that turns it off/no and sets thermostat temperature.
- It is not to noisy.
- It is low and square. Very stable shape. You really can’t knock it over. So, no fire hazard.
- It is easy to clean with a blast of compressed air.
The model BRH 402 heater is the smallest model in the BRH series. It draws 16.7 amps at 240 volts. Thus it requires a 20 amp 220 volt circuit breaker. However, I run the heater on the same circuit as my large 3hp VB36 lathe. I plug them into the same wall outlet.
It is a little known fact that you can replace the local hardware store variety single outlet 220 volt receptacle with dual outlet one. You need a “NEMA 6-20 duplex receptacle” (www.mcmaster.com item # 7120K942)

Marley makes larger BRH heaters. But they require more than 20 amps. Click here for details.
120 Volt Blue Blower with Heater Attachment
I love my “Nascar Blue Blower” it is “the best fan I have ever owned”. I take it every where in the summer.
I love this fan because it will blow a stream of air, straight across the room, 10 feet or more. It has low, medium, and high speeds. High = wind tunnel. It is a small portable squirrel cage fan driven by a 180 watt motor.
They make a $30 heater attachment that snaps onto the front of blue blower. It works pretty good. But, I don’t like standing in front of it. Its just a little to cool. Because, even on low speed the blue blower moves to a lot of air. The heater works fine if you don’t stand in front of it.

If you don’t have 220 volts then blue blower heater is a good 120 volt solution. You just have to live with less/slower heat. I take the blue blower heater with me in the winter when I stay in cheap motels.
I don’t think they are still selling the orginal blue blower. I have seen lots of knock offs. Same quality? Look around on Amazon. Original fan $70 + heater $30.
Air Cleaner
I have a JDS 750-ER air cleaner in my studio. It is a very important part of my heating and AC systems.
The air cleaner hangs from the low ceiling in the center of my studio. My “Modine” heater is positioned so it blows hot air across the room into the intake on my air cleaner. The air cleaner blows the heat around the rest of the shop.
]]>Longer Chuck Wrench Handle
For me, the bar on the Oneway Chuck handles is to short. It slips out of my hand, hurts my hand or I can’t get enough leverage.
I have replaced the bar in my chuck handles with a 7-3/4″ long Hardened Steel Shaft. www.mcmaster.com Part # 6112K44 = “Hardened Precision Metric Steel Shaft 8 mm Diameter, 200 mm Length”. $6 on 2/1/2013.
The 8mm shaft is a perfect substitute. No drilling, no fuss. Just pop the red end covers off the existing the rod. Slip in the new shaft. Reinstall the red end covers.
I do not want the longer rod to bend easily. Thus I use a handed steel shaft rather than cold rolled steel rod from local hardware store. After a year of use the shaft is like new. No bends.
The photo below shows the old back rod and the new silver shaft.

Add a Shaft Collar to Oneway Wolverine Vee-Arm

I have added a two-piece shaft cover to Vee-Arm on my Oneway Wolverine grinding jig. I no longer have to fuss around with pencil marks on the square bar, etc. See photos.


If you have one of those new CBN grinding wheels you will never need to move the collar. If you have good old grinding wheels like me then you have to move it after you dress the wheels a few times. A lot less often then you might think.
A 1″ round shaft collar works on the 3/4″ square bar IF AND ONLY IF it is a “Two-Piece” shaft collar. One piece solid or split collar will not work. They are just a little to big. The extra play in a two piece shaft collar makes it just the right size. Or you can just take it apart and grind a little off the flat ends.
www.mcmaster.com Part # 6436K18 = ‘Two-Piece Clamp-on Shaft Collar Steel, 1″ Bore, 1-3/4″ Outside Diameter, 1/2″ Width’ $4.25 on 2/1/2013

I had to replace a 10 year old Delta 8″ bench grinder that was giving me trouble.

The Grinder
It is a Dayton Bench Grinder model # 2LKR9. 8″ x 1″ wheels, 3450 RPM, 3/4 hp, 120 volts, 7 amps.
It only cost me $210 from Zozo Tools on the web. This is a very good price for an industrial quality grinder. This grinder comes with a cast iron base and impressive cast iron wheel guards. Good quality 3/4 HP motor.
When I first powered on this grinder on I got this “WOW” feeling. This is a quality tool! It runs really smooth and sounds great! You just want to turn on the grinder and admire it!
The grinder comes up to speed fast when turned on and coasts for a long time after you turn it off.
I really like the 21″ width of this grinder. When grinding a tool, I don’t have trouble with the tool handle or my hand hitting the “other” wheel. The center to center distance between the wheels is 16.5″.
Beware! The grinder comes with dust collection hoses. Metal working dust collectors are explosion proof. Woodworking dust collectors are not explosion proof and thus CAN NOT be used. I just discarded the dust hoses.
Grinding Wheels
The 8″ grinding wheels that come with the grinder are better than the low quality ones that typically come with cheap grinders.
On cheap grinders you mount the grinding wheels onto the motor shaft by pushing them up against a washer or C ring. The washers flop around and make it hard to mount the wheel so it runs really true.
The wheels on this grinder run really true! Because, the grinder comes with these fancy aluminum “Inner Wheel Flanges” that slip over the shaft. The flanges have a wide face that registers against the wheel on one end, while the other end extends back down the shaft into the grinder where it registers up against the motor.
You can’t teach and old dog new tricks. So, I decided to replace one of the grinding wheels with my favorite grinding wheel. A Norton 8″ x 1″ x 1″, Gemini, Alundum (Aluminum Oxide), 100 Grit, Fine, Grinding Wheel. In some places it is listed as 100/120 grit. Norton part# 88280 or part# 07660788280. Zoro part# G12205592, stock# 6A092. Beware, this wheel use to be a gray color with a colorful “Gemini” label on it. Norton has changed the color and packaging. The wheel is now a brown color with a boring blue Norton label. Same great wheel! Not to soft and not to hard. Not to fine and not to course.

Use Drill Bushings
Most 8″ grinding wheels come with a 1″ mounting hole and these plastic bushings so you can mount them on a grinder with 5/8″ diameter shaft. The nested plastic bushings may cause wobble.
I use steel Type “P” Drill Bushings rather than plastic bushings. There are precision ground to 0.0014″ tolerance. Type “P” = Headless Press Fit. 1″ outside diameter, 5/8″ inside diameter, 1″ long.

2 of Zoro part# G3591761, or Mcmaster-Carr part# 8491A562
The Tool Rests
The tool rests that come with grinder are better than average. But, I discarded them because I really like the Wolverine Grinding system from Oneway.

Cheap Grinders Cost More!
The wheels on this grinder run true! Thus this grinder does not require those fancy Wolverine Wheel Balancers from Oneway.
Other 8″ grinders go for $120 to $150. Wheel balancers are $70 each.
$120 + $70 + $70 is $260. My new grinder was only $210.
10 years ago you could buy a cheap grinder that did not require wheel balancers to run true. It seems those days are long gone.
Not Variable Speed
I was looking for a 2 speed or variable speed grinder when I found this grinder. I wanted 1725 rpm to 3450 rpm. I could not find a good or even reasonable quality 8″ variable speed bench grinder. I decided to
live with this 3450 rpm grinder because I liked the quality and I personally only use 3450 rpm. The variable speed was for my friends and students.
Dayton does make a very similar 8″ variable speed grinder model #2FDB6. But it is 1.5 hp and thus costs $470. To much! It also makes a similar 1725 rpm grinder model #2LKT2. But it uses 10″ wheels. To large! No
good!
I only like 8″ grinders. I do not like 6″ grinders. I can’t grind my tools to the shapes I like on a grinder with 6″ wheels. If 6″ is ok with you then Dayton does make a similar 6″ variable speed grinder model
#2FDB5 for $278. Beware! Dayton makes other 6″ grinders but the wheels are not 1″ wide. They are only 3/4″ of an inch wide. To narrow!
Zoro Tools
I found Zoro Tools on the web. http://www.zorotools.com/
I have purchased a few things from them. Low prices! No problems.

My New Grinder Stand
I mounted my new grinder on a new grinder stand. It’s my 2nd generation stand. My 1st generation stand was good. This one is even better. A friend was over last week and, he really liked the height of my grinder. Center of grinder wheel is 46″ off the floor.
I like having my grinder mounted on a stand that I can easily move around the shop as needed. My new stand is built on a base I purchased from Grizzly tools a long time ago. It is 32″ tall. I just saw a very similar stand for less at Harbor Freight.
Here is what my new stand looks like:

More photos are here: http://www.carlford.info/blog_images/cbf_grinder_stand
The stand is made out of 3/4″ local hardware store plywood. I buy the better, almost cabinet grade $38 plywood. The stand is sturdy because I lock the plywood pieces together with 3/4″ wide by 1/4″ deep dado groves. All joints are glued and screwed. All exposed plywood edges are belt sanded before assembly so they look nice. Sizes: Top platform 19″ wide by 11″, Middle platform 20″ wide by 10″, Bottom platform 20″ wide by 13″, Back 8″ wide by 19.5″, Middle platform supports are 9.5″ wide by 6.25″ + 0.5″ for dados.
]]>
The demo was very well received. People understood that I was presenting food for thought. Before giving the demo I was afraid the subject would be boring or provoke a religious debate.
I created a new handout for the demo. It is on my web site here:
http://www.carlford.info/pages/demos_classes/great_poly_finish/Great_Poly_Finish.pdf

Please contact me if you would like me to present demo for your club or symposium.
Updated 11/29/2019: Don Pencil is no longer in business. See my “8” Buffing Wheel, 4” Bowl Buff, and 8” Long Buffing Adapter” blog entry for updates to the above handout. See http://carlford.info/blog/2019/11/8-buffing-wheel-4-bowl-buff-and-8-long-buffing-adapter/.
]]>8 drills for $30 is a good deal.
www.victornet.com item number SD-08

While woodturning I have found that I often need to drill holes over 1/2″ in diameter. Good US made drills over 1/2″ cost big bucks.
This cheap set of imported drills is good enough for drilling in wood and soft metals like aluminum.
The drills have straight shanks reduced to 1/2″ so they fit into common 1/2″ drill chucks.
Like it says on Victor’s web site. The drills DO NOT come in a case like the picture. The bits come loose. I would just throw the case away so no big deal.
I have found that twist drills work better than spade bits when drilling on the lathe. They don’t easily wonder off center.
For drill sizes I use often, like 5/8″. I like “Taper Shank” drills that I can mount directly in my lathes #2 morse taper tailstock with out a drill chuck. I got this set of 1/2″ shank drills to fill in the less common sizes I don’t already have in taper shanks.
Victor Machinery also stocks a good selection of imported “Taper Shank” drills at good prices.

P.S. You can never have to many drill chucks. Victor has a great deal on a 1/2″ CVA drill chuck for $16, item #CVB5/8-16 I have 2 of these. I am very happy with the quality.

Don’t forget to buy a matching arbor for Drill Chuck. 5/8-16 threads with #1, #2, or #3 Morse Tapper that matches your lathe. Beware the 5/8-16 thread is very rare. So get the matching one from Victor. If you run your lathe in reverse then think about epoxying the chuck onto the arbor to keep it from unscrewing.


- – Because my Wednesday Night Woodturning group says I have good ideas that I should share with others.
- – Because I often find new tools, etc that work well for me and that I would like to share with others.
- – Because I am often to lazy to write up all my little ideas for Club Newsletters and Magazines. I just want to jot down a few sentences.
This blog will cover the following:
- – New Tools. Mostly woodturning tools.
- – Ideas for new woodturning projects. Mostly what we are doing on Wednesday Nights.
- – Announcements for any classes I teach.
- – Announcements for any demos I do.
- – Announcement for any new handouts I add to my web site.
This blog will NOT allow the following:
- – Any chit chat in any way shape or form.
- – Political or religious stuff.
- – Any negative comments. All comments will be held and moderated by me.
It’s my Blog if I don’t like what you have to say then it goes in the bit bucket. Go start your own Blog if you want to say negative things! - – Positive comments will be allowed only if they are non trivial.
- – No spam! I have all the spam filtering stuff turned on.
Frequency of Blog Posts:
- – I plan on posting to this blog roughly once a week. Probably on Fridays.
- – You can safely subscribe to this blog. I will not fill up your email with a lot of crap.